Rev: 09.11.20 Page 3 CCD-0001360-AU
Removing these items prematurely may cause personal injury or property damage.
Do NOT remove the following items until instructed:
1. Tape securing the fabric.
2. Cotter pins in the spring assemblies.
Note: This manual will refer to the “drive side” and “idler side” throughout for various instructions. The
“drive side” is the left hand side of the awning when facing the awning from the exterior of the unit.
The “idler side” is the right hand side of the awning when facing the awning from the exterior of the
unit.
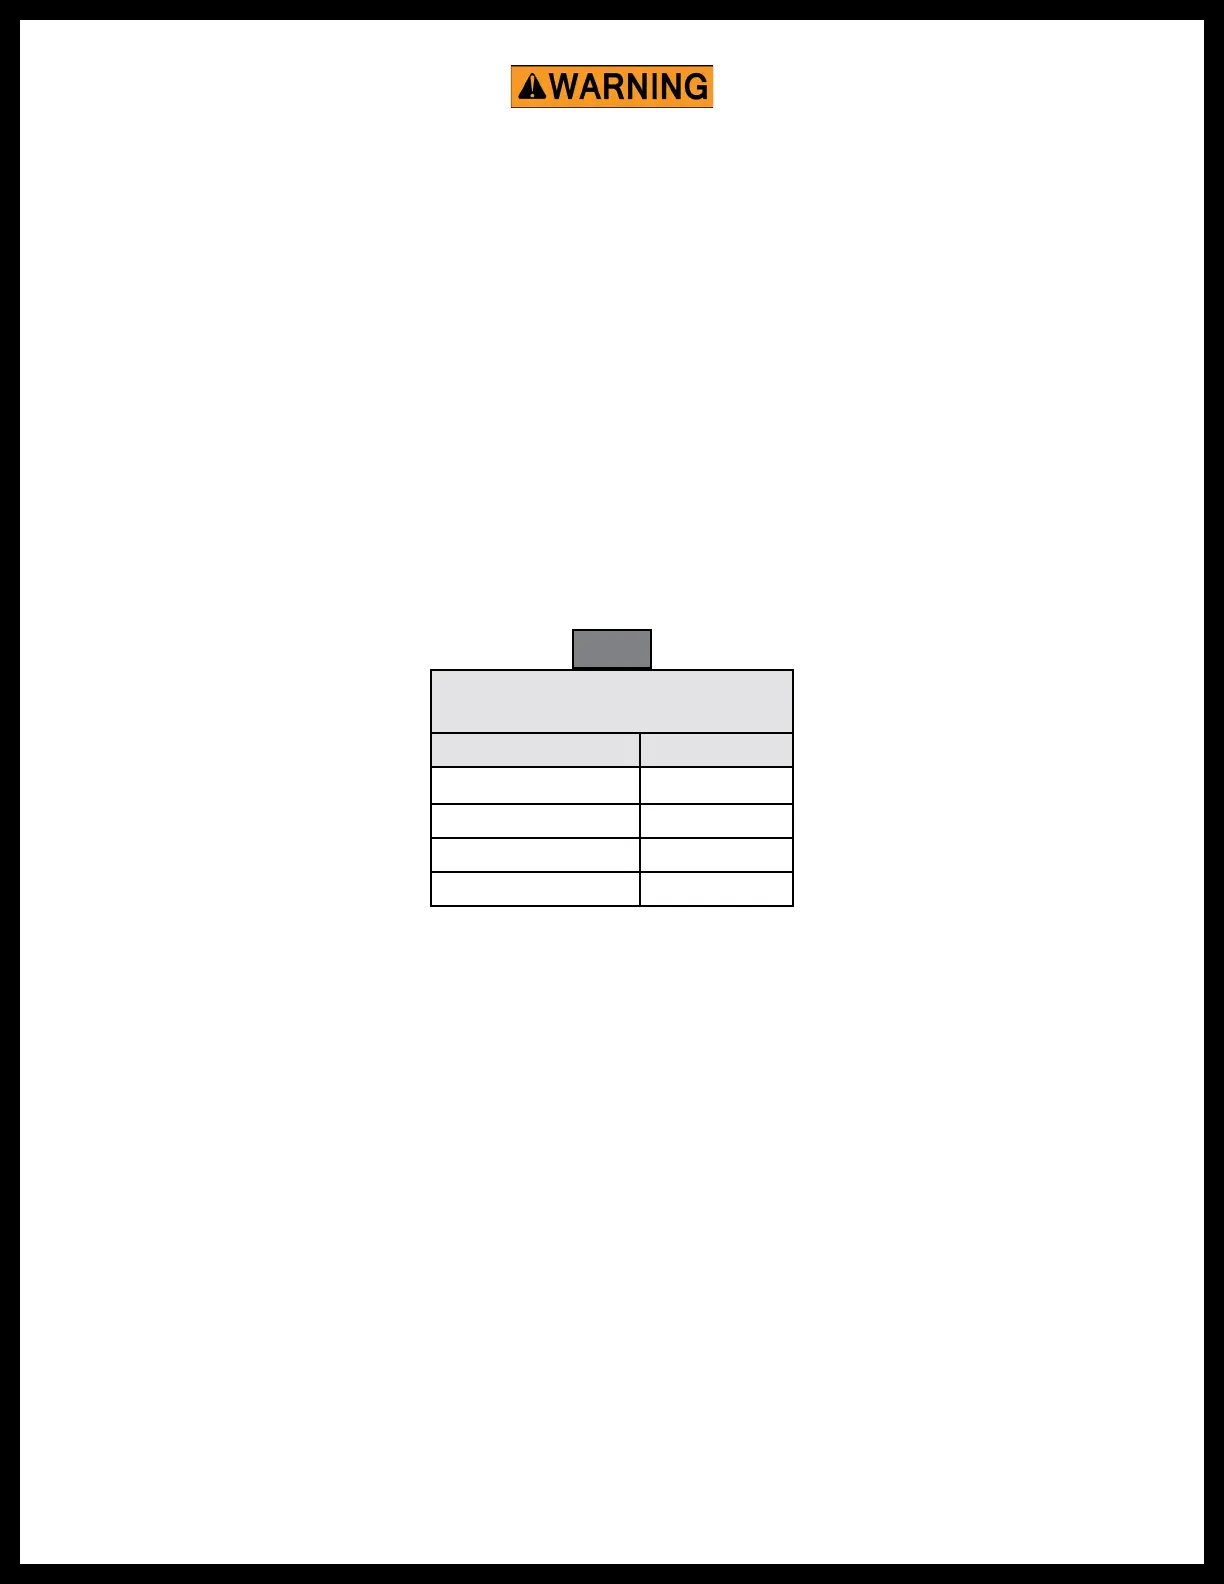
Solera® Classic Awning drive and idler heads are preloaded with tension and secured with cotter pins from
the factory. If the cotter pins have been removed or otherwise lost, and tension needs to be added to the
heads, use the turn chart (Fig. 1) to add correct number of turns to awning heads.
A. Turn the drive head clockwise the correct number of turns.
B. Turn the idler head counterclockwise the correct number of turns.
Note: If awning is on a work surface, base the direction of the turns (clockwise or counterclockwise) on the
orientation of the awning assembly on the unit.
Resources Required
• 1 to 3 people
• Cordless or electric drill or screw gun
• Appropriate drive bits
• Screwdriver
• Ratchet
•
⁄
” socket
•
½
” socket
•
½
” wrench
•
⁄
” drill bit
• Non-permanent method of marking
• Silicone sealant or butyl tape
• Silicone lubricant
•
¼"
x 3" lag screws or the equivalent (not
provided)
Fig. 1
Classic Awnings Pre-Install
Turn Chart
Size Turns
6 ft to 14 ft 4
15 ft 5
16 ft to 18 ft 6
19 ft to 21 ft 8
Preparation

 Loading...