6
4.0 Hardware Installation
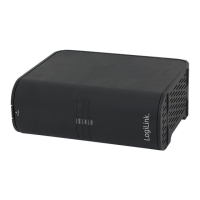
4.1 Install Hard Drive
The following guidelines provide information for the first time installation of your NAS.
Before you can get started on the configuration and setup, you will need to install hard
drives on your device.
1. On the bay cover, press in the indicator to open the cover. The cover pops open.
2. Open the Case cover, install hard drivers on NAS. Slide the HDD assembly into place
until it is flush in the rail track. The HDD must be flush with the rail track.
3. Close the Case cover.
4. Connect NAS to your router or Ethernet switch with an Ethernet cable.
5. Plug in the power cable and then press power button to power on. The status LED
starts to blink. This process may take 1 to 2 minutes.
Note:
In the event of failure or improperly installed HDDs, the HDD LEDs is red. Please power off
and follow the steps above again
4.2 Connect to Desktop PC
Set your PC’s IP settings to match the network subnet group of the NAS.
Example:
Logilink NAS default IP settings: 192.168.16.1
Configure your PC to these settings: 192.168.16.X (Whereas X represents a number from 1
to 254 other than 1).