EasyManua.ls Logo

LS SV055iS5-4 - Operation Using Keypad and Control Terminals

Default Icon
205 pages
Print Icon
To Next Page IconTo Next Page
To Previous Page IconTo Previous Page
Loading...
Chapter 4 – Quick start procedures
54
4.3 Operation using Keypad and Control Terminals
4.3.1 Frequency set by External Source and Run/Stop by Keypad
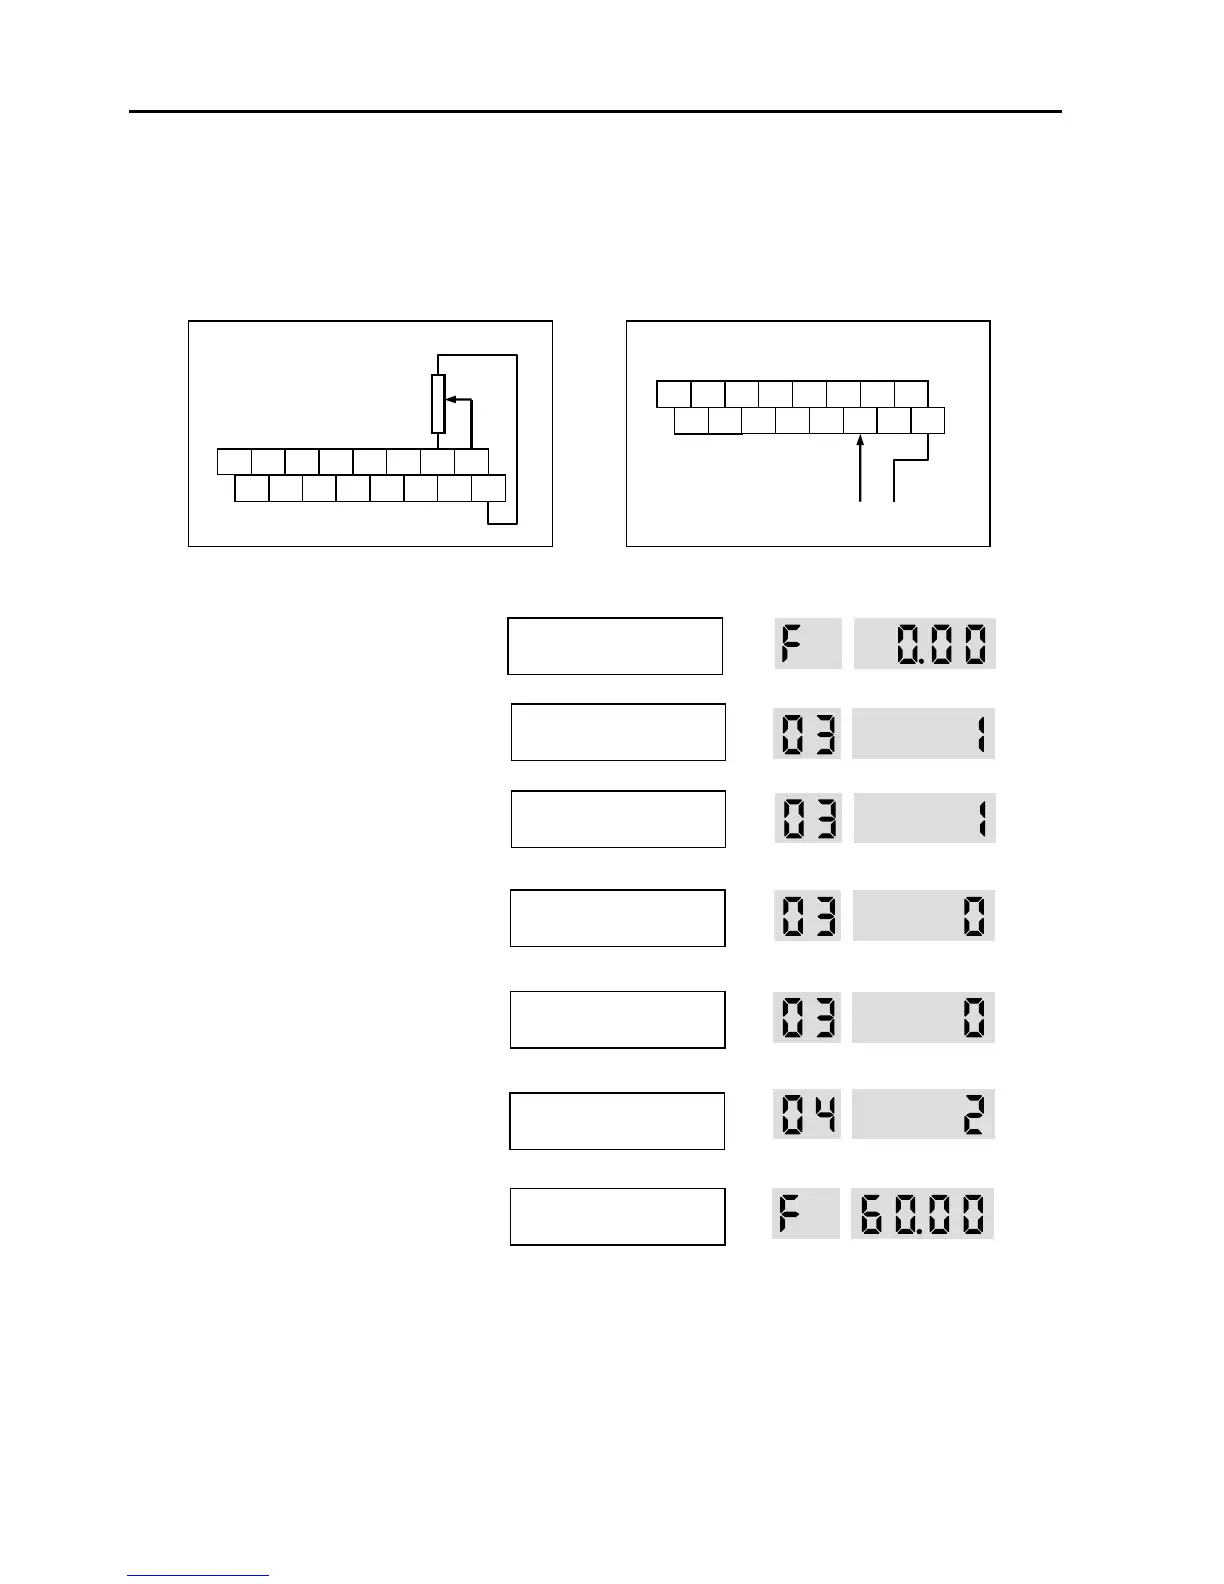
1. Install a potentiometer on terminals V1, VR, 5G and connect wiring as shown below left.
When a ‘4 to 20mA’ current source is used as the frequency reference, use terminals I and 5G as shown below.
2. Apply AC power.
3. LCD: Press [] key to move DRV 03.
7-Seg: Rotate encoder knob until ‘03’ is
displayed.
4. LCD: Press [PROG] key.
7-Seg: Press [PROG/ENT] key.
5. LCD: Press [] key one time.
7-Seg: Rotate encoder knob and set at ‘0’.
6. LCD: Press [ENT] key.
7-Seg: Press [PROG/ENT] key.
7. Confirm that the DRV 04 is set at ‘V1’.
8. Press [SHIFT/ESC] key.
Set the frequency by rotating the
potentiometer.
9. LCD: Press [FWD] or [REV] key.
7-Seg: Press [RUN] key.
P1
P2
JOG
CM
P3
FX
RX
NC
CM
BX
RST
I
VR
VI
FM
5G
4 to 20mA signal
1 , 1/2 W
P1
P2
JOG
CM
P3
FX
RX
NC
CM
BX
RST
I
VR
VI
FM
5G
DRV 04 must be set at V1.
DRV 04 must be set at I.
DRV
T/K 0.0 A
00 STP 0.00Hz
The DRV LED is ON.
DRV
Drive mode
03 Fx/Rx-1
DRV
Drive mode
03 Fx/Rx-1
The PROG/ENT LED is turned ON.
DRV
Drive mode
03 Keypad
The PROG/ENT LED is turned ON.
DRV
Drive mode
03 Keypad
The PROG/ENT LED is turned OFF.
DRV
Freq mode
04 V1
The PROG/ENT LED is turned ON.
DRV
T/V 0.0 A
00 STP 60.00Hz
The FWD or REV LED starts blinking.
The RUN LED starts blinking.
To change the motor running
direction, change DRV 13 to
1
.

Related product manuals