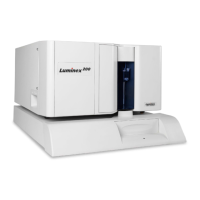
Luminex 200 Installation Manual
9
Technical Support Luminex Technical Support representatives are ready to help you,
particularly when the system or software cause any questions or
problems. If the question or problem relates to materials from the
assay kit, you should contact the kit provider directly.
Luminex Technical Support is available to users in the U.S. and
Canada by calling 1-877-785-BEAD (-2323). Users outside of the
U.S. and Canada can contact us at +1 512-381-4397. Inquiries may
also be sent by email to support@luminexcorp.com.
Luminex Website Additional information is available on the Luminex website. Search
on the desired topic or navigate through menus. Also, review the
website’s FAQ section. Enter http://www.luminexcorp.com in your
browser’s address field. Click Support>Support Login to log into
the Support FAQ site, then click on the Support tab.
Luminex User
Manuals
User manuals for Luminex software and hardware are available
online in PDF format. To download a manual, enter http://
www.luminexcorp.com in your browser’s address field. Click
Support>Support Login to log into the Support FAQ site, then click
on the Support tab. You can perform a search using the search
engine in the browser for the manual, or scroll down through the
Title menu to find the manual you want to download. Manuals are
available in English, Spanish, Italian, French, German, and Chinese.
Luminex 200
System Setup
Before connecting the system components, ensure that the facility
complies with all system and safety requirements. Read the safety
information that begins on page 3. Position the instrument to
minimize temperature fluctuations.
The following sections describe how to connect the Luminex 200
system components. An Installation Drawing (page 20) provides
clearances and other related information. Figure 11 shows the
components of the system and how they should be placed.
Perform the following procedures to set up the system. Each of these
steps can be found on the page number shown in parentheses:
1. Connect the Luminex 200 Analyzer and Luminex XYP to the PC
(page 10).
2. Connect Sheath and Waste Containers (page 12).
3. Install the Luminex XYP Instrument Sample Probe (page 12).

 Loading...