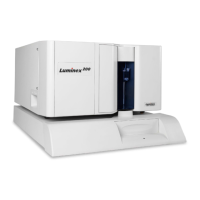
Luminex 200 Installation Manual
15
Install the Luminex XYP
Instrument Reservoir
Use the Luminex XYP instrument reservoir for the Luminex 200
analyzer maintenance functions.
To install the Luminex XYP instrument reservoir:
1. Eject the plate holder.
2. Insert the reservoir in the upper-right corner of the plate holder.
3. Retract the plate holder.
Calibrate and Verify the
System
Run system calibration. For further details for running calibrations
and controls, consult the Luminex Online Help or the applicable
Luminex software manual.
Install the SD System To install the Luminex SD system:
1. After performing system calibration, click Prime. When the
pressure has stabilized, record the value of the Sheath pressure in
the software.
Air pressure: _______ psi.
Sheath Pressure: _______ psi.
Save this information. You will need it later in the installation
procedure and also if you return to the original sheath fluid and
waste bottle configuration.
2. At the end of the Prime cycle, disconnect the sheath fluid bottle.
Store it in a safe place. If you plan to use the Luminex SD
system waste line, disconnect the waste bottle. Connect the
system waste line to the instrument and insert the end into a large
waste container or dedicated drain.
3. Place the Luminex SD system near the sheath fluid connection
on the left side of the Luminex 200 analyzer. Do not place the
Luminex SD on top of the Luminex 200 analyzer. Make the
following connections; refer to Figure 14.
• Connect the sheath fluid line (blue fitting) to the Sheath Out
connector on the front of the Luminex SD system.
• Connect the air line (green fitting) to the Air In connector on
the front of the Luminex SD system.
• If you are using the Luminex SD system waste line, connect
the waste line tubing to the waste connector on the left side
of the Luminex 200 analyzer (orange fitting). Place the other
end of the waste line into a large waste receptacle. Cut off
excess tubing. Ensure the waste receptacle is level with the
Luminex 200 analyzer or no more than three feet below it.

 Loading...