Luminex 200 Installation Manual
16
• Once the system is installed, do not permanently raise or
lower the waste line. If you must permanently reroute the
waste line, contact Luminex Technical Support. You can
move the waste line temporarily for cleaning or other
maintenance.
• The device disconnect for the Luminex SD is the power
cord. Do not position these devices such that it is difficult to
operate the disconnect device.
• Connect the sheath fluid intake line (white fitting) to the
Sheath In connector on the front of the Luminex SD system.
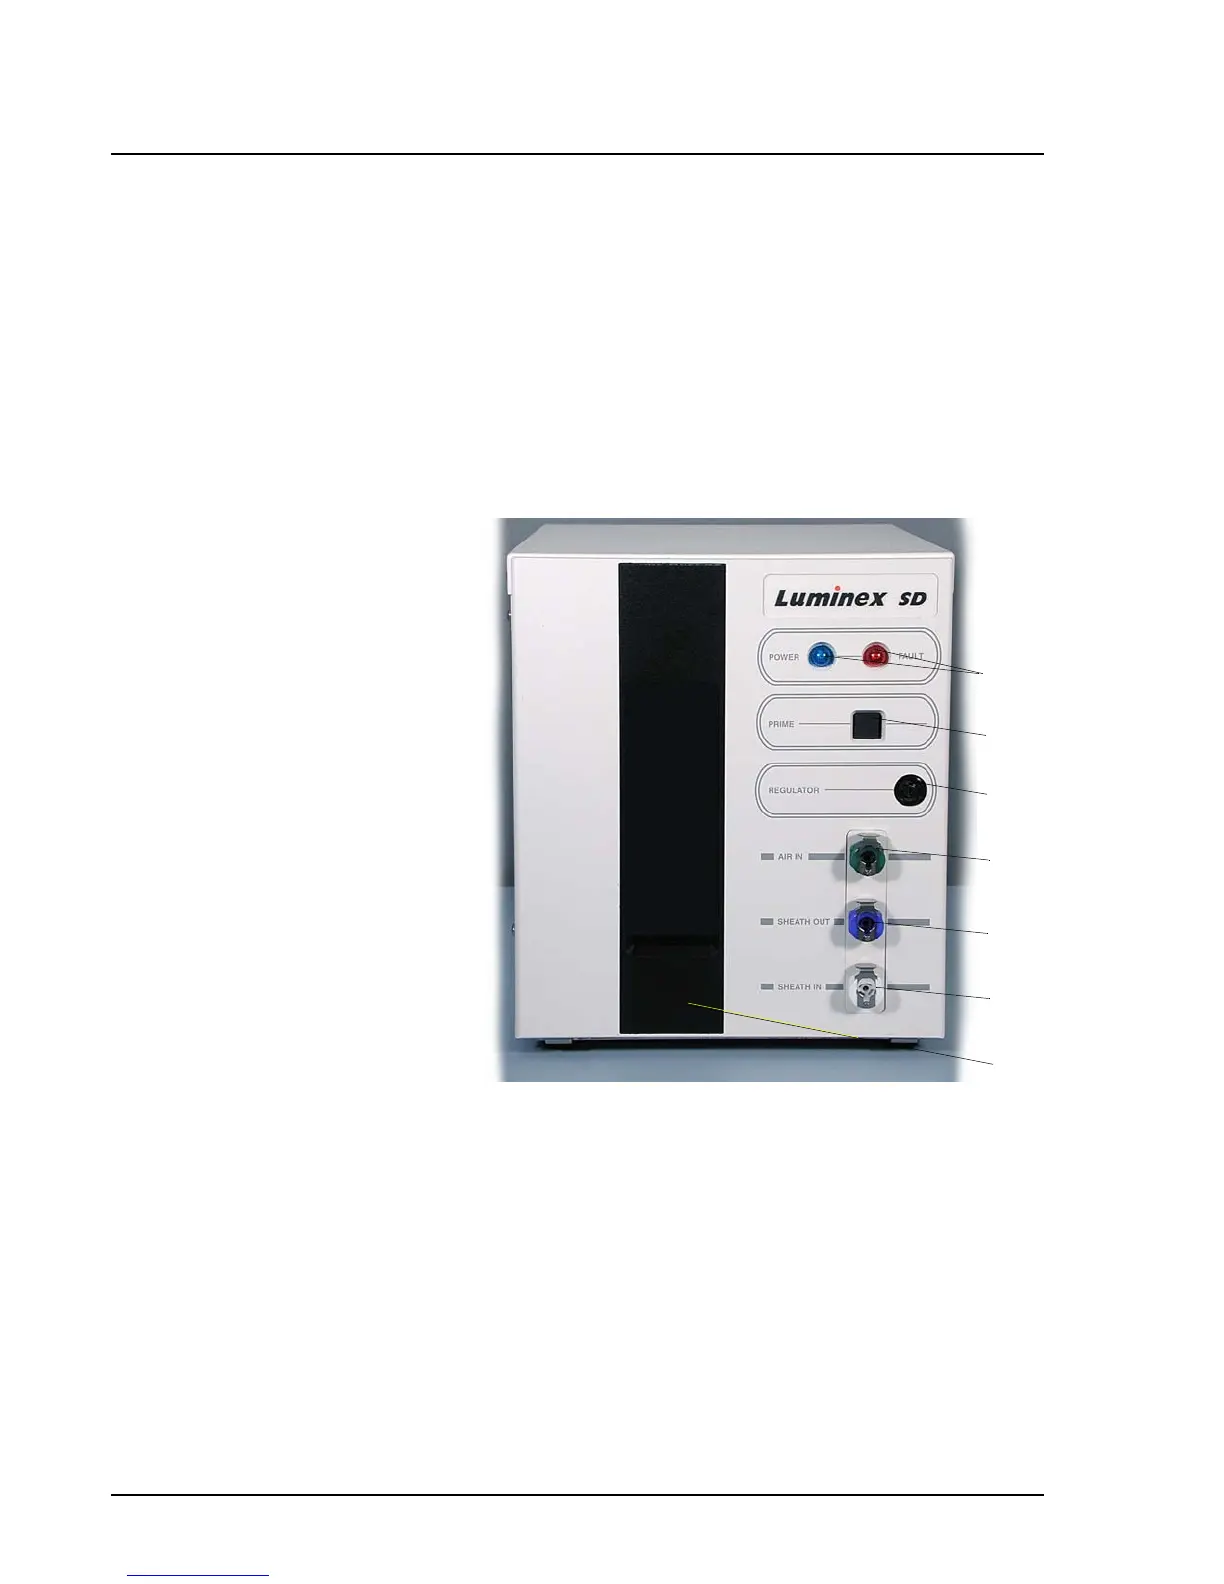
Figure 14. Luminex Sheath Delivery Device
• Lower the stainless steel filter end of the sheath fluid line to
the bottom of a full 20 liter box of Luminex xMAP Sheath
Fluid. Secure the cap on the sheath fluid box. Place the
sheath fluid container so that the cap is on the top.
1. Power and Fault indicators 5. Sheath Out connector (blue)
2. Prime button 6. Sheath In connector (white)
3. Regulator adjust 7. Reservoir window
4. Air In connector (green)
4.
5.
6.
1.
2.
3.
7.

 Loading...