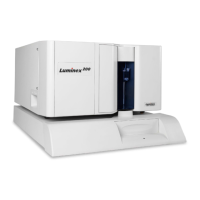
Luminex 200 Installation Manual
18
6. Click Prime. During the prime cycle, use a screwdriver to adjust
the regulator counter-clockwise on the front of the Luminex SD
system. See Figure 14. Turn it until the sheath pressure is the
same as the sheath pressure you recorded in step 1. The system
should stabilize at this sheath pressure. The air pressure should
be the same as you recorded in step 1, within 0.1 psi. If the Prime
cycle ends before you have completed the adjustment, select
Prime again and continue to adjust the regulator.
7. Calibrate the system again. Observe the sheath pressure during
the calibration cycle. The pressure should be within 0.1 psi of the
pressure recorded in Step 1.
Do not reroute or lengthen the waste tubing after it has been installed
by a Luminex Certified Installer. If the waste tubing length is
extended or rerouted, the flow rate must be readjusted. The
maximum recommended waste tubing length is 12 feet, which is the
length of the tubing provided with the SD system. The waste tubing
may be shortened, if necessary.
Install the Luminex XYP
Instrument Heater Block
Use the Luminex XYP instrument heater block as required by your
assay kit instructions. This is an optional step. When not in use, store
the heater block in the bracket inside the left access door of the
Luminex 200 analyzer.
To install the Luminex XYP instrument heater block:
1. Eject the plate holder.
2. Insert the Luminex XYP instrument heater block on the plate
holder.
3. Retract the plate holder.
4. Turn the heater on and set the temperature. Refer to the
applicable Luminex software manual.
For new system installations, perform the preliminary commands
listed in the Prepare System for First Use (page 19) before running
samples.
Network Installation
Advisory
This section is intended for your network IT representative regarding
Windows XP Settings. The Windows XP security settings “Virus
Protection” and “Automatic Updates” alerts have been turned off by
default. Please refer to your IT department when connecting to the
network. Luminex does not support network installations.

 Loading...