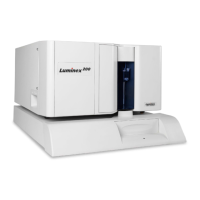
Luminex 200 Installation Manual
14
Adjust the Sample Probe
Vertical Height
1. Remove the clear plastic shield that covers the sample probe
area.
2. In a 96-well microtiter plate where overall height is no more than
0.75 inches (19 mm), place the appropriate alignment tool in the
plate:
For a standard plate with flat-bottom wells—stack two of the
larger (5.08 mm diameter) alignment discs together and place
them into the selected well.
For a filter bottom plate—stack three of the larger (5.08 mm
diameter) alignment discs together and place them into the
selected well.
For a half-volume plate with flat-bottom wells—stack two of
the smaller (3.35 mm diameter) alignment discs together and
place them into the selected well.
For a round-bottom (U-bottom) plate—stack two of the
smaller (3.35 mm diameter) alignment discs in the selected well.
For a plate with conical wells—place one alignment sphere into
the selected well.
3. Eject the plate holder. Place the 96-well microtiter plate on the
Luminex XYP instrument plate holder with position A1 in the
top left corner.
4. Verify that the correct well location is selected in the Luminex
software, and that you are using the appropriate number of
alignment discs. Retract the plate.
5. Loosen the front thumbscrew on the probe holder one-third to
one-half turn. Pull it upward until it touches the top of the
adjustment slide. Tighten the thumbscrew.
6. Use the Luminex software to lower the sample probe.
7. Loosen the front thumbscrew. Gently push the probe down until
it just touches the top of the alignment discs or sphere.
8. Tighten the front thumbscrew.
9. Raise the sample probe using the Luminex software.
Replace the plastic shield that covers the sample probe area.
Note: Ver
y t
at t
e
microtiter plate is not warped.
Warped plates can lead to
incorrect probe height
adjustment.
Note: Alignment discs can be
placed in any well as long as
the well is designated in the
software.

 Loading...