R2 Series Clinic Handout 13
1. Use the Header Tilt switches (A) on the ground speed lever (GSL)
to set the center-link to the mid-position (5.0 on the monitor)
2. Using the header down button (B), lower the header fully and ensure
the header lift cylinders are fully retracted.
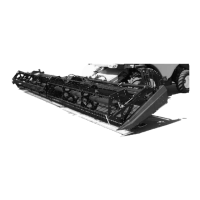
3. Grasp one end of the header and lift. The force required to lift the
header should be 426 – 471 N (95 – 105 lbf).
The force required to lift the header should be equal on either side.
If adjustments to float are required
4. Press rotary scroll knob (A) on the HPT (monitor) to display the
QuickMenu system.
5. Rotate scroll knob (A) to highlight header float icon (B) and press
scroll knob to select.
6. Turn scroll knob (A) to highlight left (B) or right (C) float and press
knob (A) to activate selection.
7. Rotate scroll knob (A) to adjust float setting and press knob when
finished. Float is now set.
8. Use softkey 3 (D) to remove/resume float to previous setting when
attaching or detaching the header.
Setting Header Float
Note:
Float adjustments of 1.0 (out of 10) change the header weight at the cutterbar by approximately 91 kg (200 lb.).
Adjust float in increments of 0.05 to optimize field performance.
Too heavy float causes skid shoe wear, too light float causes excessive header bouncing over uneven terrain.