Delete:
Top right button will pop up a message saying “Delete current or both ears?”
Top left button will cancel
the process. The Top middle button will delete the data of the
currently selected ear and bring you back to the Test screen. The Top right button will delete
data on both ears and bring you back to the Test screen.
Right and Left buttons will select respec
the Test screen. The existing data of chosen ear will only be deleted after the probe is
detected to be in the ear with a proper seal.
Up and Down buttons allow
first or last test of an ear, pressing Up or Down
the other ear.
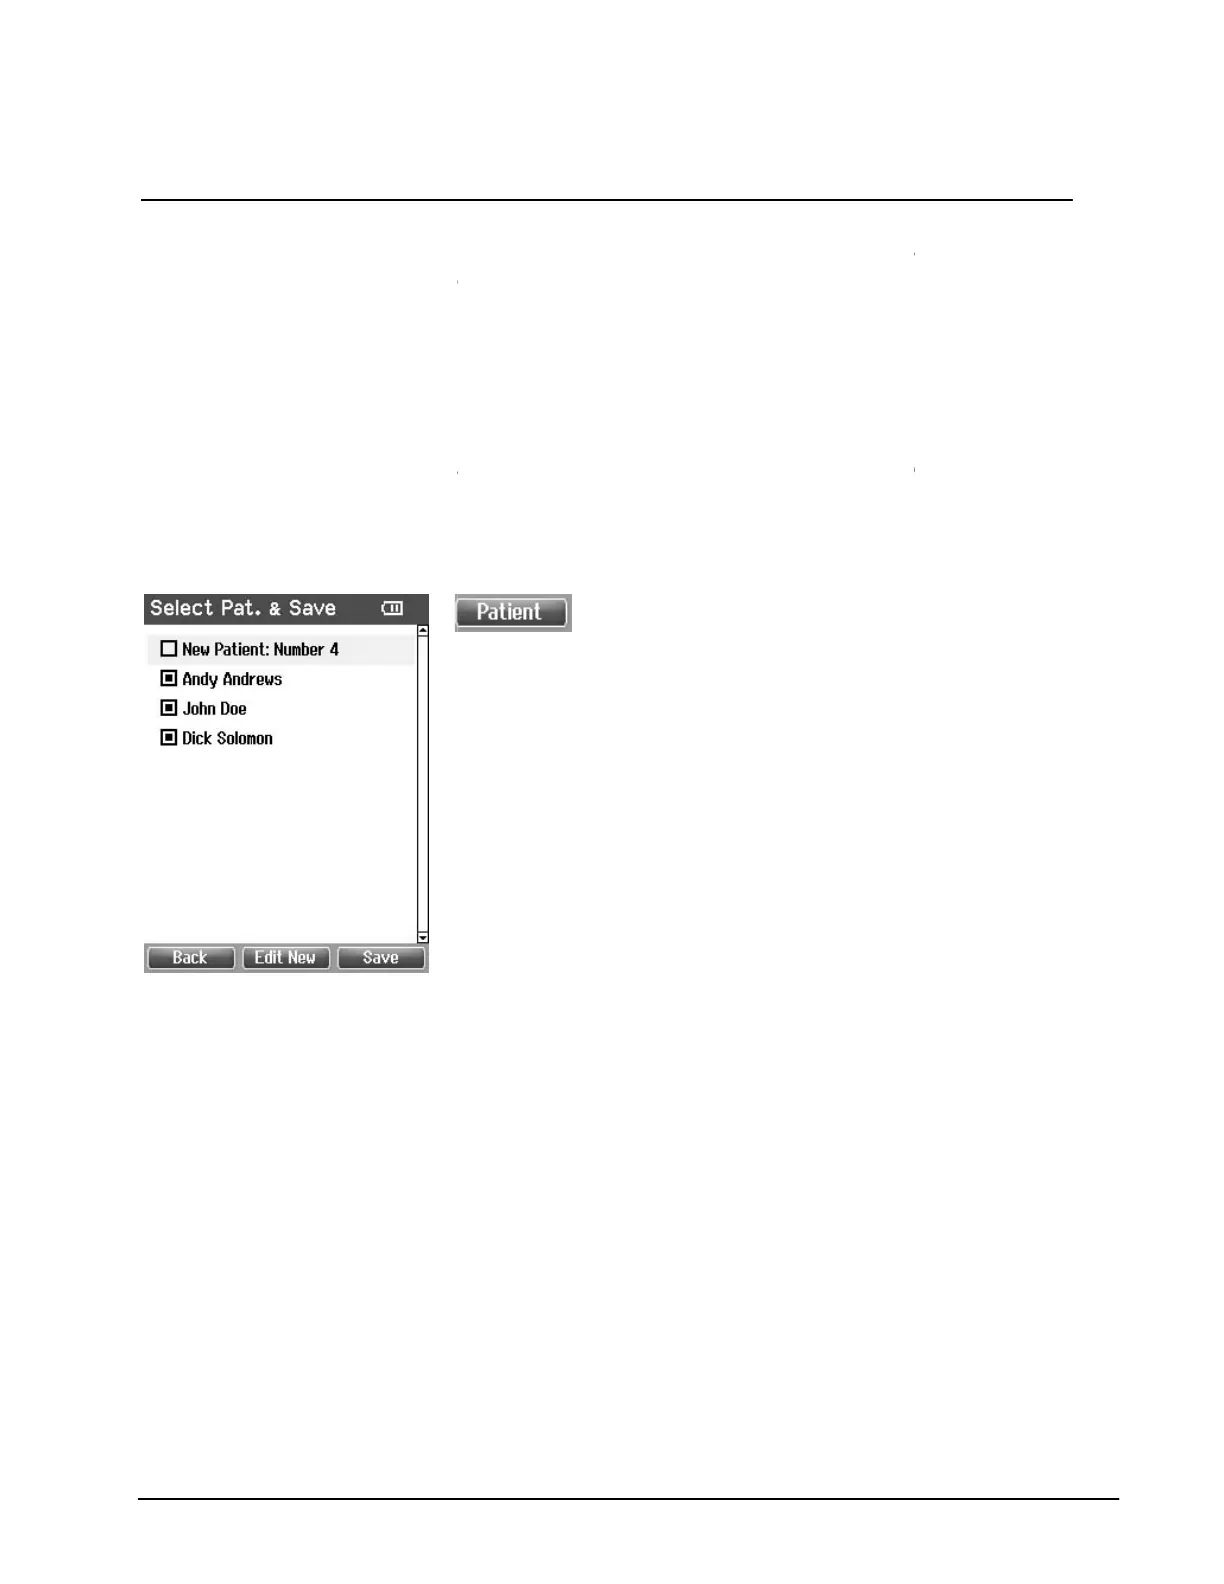
4.4.4 Select Patient & Save
will always get the name “N
# stands for the next available number
Operating from this screen:
Top left button will bring you back to the
data.
Top middle button
opens a screen for editing new patient details.
Top right button will save the data to the selected client. After saving all data is deleted and
easyTymp®
returns in the Test screen, ready for testing.
Right and Left buttons w
ill bring you to respectively the top or bottom of the client list.
Up and Down buttons make you move up or down one client.
18
Top right button will pop up a message saying “Delete current or both ears?”
the process. The Top middle button will delete the data of the
currently selected ear and bring you back to the Test screen. The Top right button will delete
data on both ears and bring you back to the Test screen.
Right and Left buttons will select respec
tively right or left ear for testing and bring you back to
the Test screen. The existing data of chosen ear will only be deleted after the probe is
detected to be in the ear with a proper seal.
to scroll through the different
test results. When viewing the
first or last test of an ear, pressing Up or Down
respectively,
will bring you to the test results of
From this screen you can either save data to an
patient
or save data to a new client. New
will always get the name “N
# stands for the next available number
.
Top left button will bring you back to the
“Done”
screen without saving and without del
opens a screen for editing new patient details.
Top right button will save the data to the selected client. After saving all data is deleted and
returns in the Test screen, ready for testing.
ill bring you to respectively the top or bottom of the client list.
Up and Down buttons make you move up or down one client.
Top right button will pop up a message saying “Delete current or both ears?”
and the
the process. The Top middle button will delete the data of the
currently selected ear and bring you back to the Test screen. The Top right button will delete
tively right or left ear for testing and bring you back to
the Test screen. The existing data of chosen ear will only be deleted after the probe is
test results. When viewing the
will bring you to the test results of
From this screen you can either save data to an
or save data to a new client. New
patient
#”, where
screen without saving and without del
eting
Top right button will save the data to the selected client. After saving all data is deleted and
ill bring you to respectively the top or bottom of the client list.
 Loading...