Operation Manual easyTymp
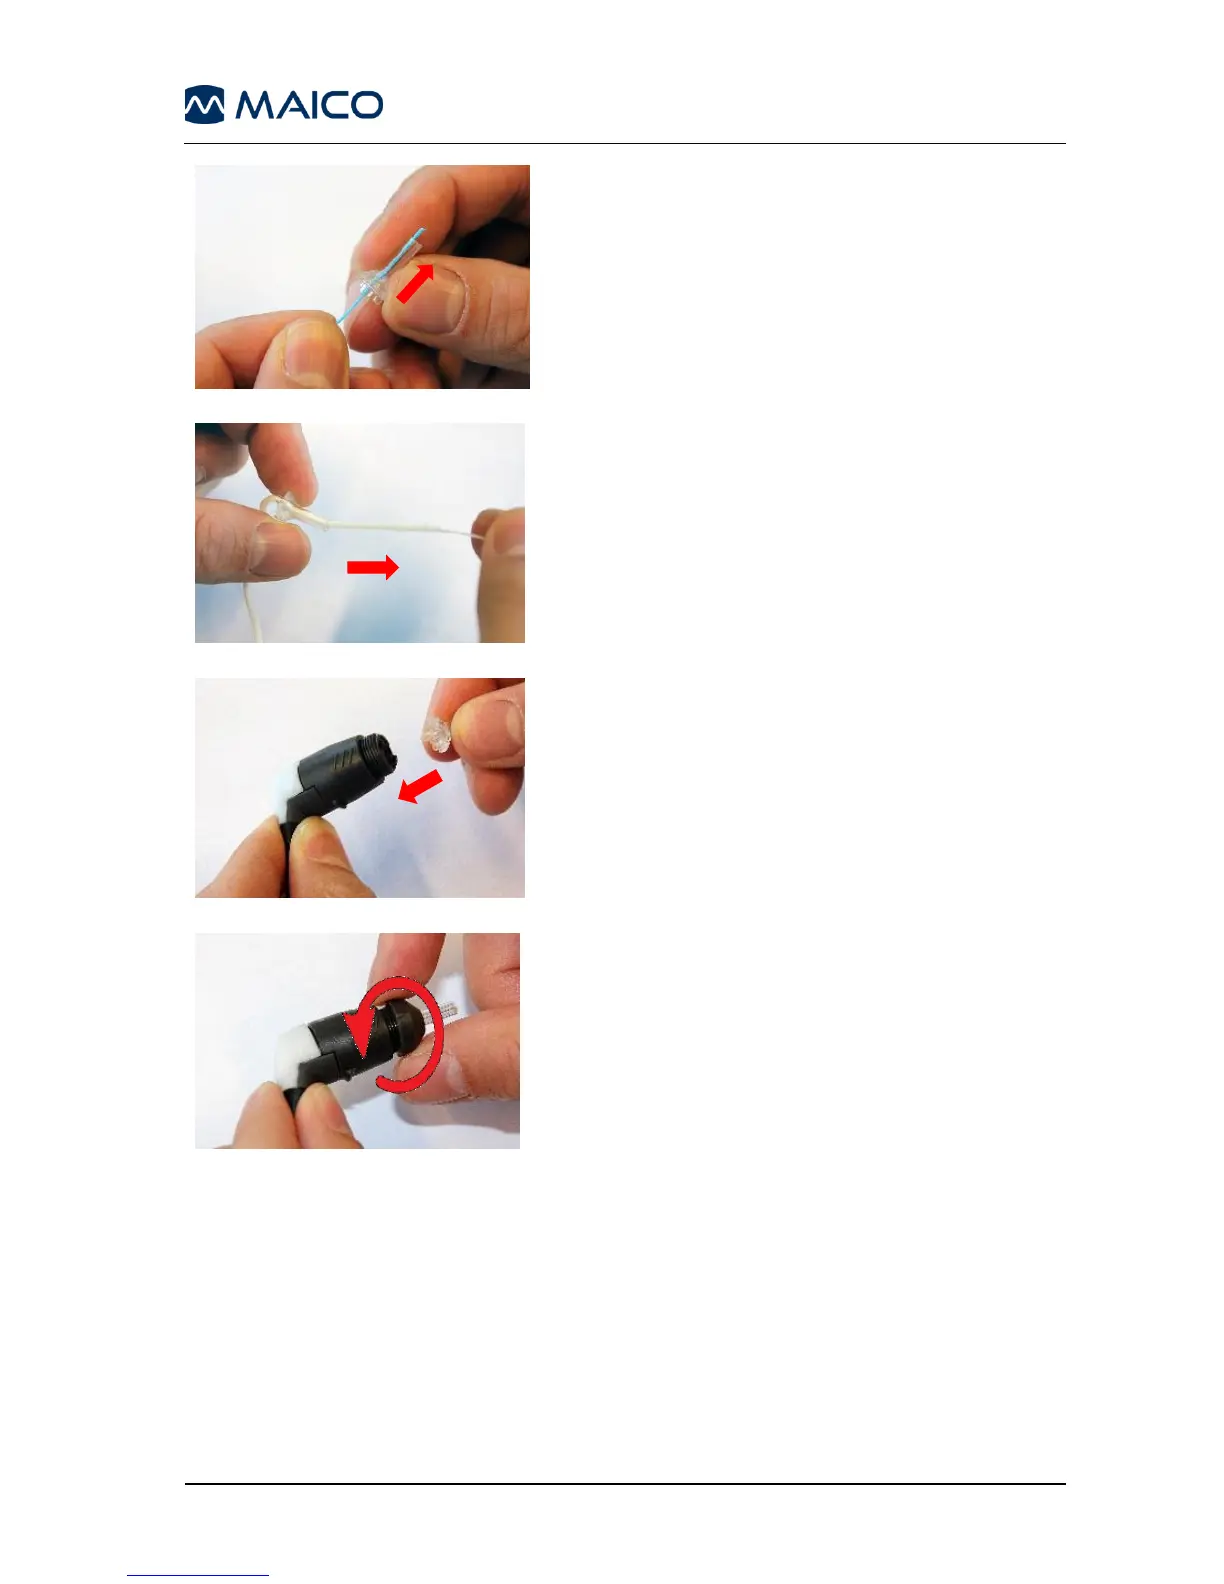
3. Insert the blue end of the floss from back to
front through one of the probe channels. Pull the
floss along its entire length through the channel
(Figure 5).
4. Proceed in the same way with all 4 probe
channels. Use the floss only once (Figure 6).
5. Place the probe tip back onto the probe. Make
sure that the plastic pegs are inserted into the
appropriate corresponding cavities (Figure 7).
6. Screw the probe cap back on the probe
(Figure 8). The force of tightening the cap will
tighten the screw sufficiently. Never use tools to
fix the probe cap!
If any blockage or damage occurs to the sealing
gasket, the probe system can only be serviced
by MAICO.