Operating Instructions
49
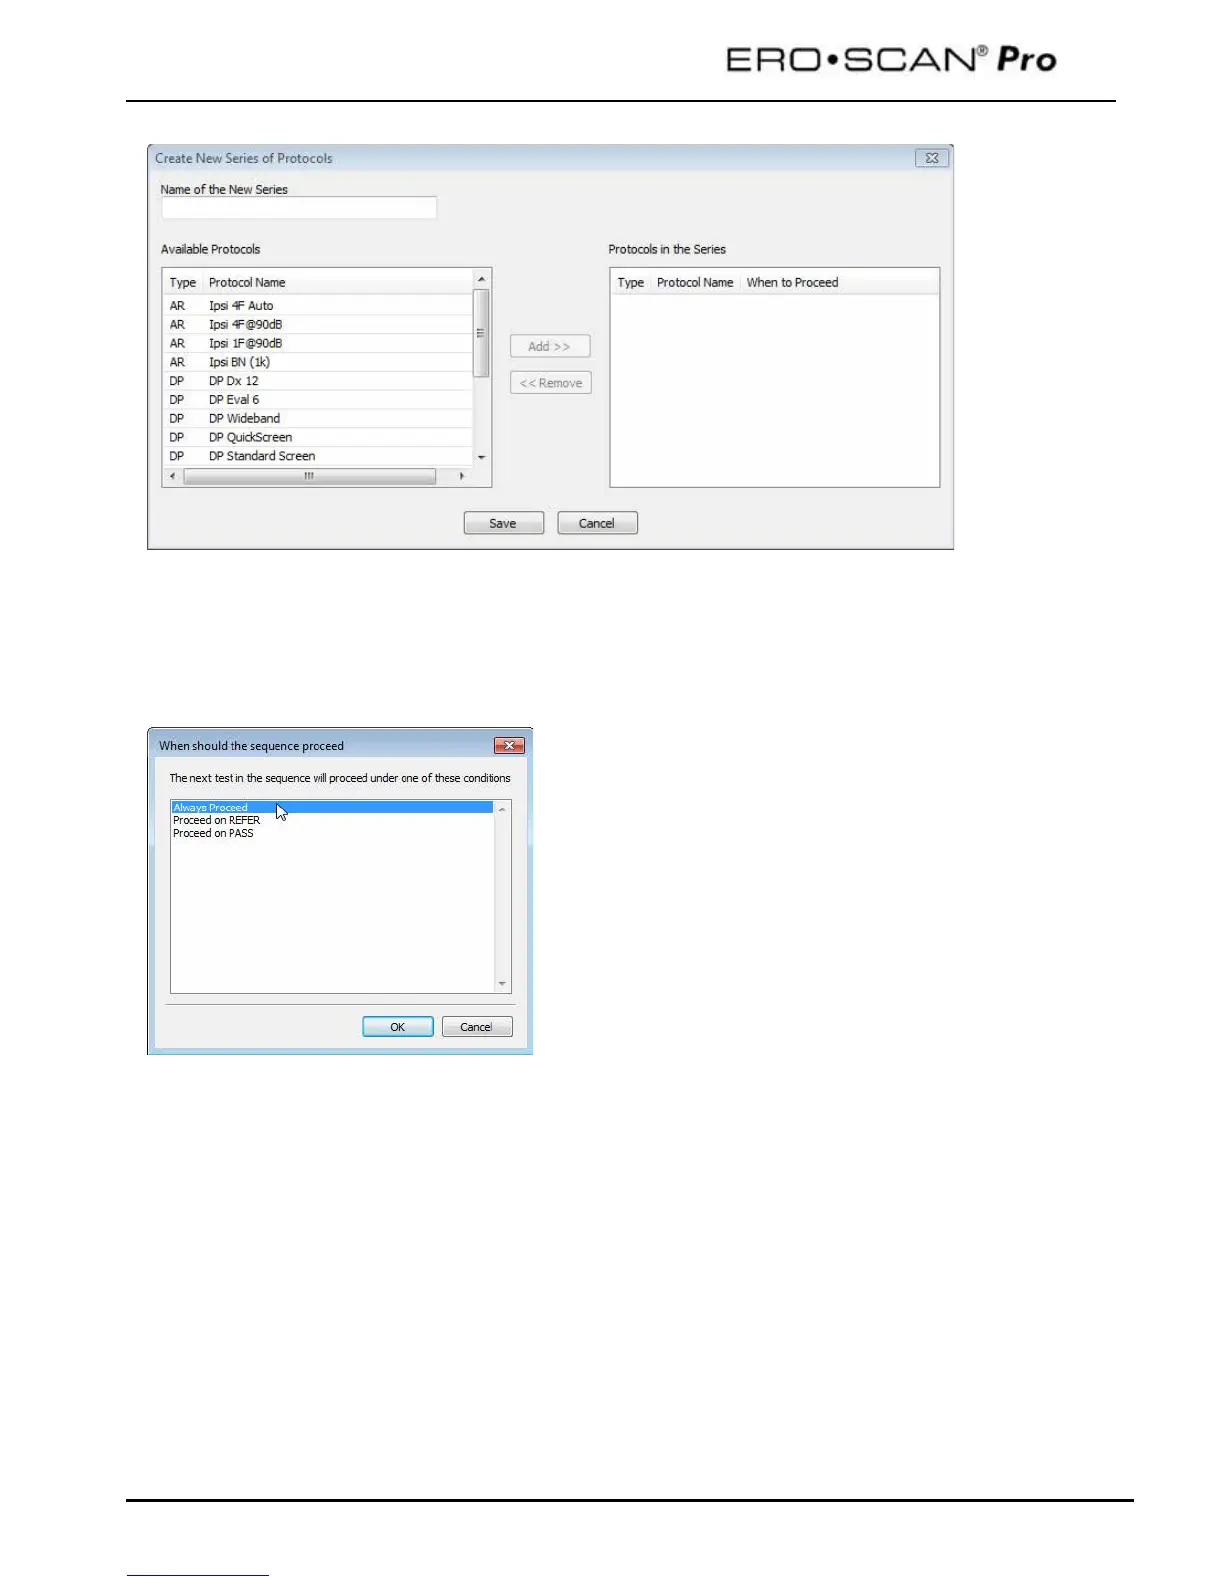
Step 1: Type the series name into the text box provided. Series names should be kept to approximately
12 characters in length to ensure the full protocol name will display on the instrument.
Step 2: From the list of
Available Protocols
on the left of the window, select the first protocol for the
series and then click
Add
.
Step 3: You will be prompted to determine when the testing sequence should proceed to the next
protocol. Make a selection and click
Ok
.
Always proceed = testing will proceed to the
protocol in the series regardless of test outcome
Proceed on Refer = testing will proceed to the next
protocol in the series only when the outcome of
selected test is
Refer
.
Proceed on Pass = testing will proceed to the next
protocol in the series only when the outcome of
selected test is
Pass.
These rules can help improve the efficiency of testing by applying the logic you may use typically in your
practice setting. For example, you may want to start with an OAE test and only proceed with the
tympanometry test when there is a Refer outcome on the OAE test. Another option might be to start
with a tympanometry test and only proceed with the OAE test when the tympanometry result is within
normal limits (Pass). Finally, you may choose to establish a complete test battery series that runs a
several protocols in sequence regardless of the outcome of any single protocol.
Continue repeating step 2 (selecting from available protocols) and step 3 (determining how to proceed)
as described above until the series contains the desired protocols. When finished, click
Save
on the
Create New Series of Protocols
window. Confirmation that the series was successfully loaded into the
instrument is provided. When the instrument is removed from the cradle the new series will appear in
the list of protocols.
Note: if the series contains any OAE frequencies above 6 kHz or a tympanometry protocol then the
appropriate external probe must be connect in order for the series to be shown in the instrument.

 Loading...