Operating Instructions
51
11 Care and Maintenance
11.1 Cleaning and Disinfecting the Instrument
This instrument and its accessories may be wiped clean with a damp cloth using a mild antiseptic
solution (e.g., cetylcide). Take care not to put excessive pressure on the clear display window or allow
any utensil to puncture the display window or control panel. D
o not allow any fluid to enter the device.
Do not immerse the instrument in fluids or attempt to sterilize the instrument or any of its accessories
.
11.2 Maintenance & Calibration
This instrument should be calibrated annually by your special equipment
distributor or by Maico Diagnostics. Beyond that, it requires no regular
maintenance other than routine cleaning and battery replacement. The probe
tip requires replacement only when it becomes clogged.
11.3 Probe Tip Replacement
Probe tips are disposable and should be replaced when they become clogged.
Four replacement probe tips of each type (internal and external) are included
with this instrument. Do not attempt to clean the probe tip.
I
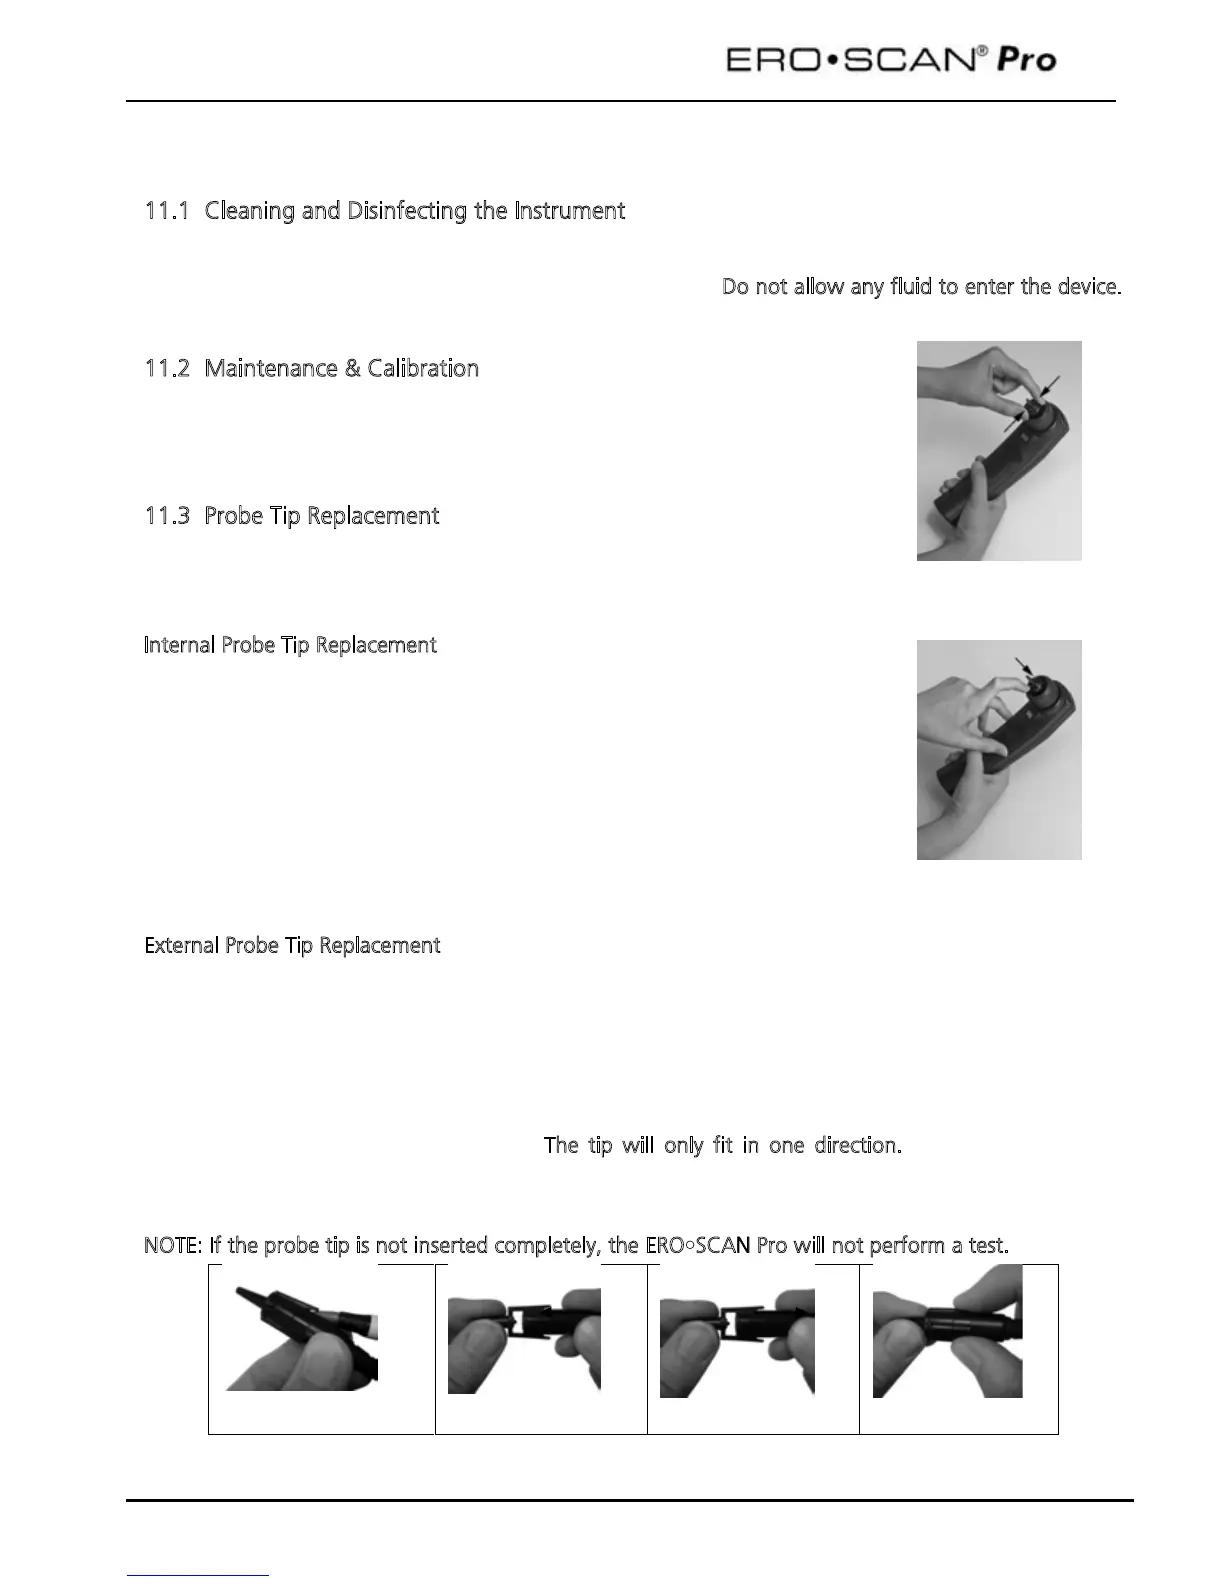
nternal Probe Tip Replacement
To replace the probe tip, squeeze the tabs as shown in the picture to the
right. The tabs should audibly snap off the probe assembly. Pull the probe tip
directly off the probe and discard it.
Obtain a replacement probe tip and orient the tip with the arrows on the face
of the probe tip directed toward the top of the instrument. The probe tip will
only fit on one way; be careful not to force the tip in place. Push the tip
directly down onto the probe. Once the probe tip is in place on the probe,
push firmly downward on the top of the tabs one at a time until a click is
heard. Tug lightly on the probe tip to verify that the tip is securely attached.
E
xternal Probe Tip Replacement
To remove:
Using a small pointed object, such as a pen or small screwdriver, push in the notches on the left and
right sides of the rear of the external probe until each tab is released (Figure 11A).
Slide the probe tip off the front of the probe and discard (Figure 11B).
To replace:
Align a replacement tip with the front of the probe (Figure 11C). Align the tab on the external probe
tip with the notch on the probe body. T
he tip will only fit in one direction. If the tip does not fit
securely on the probe, remove the probe tip and reorient it.
Press firmly on the tabs to snap them into place (Figure 11D).
N
OTE: If the probe tip is not inserted completely, the ERO•SCAN Pro will not perform a test.
Figure 11A
Figure 11B
Figure 11C
Figure 11D
 Loading...