P 11/ 23
[3] DISASSEMBLY/ASSEMBLY
[3]-1B. Bit holder section for HR2310T (cont.)
ASSEMBLING
Repair
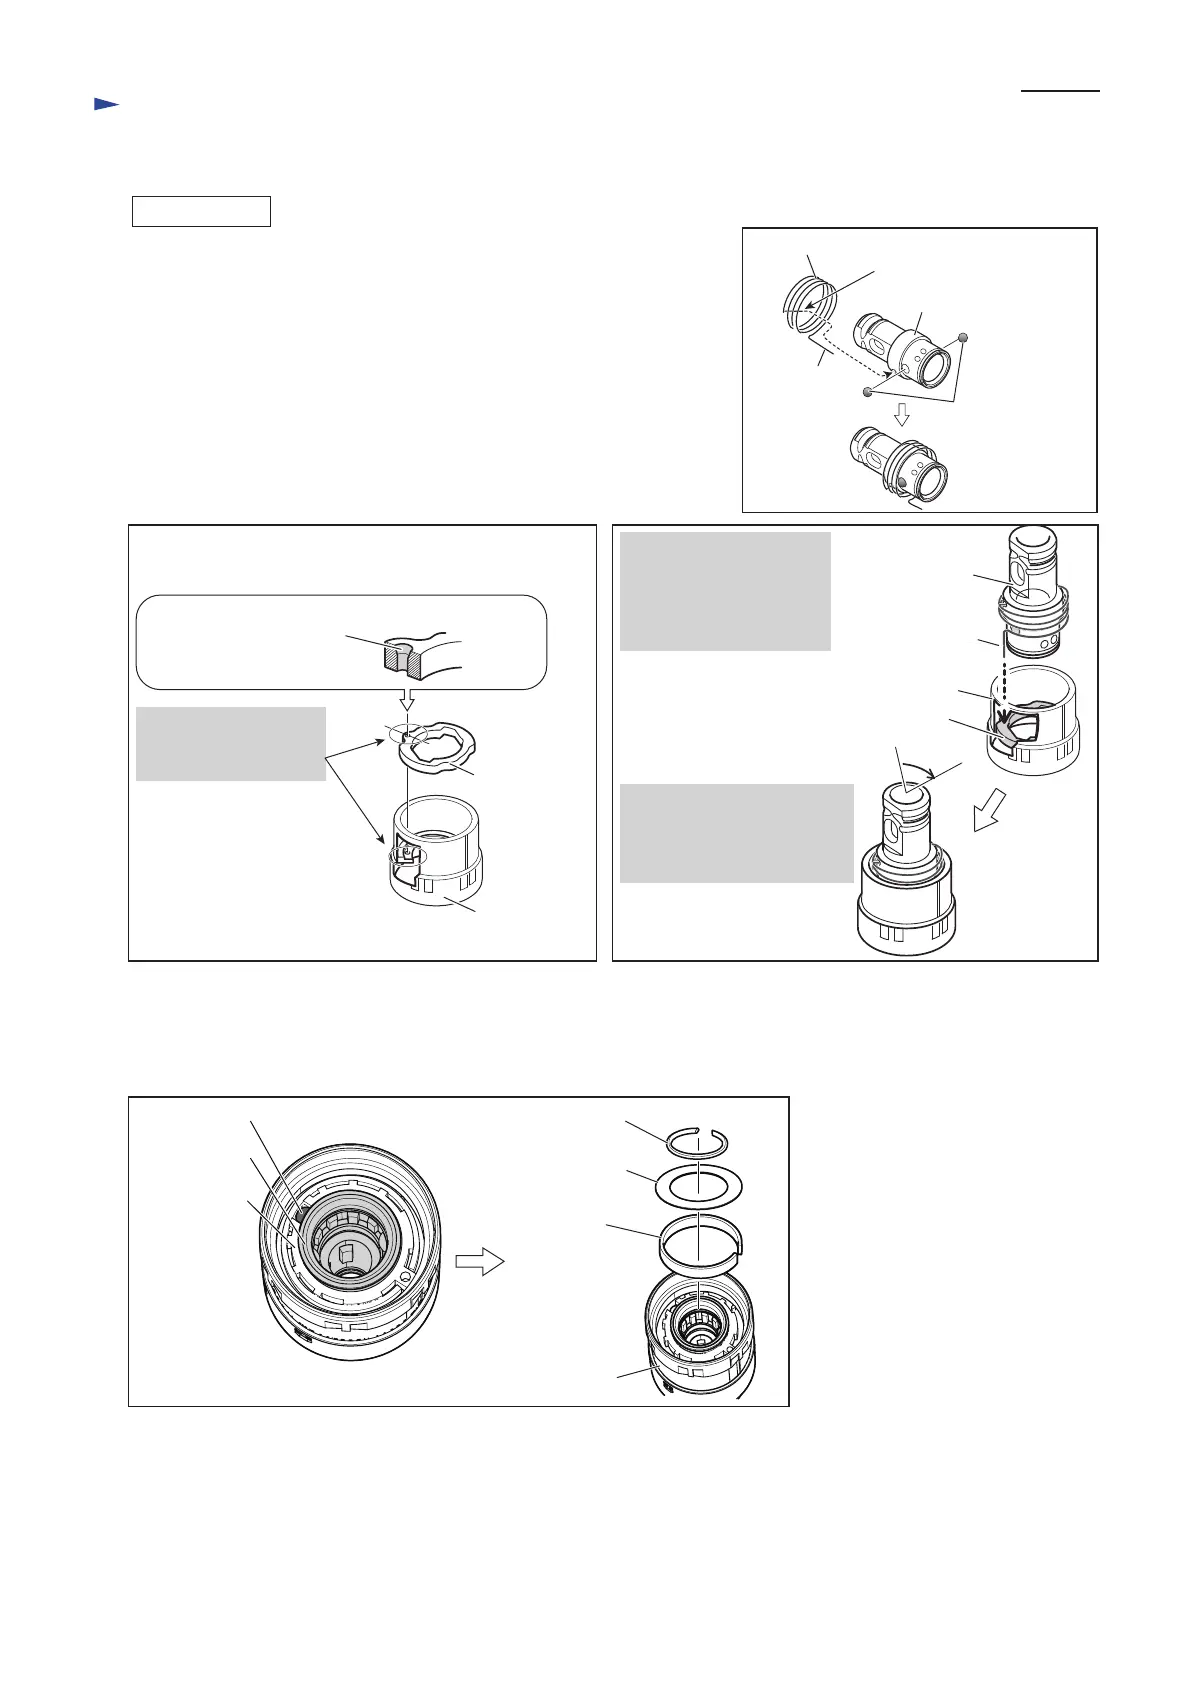
(1) Assemble Torsion spring 31 to Tool holder as follows:
• Set two Steel balls 6 on the holes of Tool holder.
• Insert the short arm of Torsion spring 31 into the hole of Tool holder.
Note: Apply Makita grease No. RB No. 00 to two Steel balls 6 to prevent
them from falling. (Fig. 13)
(2) Assemble Change ring to Change cover. (Fig. 14)
(3) Assemble Tool holder to Change cover. (Fig. 15)
Fig. 13
a
Note:
Face the chamfered end
of the hole upward.
Align the hole of
Change ring with
that of Change cover.
a'
[Section a - a']
(4) Put Steel ball 5.0 in the groove surrounded by Change cover and Tool holder. (left in Fig. 16)
(5) Set Leaf spring and Flat washer 24 in change cover, then secure them with Ring spring 21. (right in Fig. 16)
(6) As for Cap 35 side, assemble the components in the reverse order of disassembly. Refer to the previous page.
Fig. 14 Fig. 15
Change ring
Change cover
Change cover
Change ring
By turning Tool holder
approx. 75
°
clockwise,
Tool holder can be fastened
to Change cover.
Tool holder
75
°
Insert the long arm of
Torsion spring 31 into
the hole of Change cover
through the hole of
Change ring.
Flat washer 24
Leaf spring
Fig. 16
long arm of
Torsion spring 31
Change cover
Steel ball 6 (2pcs.)
Tool holder
long arm
Torsion spring 31
short arm
Steel ball 5.0
Tool holder
Change cover
Ring spring 21
 Loading...