P 12/ 23
[3] DISASSEMBLY/ASSEMBLY
[3]-2. Drill chuck assembly for HR2310T
Repair
DISASSEMBLING
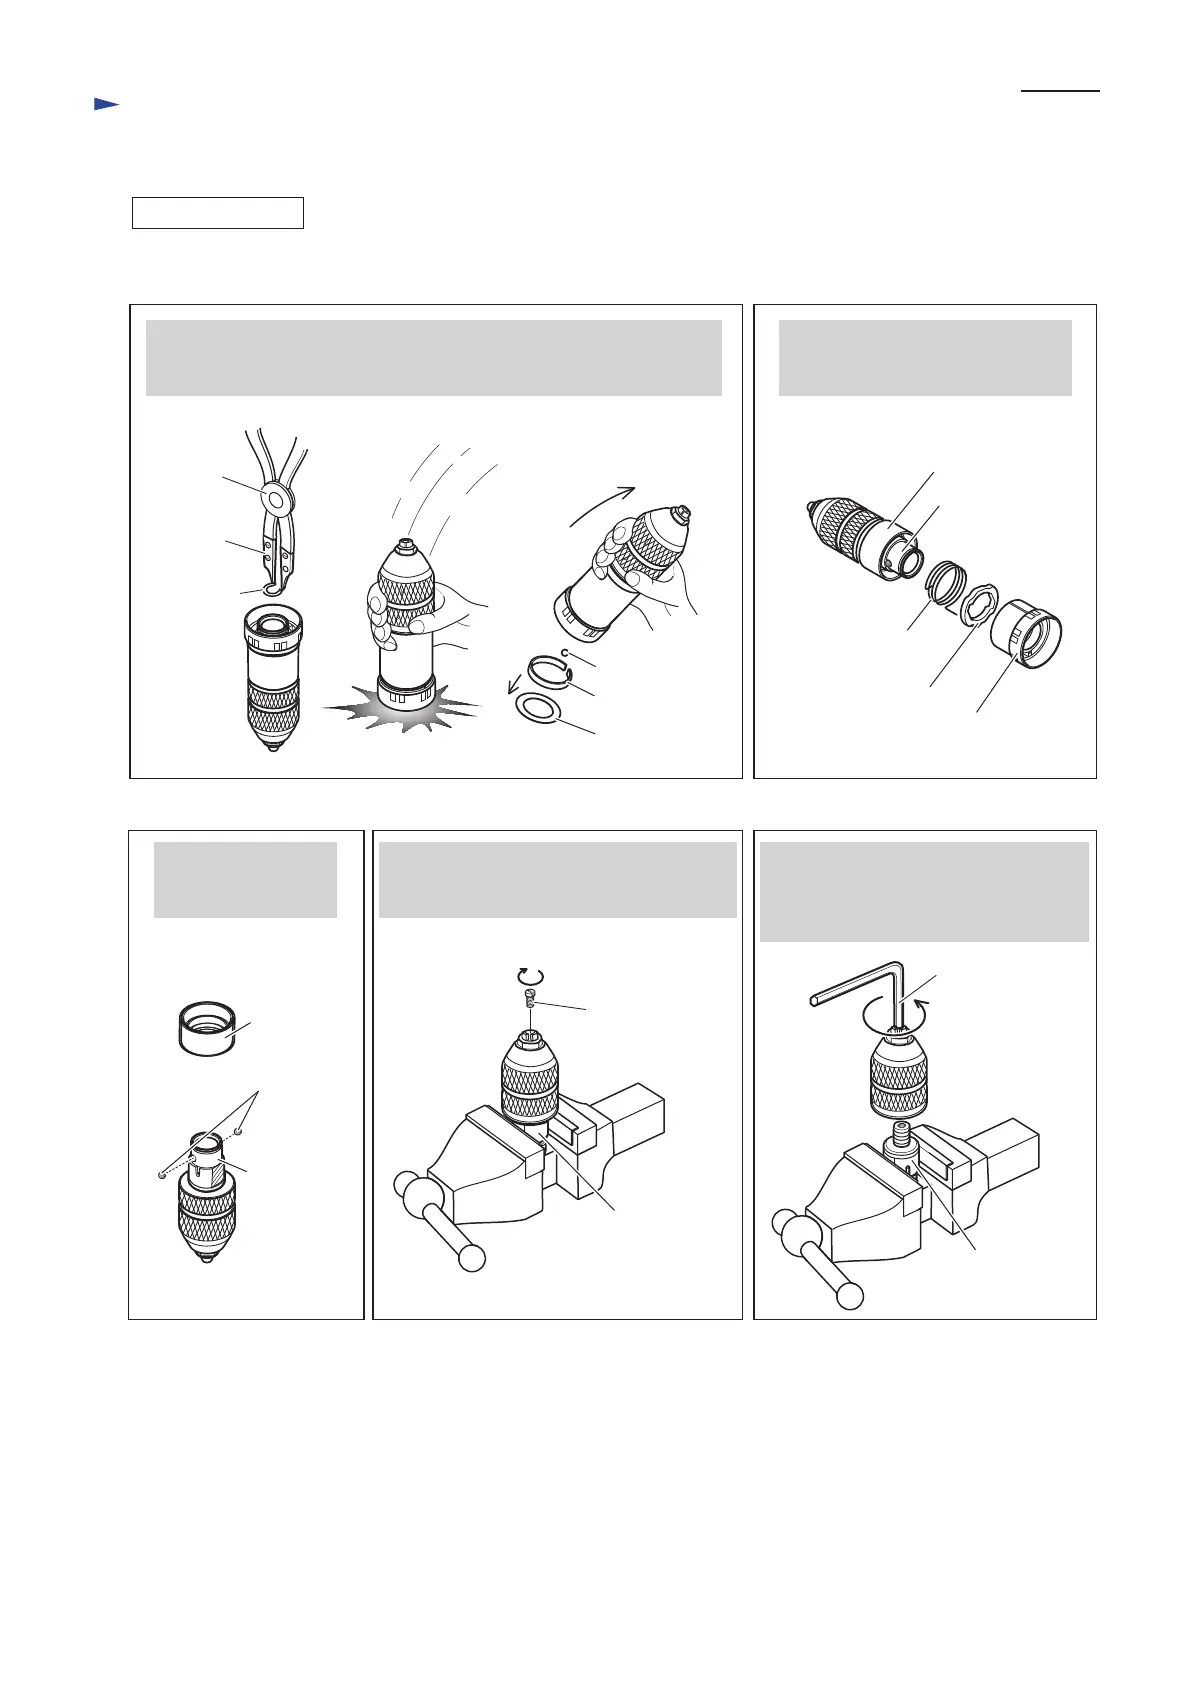
Fig. 17 Fig. 18
Fig. 21Fig. 20Fig. 19
Steel ball 5.0
Leaf spring
Flat washer 24
Drill chuck assembly can be disassembled as drawn in Figs. 17 to 21.
Change cover
Change ring
After Removing Ring spring 21, strike Drill chuck assembly against
workbench which is covered with a cloth as a cushion.
Flat washer 24, Leaf spring and Steel ball 5.0 can be removed.
Pull off Change cover.
Change ring and Torsion spring 31
can be removed.
Torsion spring 31
Chuck holder
Spacer
Chuck holder
Chuck holder
Chuck holder
Spacer
Remove Spacer and
two Steel balls 6
from Chuck holder.
Clamp the flats of Chuck holder in vise,
then unscrew M6x22 Flat head screw
by turning it clockwise using Impact driver.
Clamp the flats of Chuck holder in vise,
then separate Drill chuck from Chuck
holder by turning it counterclockwise
using Hex wrench 10.
Steel ball 6
(2 pcs.)
M6x22
Flat head screw
Hex wrench 10
Ring
spring 21
1R003
1R212
 Loading...