P 20/ 23
Repair
Fig. 48
Fig. 49
Fig. 50 Fig. 51
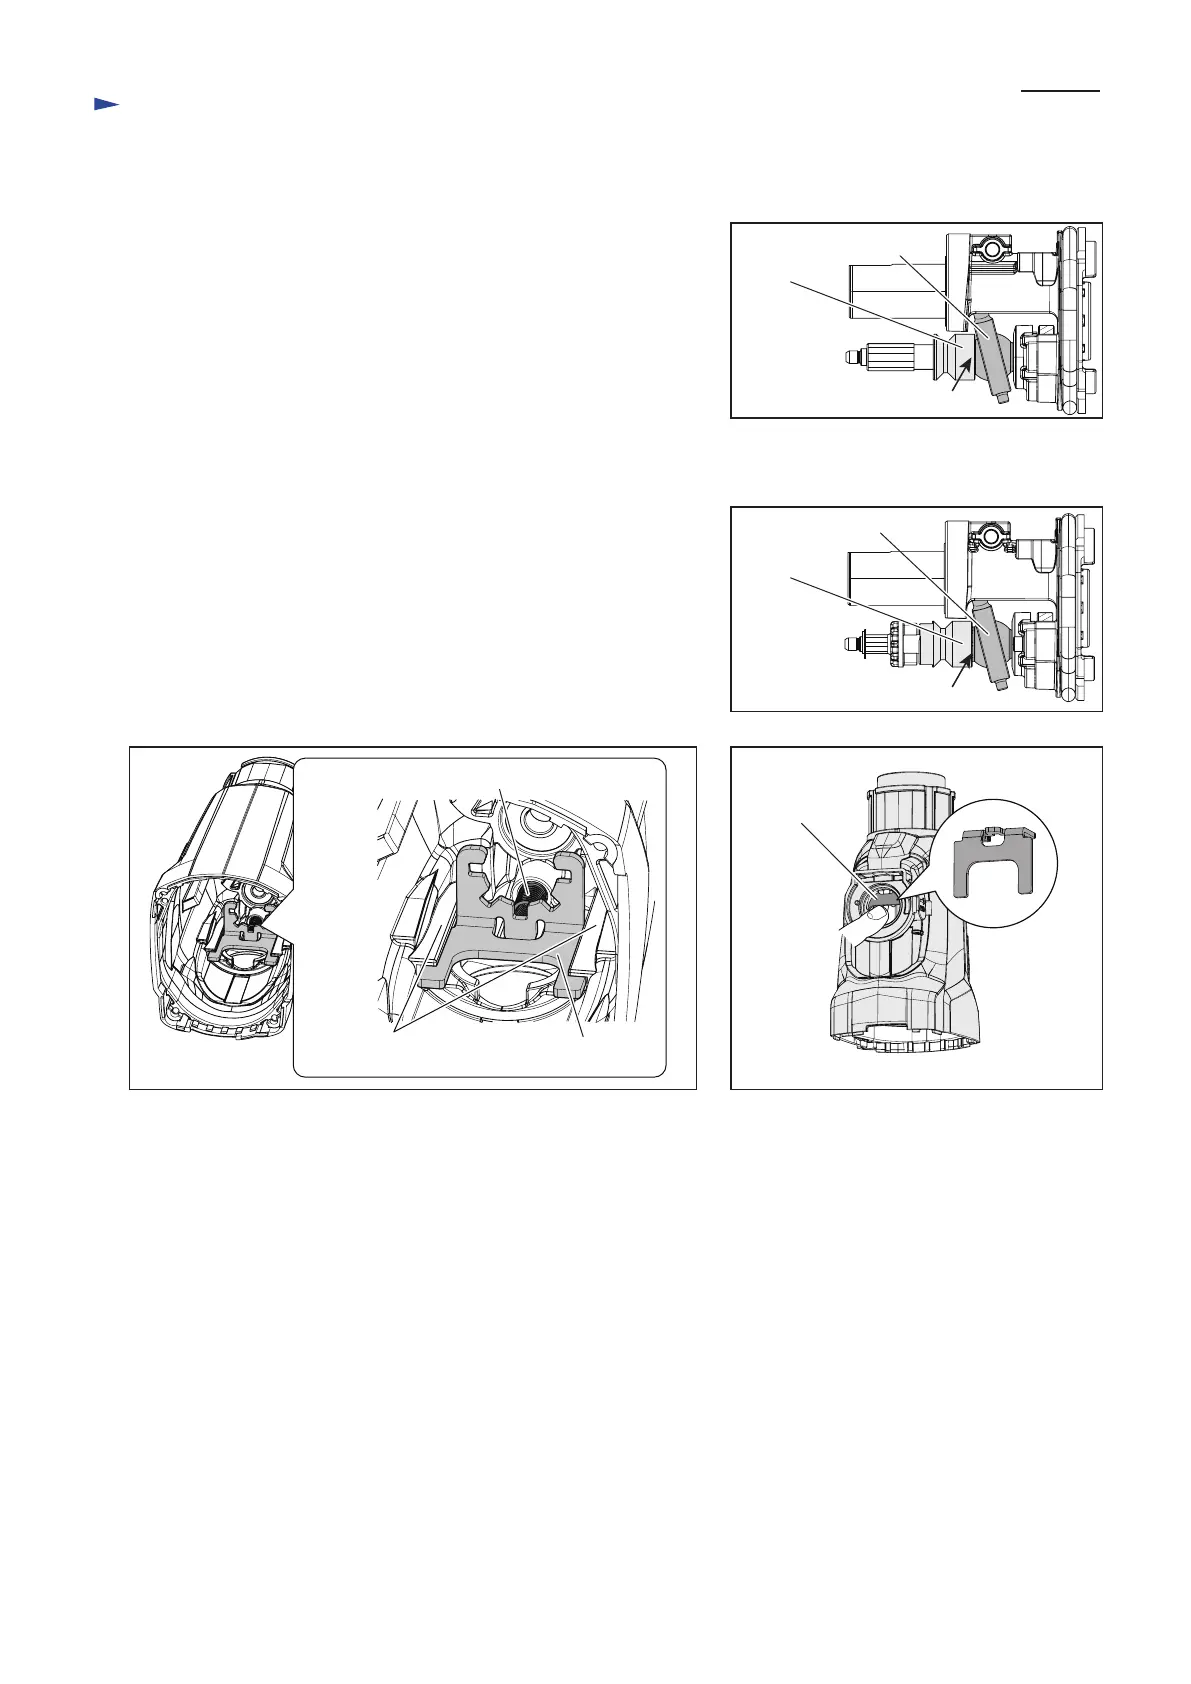
(1) Check that Clutch cam B is engaged with Swash bearing 10. (Fig. 48)
(2) Assemble Gear housing complete to Inner housing complete.
(1) Check that Clutch cam A is engaged with Swash bearing 10. (Fig. 49)
(2) Assemble Compression spring 4 and Lock plate to Gear housing
complete. (Fig. 50)
Note: Apply grease to the end of Compression spring 4 on Lock plate
mating side in order to do the next step smoothly.
(3) While holding Lock plate by a finger so as not to drop from the guide
of Gear housing complete, Assemble Gear housing complete to
Inner housing complete. (Fig. 51)
[3] DISASSEMBLY/ASSEMBLY
[3]-9A. How to assemble Gear housing to Inner housing for HR2300
Check here.
[3]-9B. How to assemble Gear housing to Inner housing for HR2310T
Swash bearing 10
Swash bearing 10
Check here.
Compression spring 4
Lock plateguides of Gear housing
complete for Lock plate
Clutch
cam A
Clutch
cam B
Lock plate
 Loading...