The system measures whether the concentration is suitable by monitoring the
“obscuration” of the beam caused by the sample being added to the dispersant.
The obscuration is simply the fraction of light “lost” from the analyser beam
when the sample is introduced. For example an obscuration of 30% means that
30% of the analyser beam (recorded during the background measurement step)
has been lost to either scattering or absorption.
The Measure-inspect dialogue will tell you the exact concentration of the
sample within the dispersant and whether it is ideal, too low or high etc. The
“obscuration bar” (À in the figure below) gives a visual indication of the
concentration of the sample. If the bar is green then the concentration is in the
correct range. If orange then it is approaching the correct range and if red then the
concentration is out of range. The exact obscuration is given at the bottom left of
the dialogue (Á in the figure below). The instrument has a wide range of
concentrations that are ideal and thus concentrations do not have to be precise.
The range of concentrations over which the instrument can be used can be
conveniently expressed in obscuration terms as below.
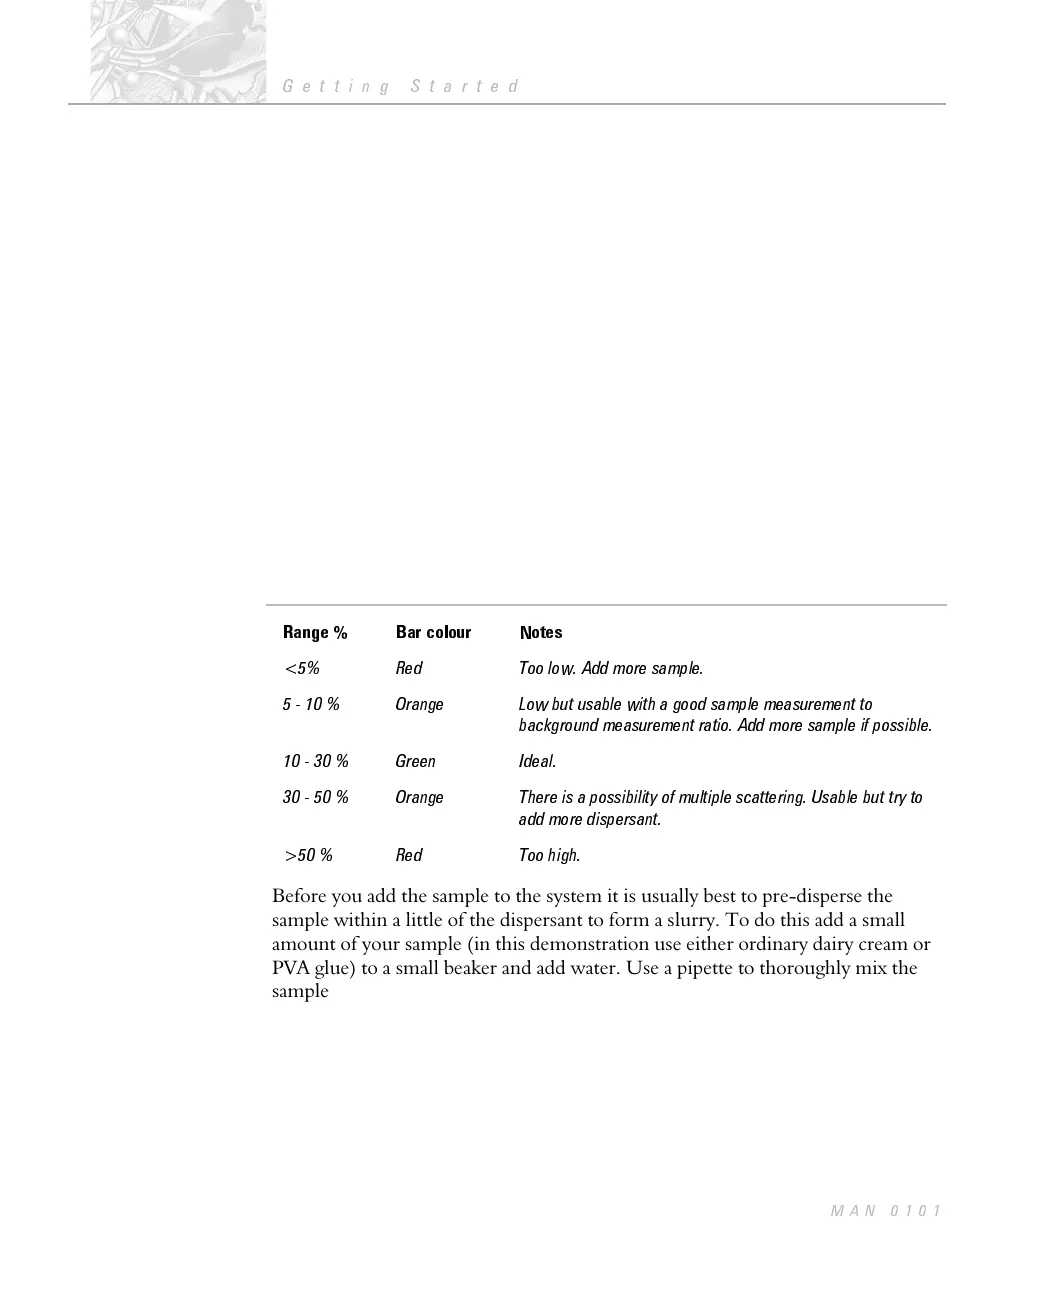
Obscuration ranges
Range % Bar colour Notes
<5% Red Too low. Add more sample.
5 - 10 % Orange Low but usable with a good sample measurement to
background measurement ratio. Add more sample if possible.
10 - 30 % Green Ideal.
30 - 50 % Orange There is a possibility of multiple scattering. Usable but try to
add more dispersant.
>50 % Red Too high.
Before you add the sample to the system it is usually best to pre-disperse the
sample within a little of the dispersant to form a slurry. To do this add a small
amount of your sample (in this demonstration use either ordinary dairy cream or
PVA glue) to a small beaker and add water. Use a pipette to thoroughly mix the
sample. When you come to measure your own samples, other than cream or PVA
glue, it will be of great benefit to read chapter 9 on sample preparation.
$
To add the sample:
.
From the Measure-background dialogue press the Next button. The
Measure-inspect dialogue shown below will appear.
CHAPTER 4
Getting Started
Page 4.12
MAN 0101
 Loading...