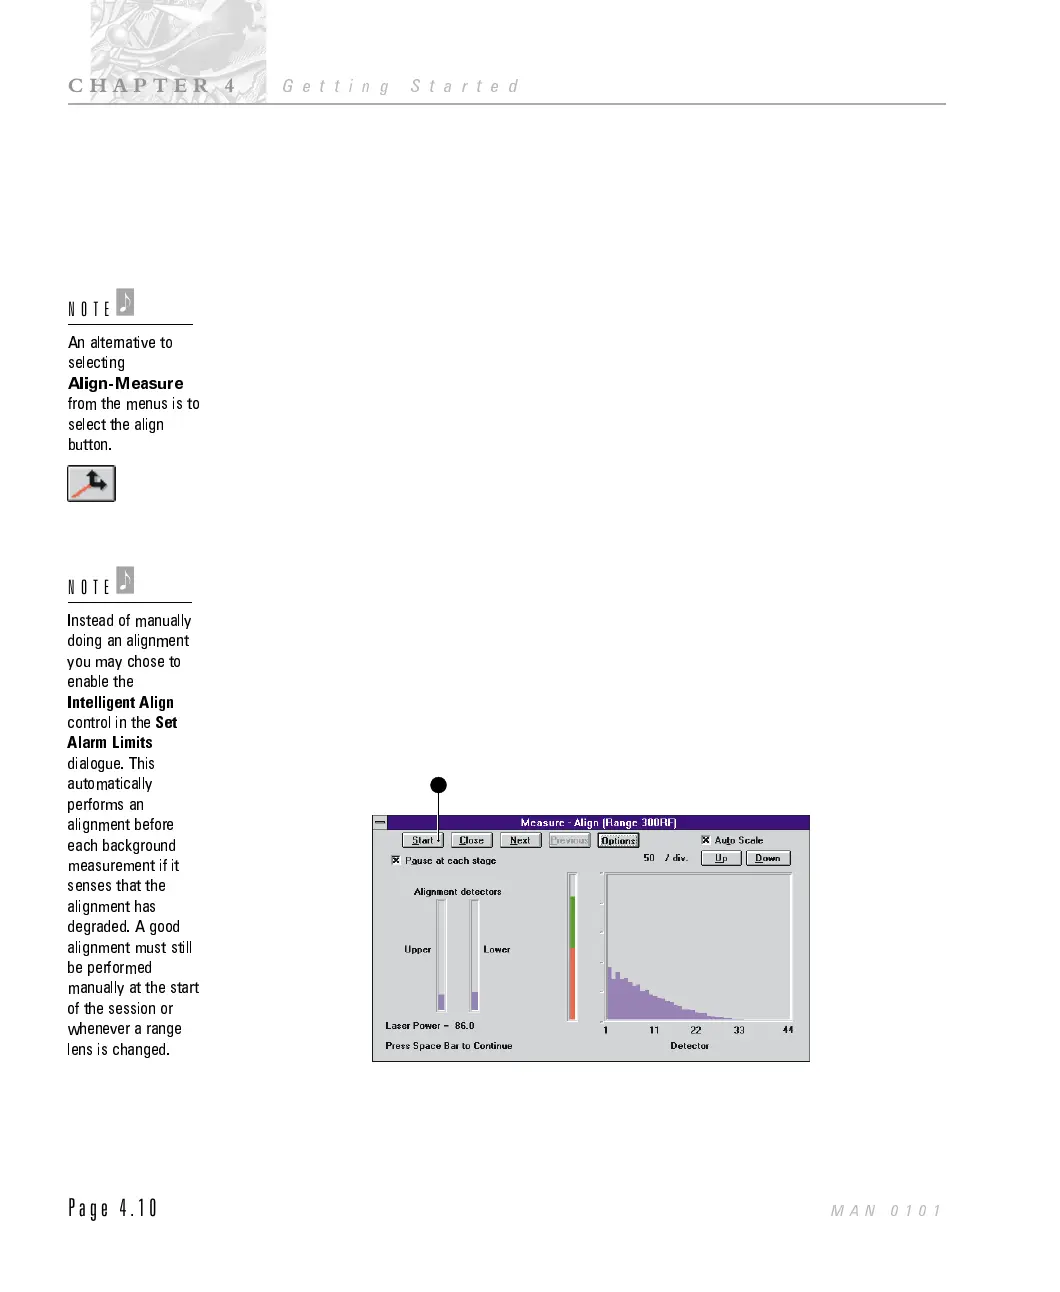
The live display shows the scattering pattern that is detected by the detector. As
stated earlier, the detector is actually made up of series of photo diodes, arranged
in a radial structure. The individual diodes are numbered, with the diode at the
centre being numbered zero. The live display shows the scattering pattern from
diode 1 outwards.
The laser power bar gives an indication of how well the system is aligned. The
laser power bar gives a reading from the central detector (detector zero). The bar
is colour coded to give a visual indication of the laser power, if the bar is green
then the laser power is acceptable. If red then the laser power is too low. The laser
power bar is linked to the laser power reading  that shows the laser power as a
percentage.
The rest of this section will take you through the rest of the measurement
sequence using the measure windows.
Align the system
The laser must be aligned centrally on the detector. An alignment must be made
whenever any of the optics (the cell, range lens, beam expander etc) are removed
or replaced. An alignment should also be made after the system has been first
switched on and had time to stabilise its temperature. If an alignment has not
been made the software will not allow you to go on to the other measurement
dialogues by “greying” out the options.
$
To align the Mastersizer:
.
Select Align from the Measure menu. The dialogue below will appear.
.
Select the Start button À and the instrument will automatically align. The
Start button will change to “Stop”. When the alignment is complete the
button will change back to “Start”. Alignment usually only takes a few sec-
1
ILL 2058
An alternative to
selecting
Align-Measure
from the menus is to
select the align
button.
NOTE
'
Instead of manually
doing an alignment
you may chose to
enable the
Intelligent Align
control in the
Set
Alarm Limits
dialogue. This
automatically
performs an
alignment before
each background
measurement if it
senses that the
alignment has
degraded. A good
alignment must still
be performed
manually at the start
of the session or
whenever a range
lens is changed.
NOTE
'
CHAPTER 4
Getting Started
Page 4.10
MAN 0101
 Loading...