PREVENTIVE MAINTENANCE PROCEDURE
CHALLENGER Series II Bulletin No. PH7
Procedure Information (Cont.)
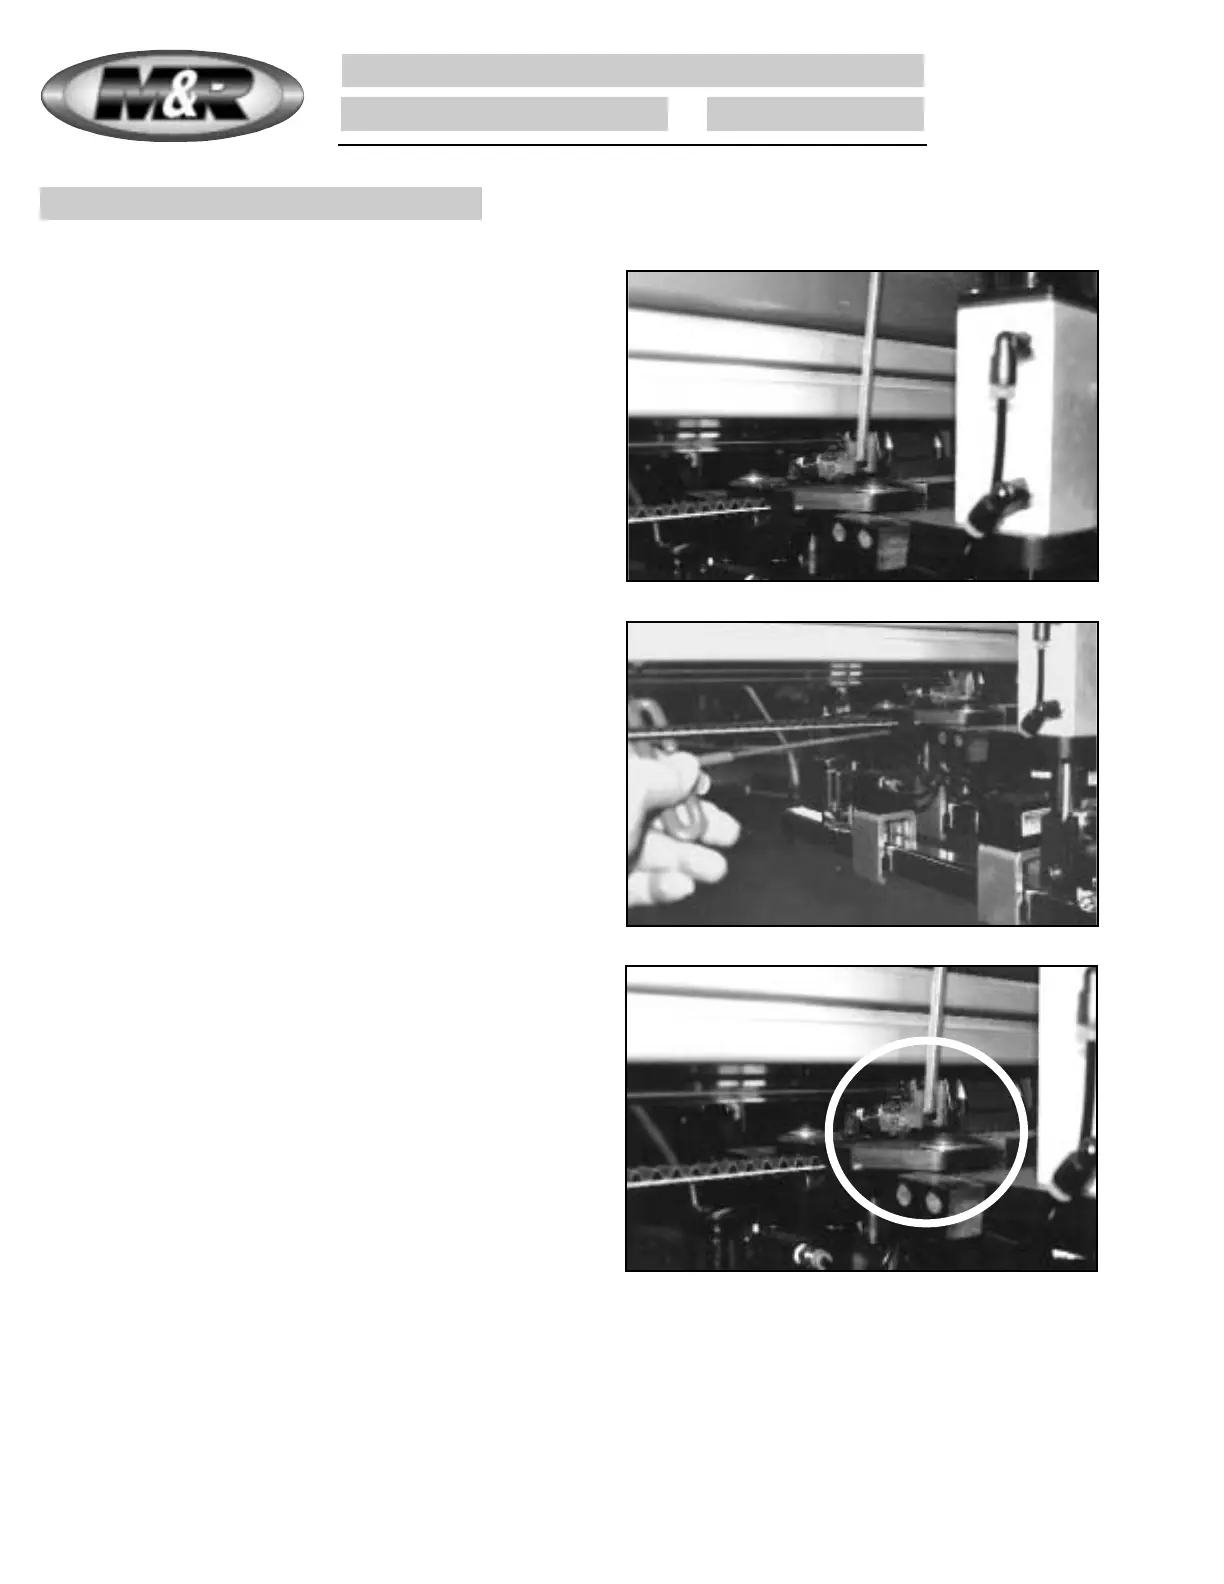
6. Adjust the 1/4”-20 X 1-1/4” allen head cap screw in a
clockwise direction to increase the tension on the timing belt.
Generally, this will only be a slight adjustment, perhaps 1/4
to 1/2 turn of the screw. (See illustration at right)
4. Using a 1/8” allen wrench, remove both the left and right
dust covers by loosening the three 10-24 X 3/8” button head
allen screws.
5. Using a 3/16” allen wrench, loosen the two 5/16”-18 X
3/4” button head allen screws on the tension bracket
assembly. (See illustration at right)
7. Re-tighten the 5/16”-18 X 3/4” button head allen screws.
8. Re-install both the right and left dust covers using the 10-
24 X 3/8” button head allen screws.
081200MS
102
 Loading...