4. CD test mode
While holding down buttons the "
8
/
6
" and "
1
" buttons simultaneously, insert the AC plug to turn
the power on.
This mode is cancelled when the power is turned off.
z
: ashes
CD test mode
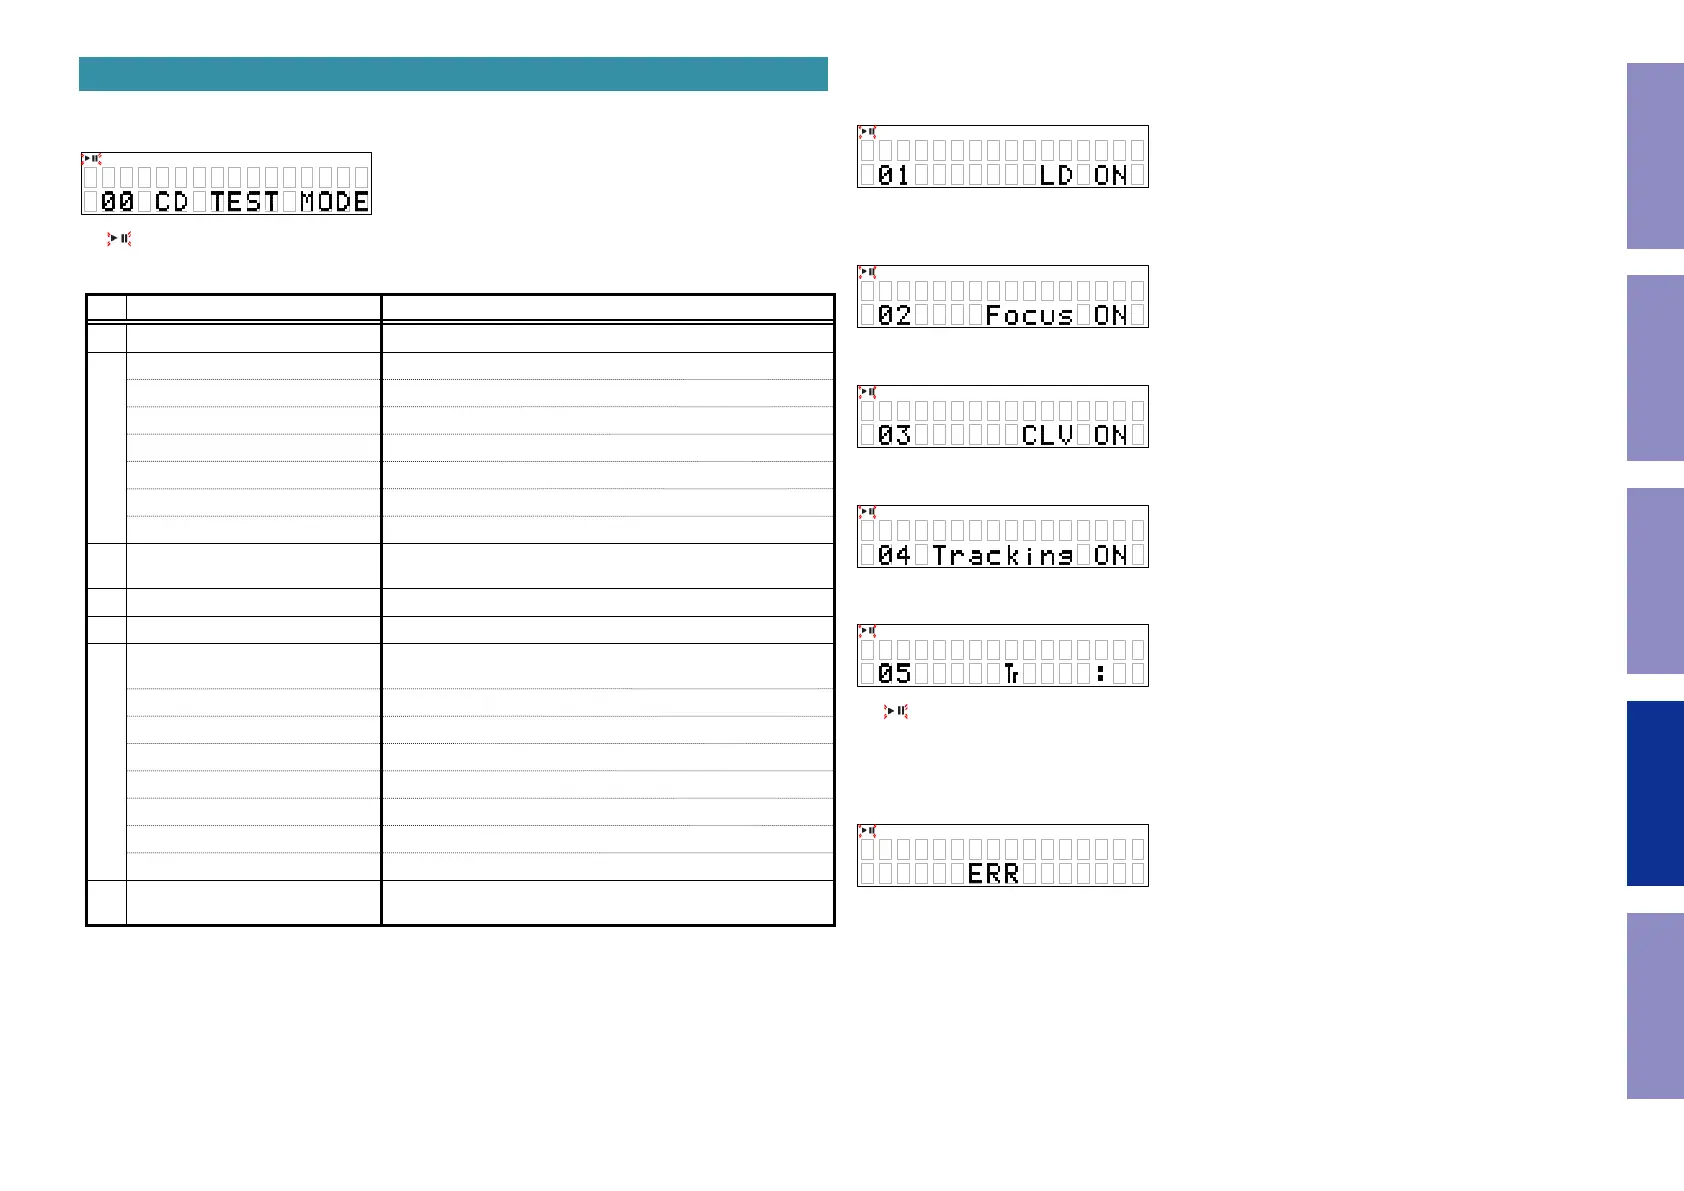
No. Mode Button / Operation
1 Disc mounting
5
2
Servo check -
LD ON
1
FOCUS ON
1
CLV ON
1
TRACKING ON
1
READ SUB CODE
1
BER display
1
3 Pickup movement
8
/
6
or
7
/
9
(The pickup keeps moving while the button is pressed.)
4 STOP Servo
2
5 All servo on
2
+
5
6
Display adjustment values
2
(Press after all servos are turned on.)
FOCUS BALANCE
7
/
9
FOCUS GAIN
7
/
9
TRACKING BALANCE
7
/
9
TRACKING GAIN
7
/
9
FOCUS OFFSET
7
/
9
TRACKING OFFSET
7
/
9
RFRP
7
/
9
7 Displaying the laser current
2
(Press and hold for more than 1 second)
4.1. Disc loading mode
• Press the "
5
" button to open the tray.
• Place the disc in the tray and press the "
5
" button again to close the tray and start disc chucking.
• Return the slide to the default setting position (10mm from inner circumference) and stop it in this
position.
• Remains in CD test mode.
4.2. Servo check
• Press "
1
" button. Execute the following steps.
(1) LD ON(while servo is stopped)
(2) FOCUS ON (disc rotating, tracking off)
If there is no disc, the unit retries the operation and then stops.
(3) CLV ON
(4) TRACKING ON
(5) READ SUB CODE (playback sound output)
z
: ashes
z
@@ : T.No
z
XX:XX : Elapsed time
z
BER: If button "
1
" is pressed while SUB CODE is displayed, BER (Block Error Rate) is displayed for 2
seconds.
X X XX
@ @
# ###
42
Caution in
servicing
Electrical Mechanical Repair Information Updating