Atomic 3000 user manual Preparation for use 7
• Following the cord cap manufacturer’s instructions, connect the yellow and
green wire to ground (earth), the brown wire to live, and the blue wire to
neutral. The table below shows some pin identification schemes.
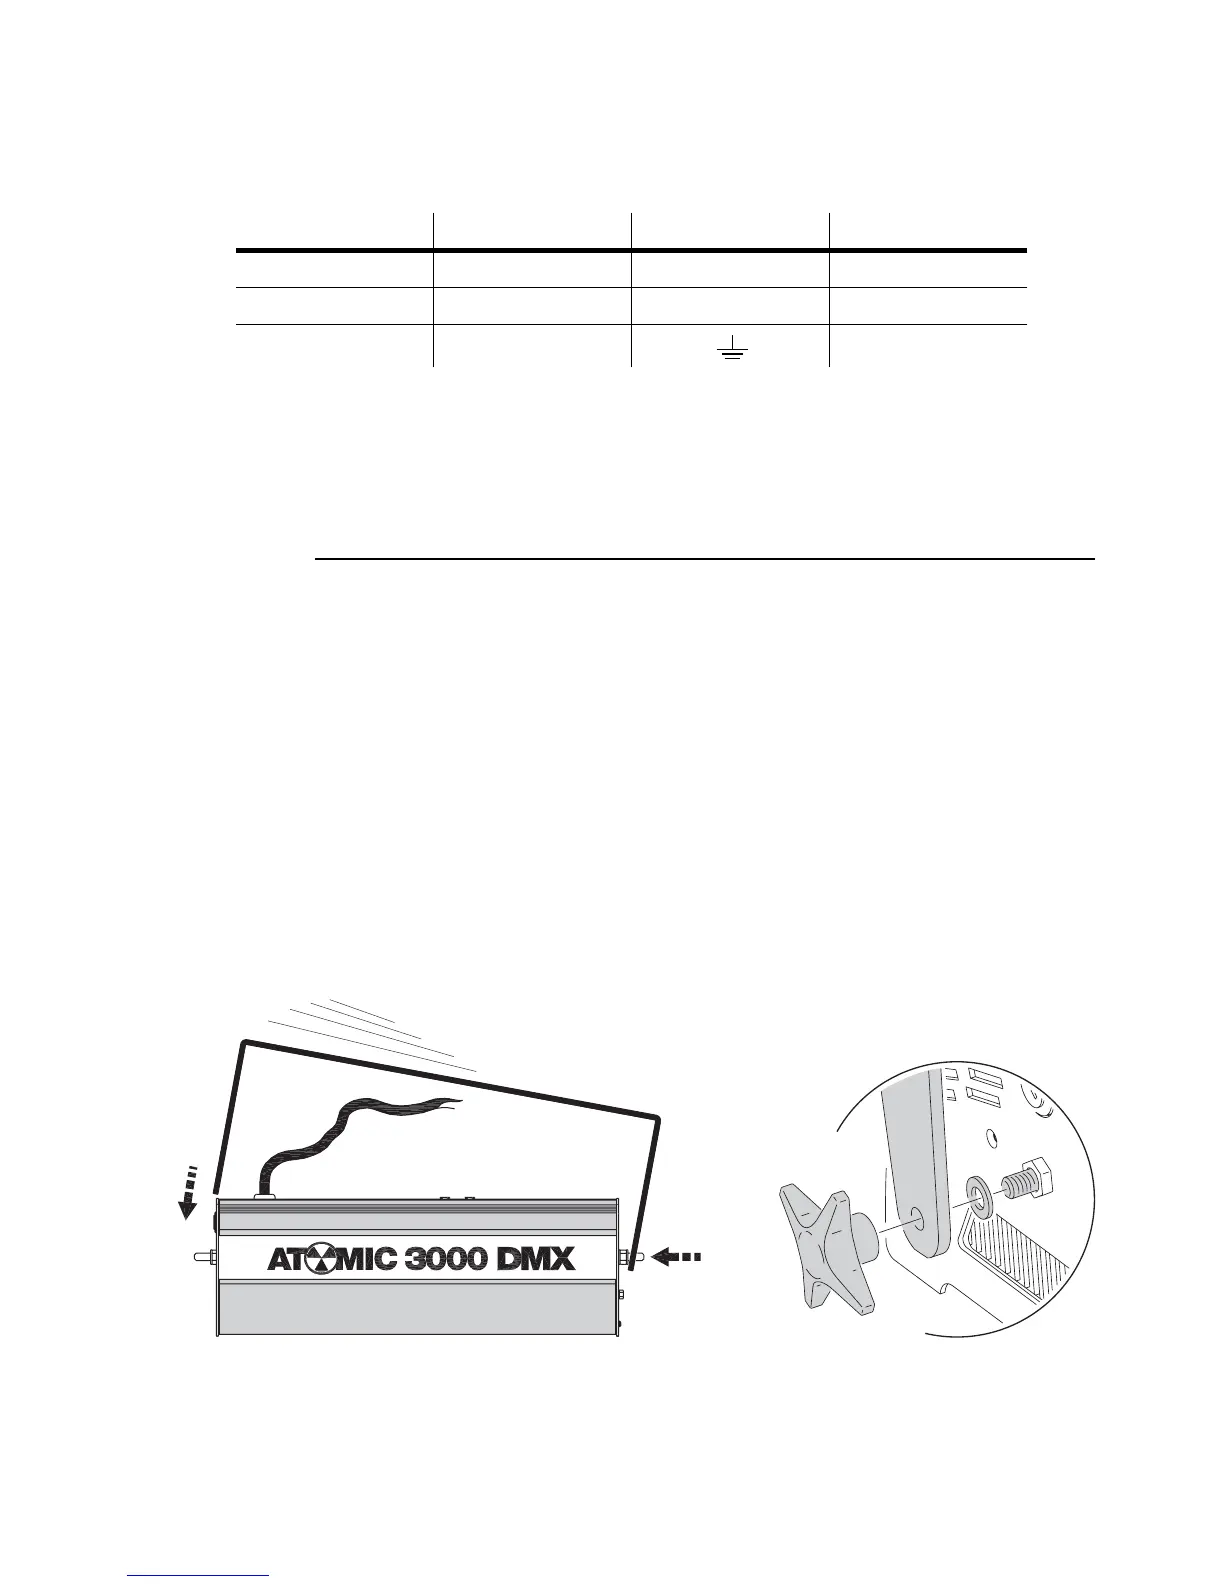
INSTALLATION
The Atomic 3000 may be installed in any orientation. The mounting bracket
provides five 12 mm holes for direct fastening or attachment of rigging clamps.
To install the mounting bracket
1 Place the fixture face down on a table.
2 Place a plastic washer on each mounting bracket stud.
3 Place one end of the bracket on one of the mounting studs. Bend the other
end of the mounting bracket open slightly and work it onto the opposite stud.
4 Place a hand knob on each stud. Tighten both hand knobs to lock the
mounting bracket in place.
Wire Pin Marking Screw color
brown live “L” yellow or brass
blue neutral “N” silver
yellow/green ground green
Table 1: Cord cap wiring
A