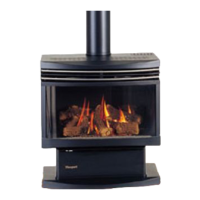
F37 Masport Rear Flued Room Sealed Freestanding Gas Heater 11
INSTALLATION
Installer Notice:
These instructions must be left
with the appliance.
Burner Orifice
Conversion Kit from NG to LPG
THIS CONVERSION MUST BE DONE BY AN AUTHORIZED GAS FITTER
IF IN DOUBT DO NOT DO THIS CONVERSION !!
Conversion Kit # 680-969 Contains:
Qty. Part # Description
1 910-018 SIT Conversion Kit-
50% Turndown LPG
1 910-037 LPG Injector (Pilot Orifice)
1 904-390 Burner Orifice #52
1 908-528 Red "LPG" label
1 908-255 Label "Converted to LPG"
1 918-031 Instruction Sheet
1) Shut off the gas supply.
2) Open the front door and carefully remove
the logs and lava rock.
3) Remove burner. See diagram below.
Pilot assembly is now accessible for steps
4) to 9).
Note: Use a magnetic type screwdriver if
possible.
4) Remove and discard the 3 pressure regu-
lator mounting screws (A), pressure reg-
ulator tower (B) and diaphragm (C).
5) Insure that the rubber gasket (D) is prop-
erly positioned and install the new HI/LO
pressure regulator assembly to the valve
using the new screws (E) supplied with
the kit. Tighten screws securely.
6) Pull off the pilot cap to expose the pilot
orifice.
7) Unscrew the pilot orifice with the allen key
and replace with the LPG pilot orifice in the
kit.
8) Remove burner orifice with a 1/2" spanner
and discard. Use a spanner to hold on to the
elbow behind the orifice.
9) Reinstall new burner orifice LPG stamped
#52 and tighten.
10) Reverse steps 3) to 2).
11) Attach the Conversion label "This unit has
been converted to LPG" on top of the Serial
# decal.
12) Replace yellow "NG" label with red "LPG"
label
13) Check for gas leaks.
14) Check inlet and outlet pressures.
15) Check operation of flame control.
16) Check for proper flame appearance and
glow on logs.
 Loading...