MAINTENANCEINSTRUCTIONS
Maintenancemustbecarriedoutonlybyauthorisedpersonnel.
Minoradjustmentscanbemadewiththeheaterinitsnormal operatingposition,butit willbefoundmore
convenienttomovetheheaterawayfromthewallformajorwork.
Ifitisnecessarytomovetheheater:-
•Shutoffthegassupplyatthevalvebehindtheheater.
•Removetheaccessplateontherearofthecabinet.
•Disconnectthegaslineattheheater.
•Liftthefluetrimabout75mmandsupportitwithawoodenblock.
•Slackenanyflueclamp,andliftthefluewhilemovingtheheaterfrombeneathit.
•Slidetheheaterawayfromthewall,supportingtheflueandtrimonasuitablespacer.
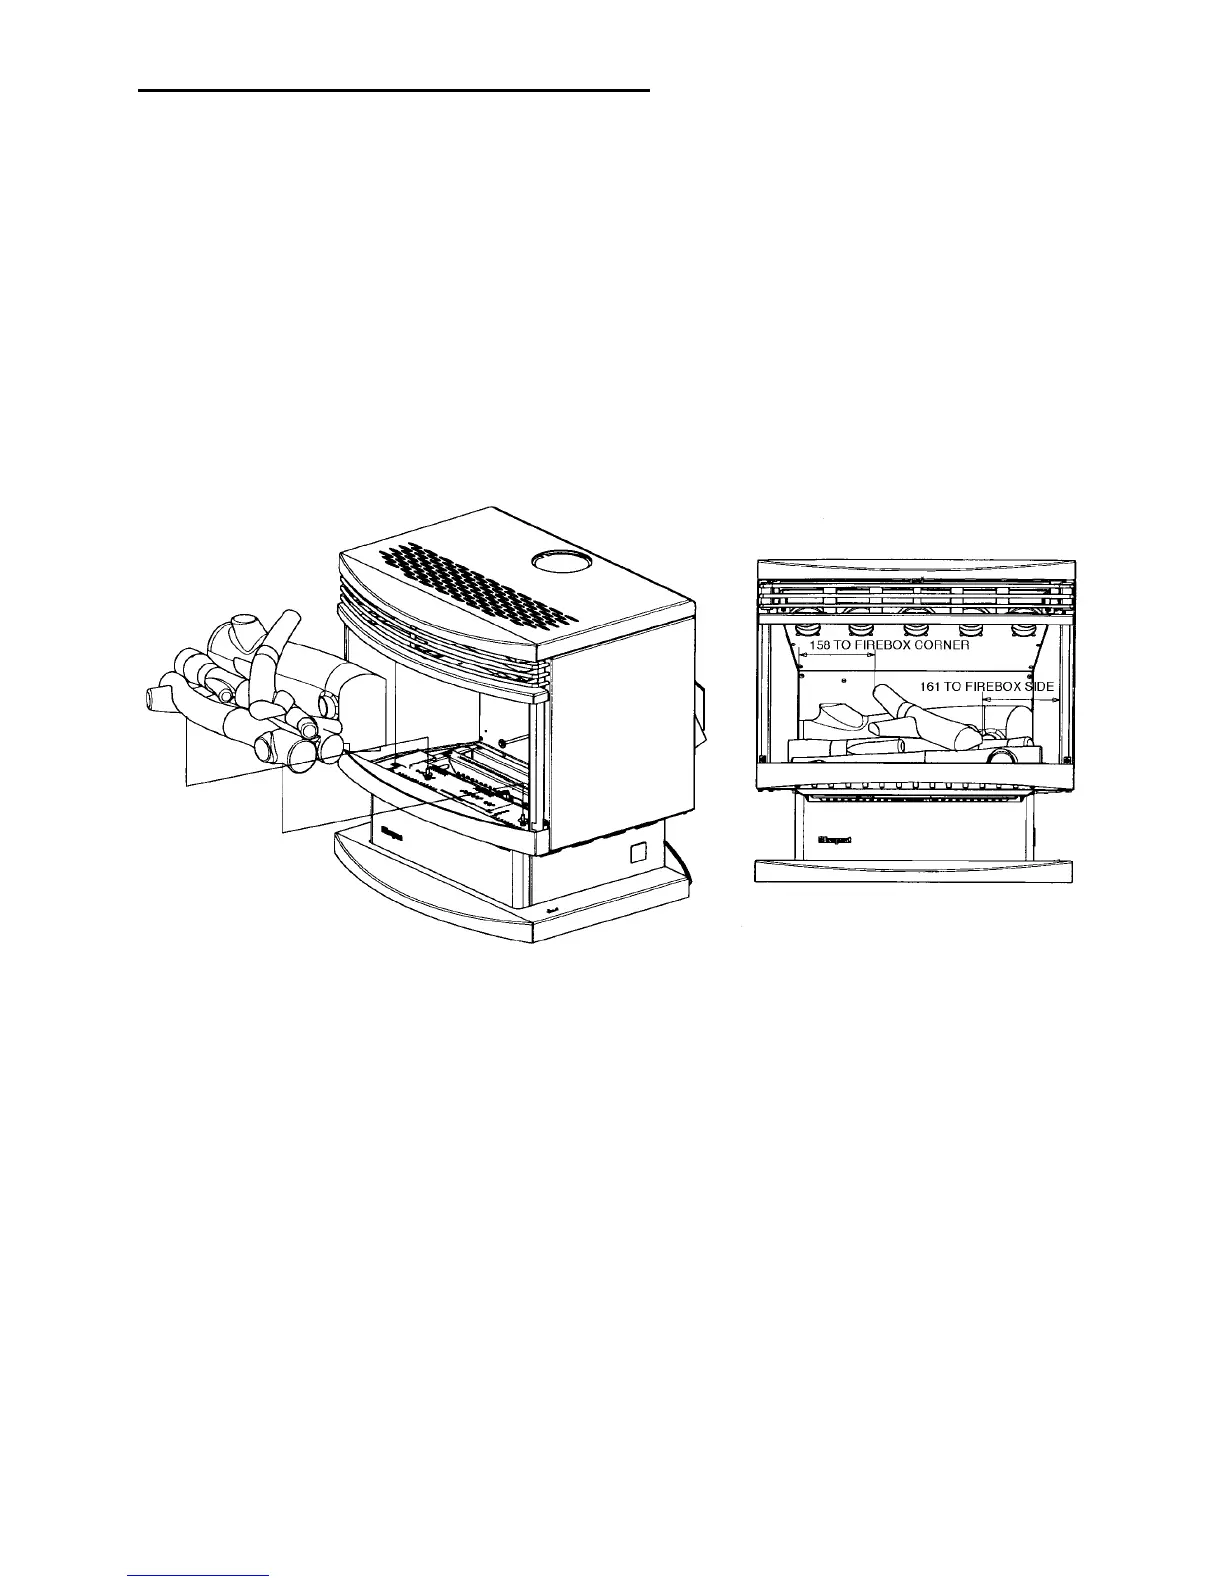
•Keeptheheateruprightatalltimestoavoiddisplacingthelogs.Thecorrectgas-logpositionsare
shownbelow.
ACCESSPOINTS
1.THECABINETREARCOVERPLATE.Thisgivesaccesstothegasentryconnectionandtherearof
thegascontrolvalve.
2.THECABINETRIGHTHANDSIDEPANEL.Theentirepanelcanberemovedtogiveeasyaccess
tothecontrolvalve.Toremoveit,firstwithdrawtwoscrewsunderitsbottomflange(oneatthefront
andtheotherattherearofthepanel).Pullthelowerendofthesidepanelawayfromtheheateruntilit
is clear of its mounting and then lower the panel until the two locating pegs on its upper flange
disengagefromthecabinet.Liftitclear.
3.THEGLASS.Seepage11forremovalinstructions.Accessisthenavailableforthelogassembly,the
pilotlight,igniterpointsandflamesafetysensorandthemainburner.
4.THEENTIRECABINETmayberemovedifaccesstotheheatexchangerisnecessary.Firstremove
theglassandthecabinetrighthandsidepanel,thefan,thedraughtdiverterhoodandtherearcover
plate.Thecabinetisretainedbyfivescrewsfromunderneath,threescrewsattherearandtwoscrews
oneachfrontverticaledgeofthefirebox.
10
 Loading...