20
3. Lower the back end of the rip fence
onto the guide surfaces of the rear
rail.
4. Push the locking lever down in order
to automatically align and secure the
fence.
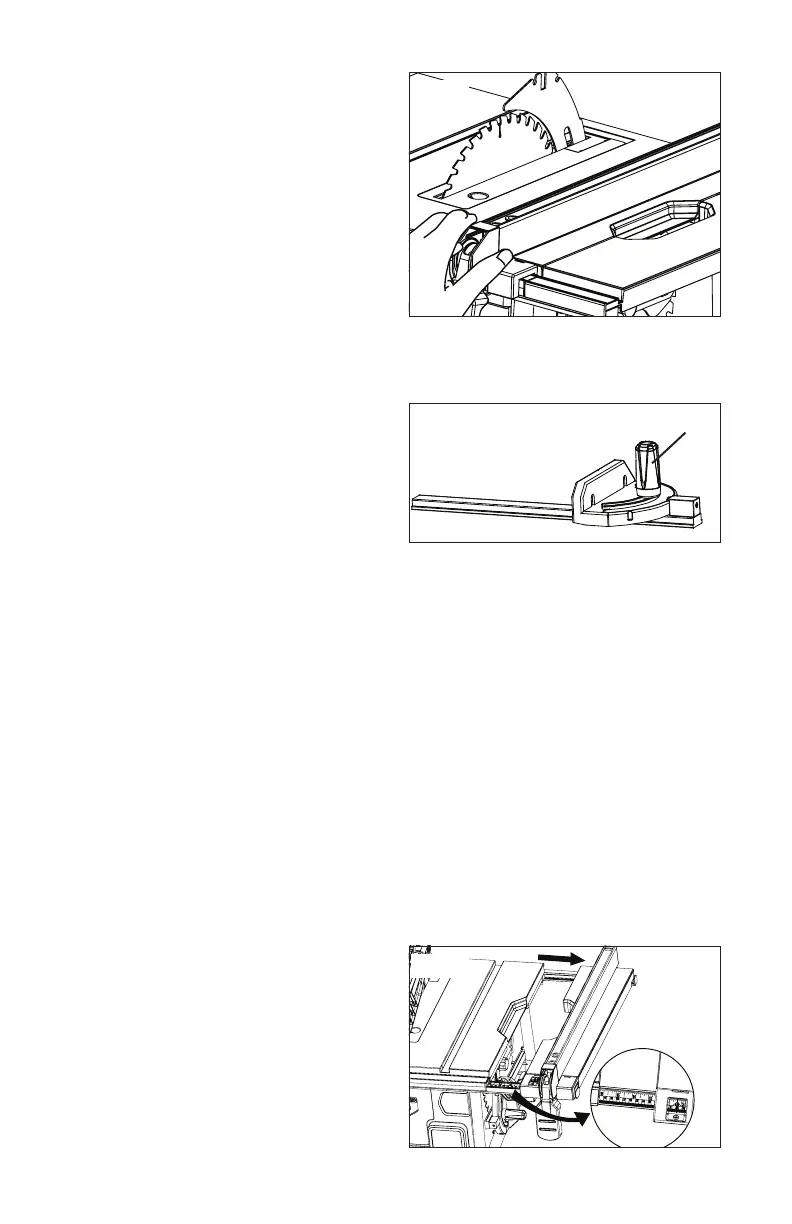
USING THE MITRE GAUGE (See Fig.
18)
The mitre gauge provides greater
accuracy in angled cuts. For very close
tolerances, test cuts are recommended.
There are two mitre gauge channels, one on either side of the blade. When
making a 90° crosscut, you can use
either mitre gauge channel. When
making a bevel crosscut (the blade tilted
in relation to the table), the mitre gauge
should be located in the slot on the right
so that the blade is tilted away from the
mitre gauge and away from your hands.
The mitre gauge can be turned 60° to the right or left. Positive stops at 0° and
45° can be located by pushing in the stop pin.
1. Loosen the locking knob
2. With the mitre gauge in the mitre gauge slot, rotate the gauge until the
desired angle is reached on the scale.
3. Retighten the locking knob.
To check the angle indicator:
Loosen the locking knob, place a 90º square against the mitre gauge rod and
the mitre gauge base, and verify that the angle indicator is at 0º. If it is not,
loosen the locking screw under the rod in order to adjust the angle indicator
to 0º, and then retighten the locking screw.
USING THE SLIDING EXTENSION TABLE (See Fig. 19)
Increase the length of the saw table by
using the extension table.
1. Set the rip fence to 12 1/2” (31.8
cm).
2. Push the extension table locking
lever toward the back in order to
unlock the lever.
Fig. 17
Fig. 19
Fig. 18
LOCKING KNOB
EXTENSION
TABLE
 Loading...