FOR SERVICE TECHNICIAN’S USE ONLY
36
Removing the Water Inlet Valve
WARNING
Electrical Shock Hazard
Disconnect power before servicing.
Replace all parts and panels before operating.
Failure to do so can result in death or electrical shock.
NOTE: The water inlet valve is replaced as an assembly, which includes all
four (4) valves, bracket, and valve assembly harness.
1. Unplug washer or disconnect power.
2. Turn off the water supply to the washer.
3. Disconnect hot and cold inlet water hoses.
4. Complete the steps 3-7 from section Removing the Console.
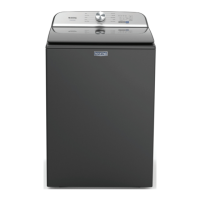
5. Disconnect the Water Inlet Valve connector from the ACU (connector
varies depending on model, features, and control board).
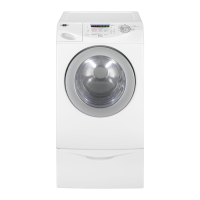
6. Using a 1/4" nut driver, remove the two (2) hex-head screws (one on
each side) securing the water inlet valve to the Top Panel of the washer.
Removing the Main Control
WARNING
Electrical Shock Hazard
Disconnect power before servicing.
Replace all parts and panels before operating.
Failure to do so can result in death or electrical shock.
NOTE: ACU may vary depending on model number and features.
1. Unplug washer or disconnect power.
2. Turn off the water supply to the washer.
3. Complete the steps 3-7 from section Removing the Console.
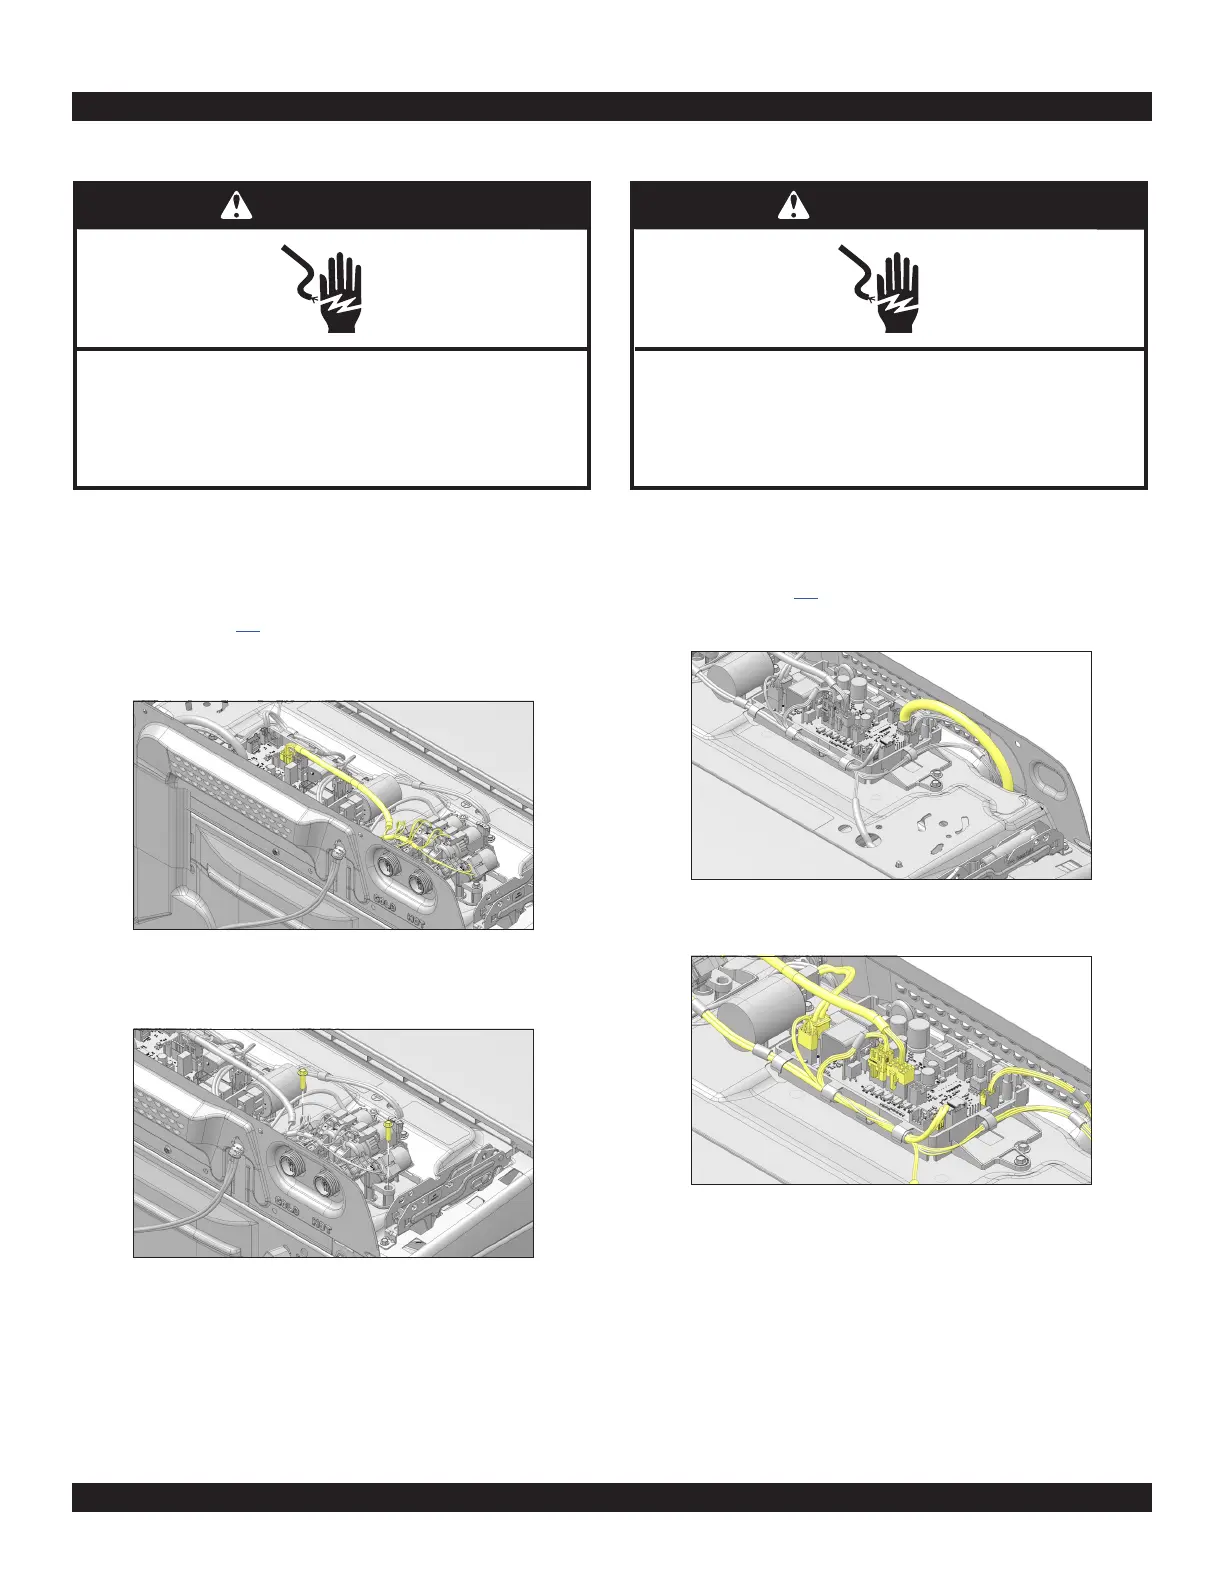
4. Remove pressure hose from ACU.
5. Disconnect all connectors from the ACU.