11
THE PRESENT MANUAL IS PROPERTY OF THE MANUFACTURER. ANY REPRODUCTION, EVEN PARTIAL, IS PROHIBITED.
- 11 -
INSTRUCTIONS FOR USE
5.
11- 11 -
3.
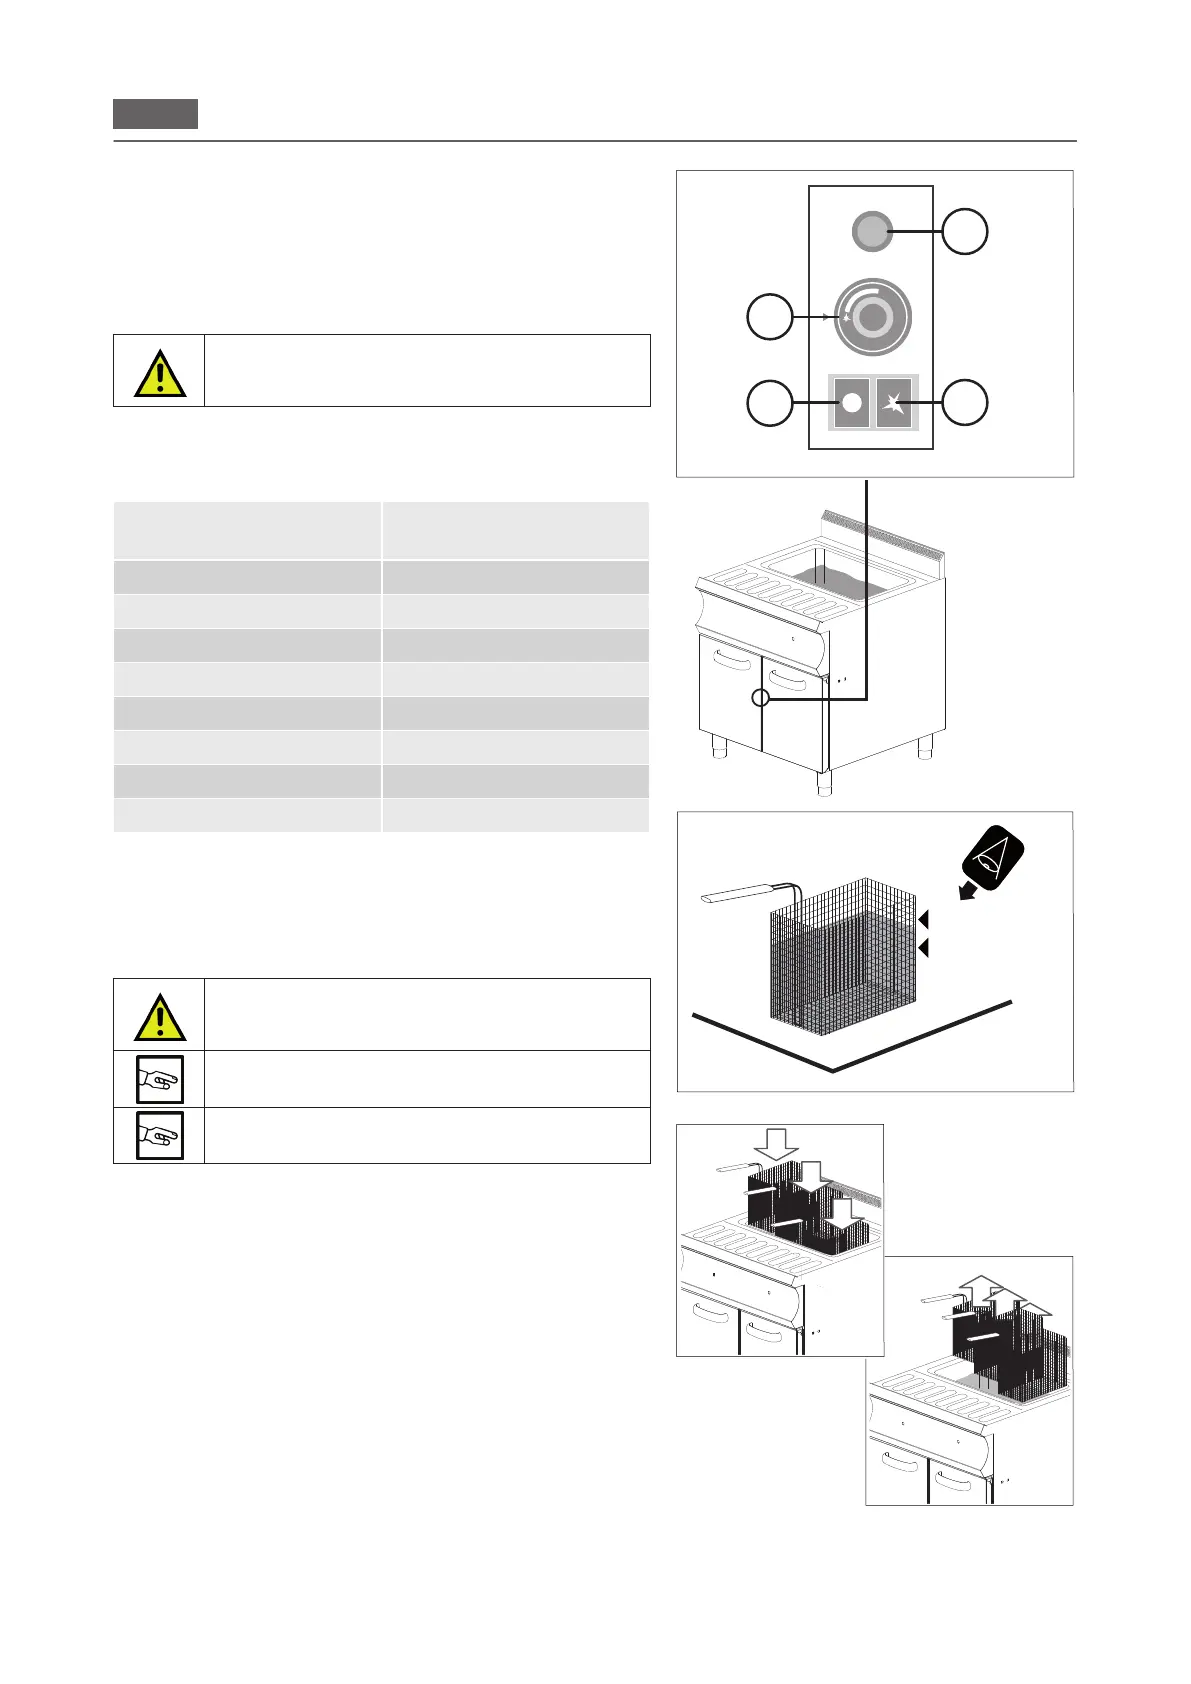
When the operations described on the previous page have been
performed successfully, do as follows to begin cooking:
• turn the thermostat knob to the piezoelectric symbol (Fig. 3C).
• Press the pilot light gas inlet key (Fig. 3A) all the way for 20”
and simultaneously press the piezoelectric button several
times (Fig. 3B) until the pilot light is lit.
Repeat the operation if after 20” the pilot light is not
yet lit. If the pilot light does not ignite, contact the
technical assistance Centre.
• After having lit the pilot light, turn the thermostat knob from 1
to 8 to set the desired working temperature (Fig. 3C).
POSITION
KNOB
TEMPERATURE
1
110
± 8 °
C
2
125 ± 8 °
C
3
140 ± 8 °
C
4
150 ± 8 °
C
5
155 ± 8 °
C
6
170 ± 8 °
C
7
180 ± 8 °
C
8
190 ± 8 °
C
Loading/Unloading the product
The amount of the product inside the container must
not exceed 2/3 the capacity of the recipient (rack
Fig.4).
Wait for the desired temperature to be reached before
placing the rack in the cooking compartment.
The product must be fully dipped into the oil inside
the cooking compartment.
The products to be cooked must be placed in the specic containers
and positioned correctly in the cooking compartment.
When the rack has been lled away from the appliance, introduce
it slowly into the cooking compartment, positioning it in the specic
housing (Fig. 5).
When cooking is over, remove the container from the cooking
compartment (Fig.6) and put it in a place prepared beforehand.
After the product has been unloaded, load it once again or else
perform the operations described in “Deactivation”.
Fig. 3
1
2
3
4
5
6
7
8
B
C
A
D
Fig. 5
Fig. 4
Fig. 6
3/4 MAX