2. Use the arrow buttons and the OK button to
move through the menu structure
Schedule
> Wizard
.
3. Enter your estimated lawn size. It is not
possible to enter a larger lawn size than the
maximum work capacity.
4. Push the OK button to confirm the lawn size.
By entering your lawn size the wizard
suggests either a suitable daily schedule
(refer to step 7) or need input for inactive
days.
5. Choose what day(s) the product should be
inactive. Use the up/down arrow buttons to
shift between days.
6. Push the OK button to confirm the chosen
inactive day(s).
7. The wizard suggests a daily schedule for the
active days. If you want to move the
schedule interval to earlier or later in the day
then push the arrow buttons up or down.
8. Push the OK button to confirm the daily
schedule. An overview of the daily schedule
is presented. Push the OK button to go back
to main menu.
Note: To change the schedule settings for
individual work days use the
Schedule >
Advanced
menu.
3.10.3.3 Day mode
The Day mode means that the product starts
mowing at 08:00 / 8 am and mows the specified
operation hours.
1. Do steps 1–3 in
To get access to the
schedule menu on page 23
.
2. Use the arrow buttons and the OK button to
move through the menu structure
Schedule
> Day mode
.
3. Use the arrow buttons and the OK button to
select
YES
to confim.
3.10.3.4 Night mode
The Night mode means that the product starts
mowing at 20:00 / 8 pm and mows the specified
operation hours.
1. Do steps 1–3 in
To get access to the
schedule menu on page 23
.
2. Use the arrow buttons and the OK button to
move through the menu structure
Schedule
> Night mode
.
3. Use the
arrow buttons and the OK button to
select
YES
to confim.
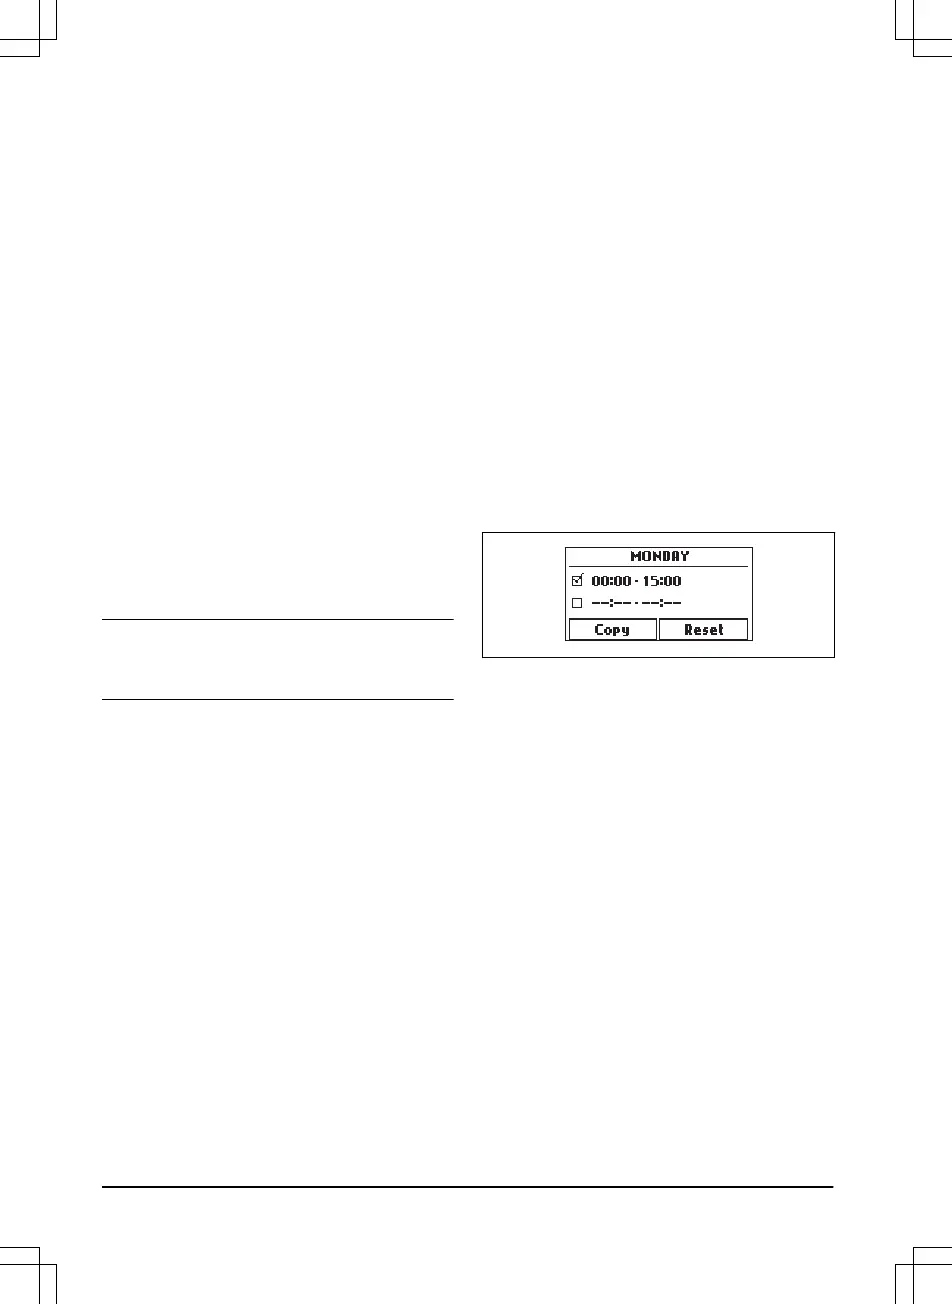
3.10.3.5 To set the schedule
1. Do steps 1–3 in
To get access to the
schedule menu on page 23
.
2. Use the arrow buttons and the OK button to
move through the menu structure
Schedule
> Advanced > Overview
.
3. Use the arrow buttons and the OK button to
select the day.
4. Use the left arrow button to select the
period.
5. Push the OK button.
6. Calculate the suitable operating hours. Refer
to
To calculate the suitable operating hours
on page 24
.
7. Enter the time with the arrow buttons. The
product can cut the grass 1 or 2 periods
each day.
8. If the product must not cut grass on a
specified day, unselect the box adjacent to
the 2 time periods.
3.10.3.6 To calculate the suitable operating hours
If the work area is less than maximum product
capacity, the schedule should be set to minimize
wear on the lawn and the product. The wizard
helps you to set suitable schedule settings, but it
is also possible to change the settings manually.
If you want to set the schedule manually, start by
calculating the suitable operating hours and then
follow the steps in
To set the schedule on page
24
and
To copy the schedule setting on page
25
.
1. Calculate the dimension of your lawn in m
2
/
ft
2
.
2. Divide the m
2
/ ft
2
of the lawn with the
approximate daily operation capacity. Refer
to table below.
3. The result is equal to the number of hours
that the product must mow each day. The
24
- Installation
1411 - 001 - 18.12.2019