12 OM Centrif Micro ΙΙ-5
Dual/Multi-Chiller Operation
Multiple Chiller Setup
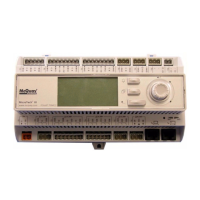
Single compressor chillers WSC and dual compressor chillers WDC and WCC have their main
control components factory wired to an internal pLAN network so that they can communicate
with each other, within the chiller itself.
On multi-chiller applications, up to four chillers, either single, or dual compressor, can be
interconnected by this internal pLAN. All that is required is simple field RS485 interconnecting
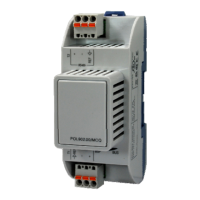
wiring, the addition of accessory communication isolation board(s) 485OPDR (McQuay P/N
330276202), and some MicroTech II control settings (see special WCC instructions at the end of
this section). The 485OPDR isolation board can be purchased with the unit or separately, during
or after chiller installation. The number of chillers minus one boards are required.
pLAN Setup
Interconnecting MicroTech II pLAN RS485 wiring should be installed by the installing contractor
prior to start-up. The McQuay start-up technician will check the connections and make the
necessary set point settings.
1. With no pLAN connections between chillers, disconnect chiller control power and set the
pLAN address as shown in Table 9.
2. With all manual switches off, turn on control power to each chiller and set each OITS
address (see Note 2 on page 14).
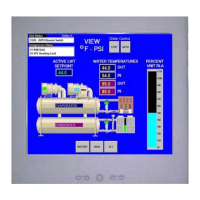
3. Verify correct nodes on each OITS Service Screen.
4. Connect chillers together (pLAN, RS485 wiring) as shown in Figure 3. The first chiller in
the connection can be designated as Chiller A. The isolation board is attached to the DIN
rail adjacent to the Chiller A unit controller. The isolation board has a pigtail that is
plugged into J10 on the controller. Most chillers will already have a universal
communication module (UCM) that connects the controller to the touchscreen already
plugged onto J10. If this is the case, plug the isolation module pigtail into the empty RJ11
pLAN port on the UCM. This is equivalent to plugging into the unit controller directly.
Next, interconnecting wiring is needed between Chiller A and Chiller B.
Two Chillers: If only two chillers are to be connected, Belden M9841 (RS 485 Spec Cable) is
wired from the 485OPDR isolation board (terminals A, B, and C) on Chiller A to the J11 port
on the unit controller of Chiller B. At J11, the shield connects to GND, the blue/white wire to
the (+) connection, and the white/blue to the (-) connection.
Note that Chiller B does not have an isolation board. The last chiller (B in this case) to be
connected does not need an isolation board.
Three or Four Chillers: If three or more chillers are to be connected, the interconnecting
wiring is still made to Chiller B’s J11 port. The second chiller (Chiller B) must have a
485OPDR isolator board that will be plugged into Chiller B’s UCM pLAN port. Chiller B will
look like Chiller A.
The wiring from Chiller B to Chiller C will be the same as A to B. That is, Belden cable
connects from A, B, and C on B’s 485OPDR board to chiller C’s L11 port. Chiller C has no
485OPDR isolation board.
The procedure is repeated to the fourth chiller if four chillers are interconnected.
5. Verify correct nodes on each OITS Service Screen.