MegaPoints servo controller Revision 24 April 2016
www.loolee.org Page: 8
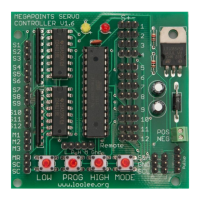
Each of the four setup buttons is connected to the corresponding pin on the connector (left to right).
The right most connector is the common ground.
Use a pair of standard servo extension leads with plugs fitted or make your own to suit your
requirements. Connect each of the left four cables to one connector of a pushbutton and connect
the other pushbutton connector to each other and the common ground. Each pushbutton will mimic
the four setup buttons on the board (LOW, PROG, HIGH, and MODE).
Servo installation
The attraction of R/C style servos is their scale like speed, adjustability, flexible mounting options
and low cost. Servos can be mounted on the top of the board using pushrods or flexible Bowden
tubes, or hidden underneath using piano wire to fit Peco style points. However you choose to mount
your servos it is important you centre the servo before committing it to the layout as you would
using solenoid point motors.
1. To centre a servo connect it to the MegaPoints Servo Controller. When delivered all servos
will centre and the range of movement is set to 0.
2. Without moving or rotating the servo output shaft, locate the output arm to the centre of
the range of motion.
3. When attaching the servo to the points the points should be in the mid position (neither in
the straight or turned position).
4. Once the servo is fitted you can press (and hold) the Low or High buttons to accurately set
the end points or range of motion while in programming mode.
5. Press the PROG button to advance to the next servo. After the 12
th
servo has been selected
the unit will exit programming mode.
The above procedure only needs to be completed once during installation. All end points, speeds
and directions of travel will be remembered by the controller.
Additional advice
Keep the servo output arm short. Points typically do not require a large range of motion. It is
therefore better to have the servo shaft rotate as much as possible by having a shorter output arm.
Use the inner most hole when several are available. This increases the servo resolution and
controllability while maximising the output torque. If the arm is too long, the servo range of motion
will be small and accuracy will be impaired.