| 76
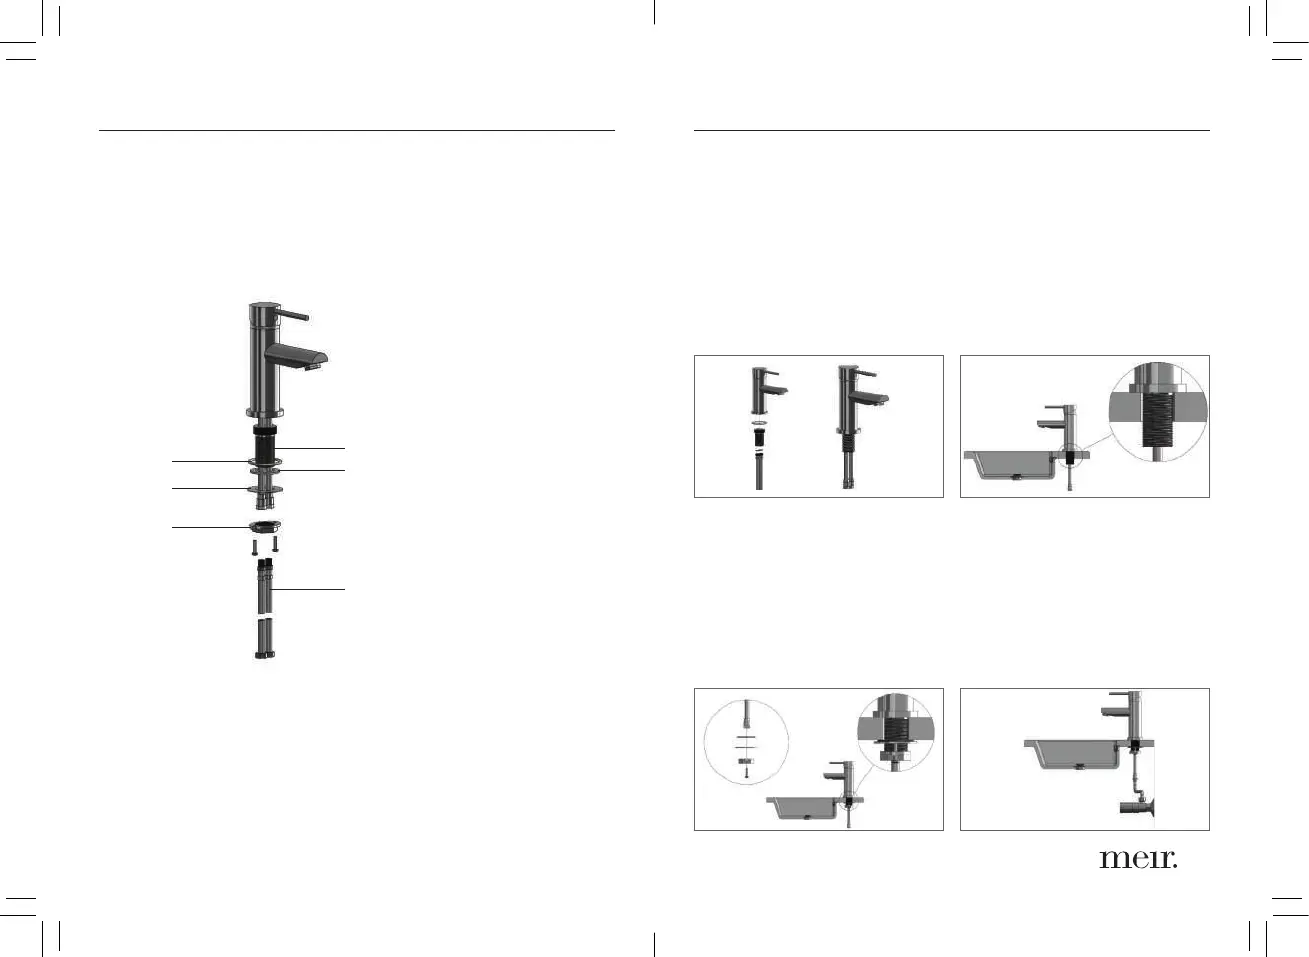
BASIN MIXER INSTALLATION INSTRUCTIONS
4
1
3
5
2
6
1. O-Ring
2. Rubber washer
3. Fixing plate
4. Threaded tube
5. Fixing nut
6. Flexible hoses
1. Install the O-Ring (part 1), flexible
hoses (part 6) and the threaded
tube (part 4) onto the mixer,
ensuring the O-ring is flat, the
hoses are tight, and the threaded
tube is secure.
NOTE:
• Hot is always on the left position.
• Some models use a horse-shoe
connection.
2. Position the mixer over the
center of the hole to be used
for mounting. Ensure the
flexible hoses and threaded
tube are pushed through first.
3. Place the rubber washer (part 2)
over the flexible hoses and push
up until it is firm against the
surface being mounted on, then
push (part 3 + part 5) the fixing
plate and fixing nut over the
flexible hoses and tighten firmly
and tighten screws where
applicable.
4. Connect the flexible hoses to the
isolating stop cocks (check that
as the hoses are being tightened
that they are not loose from the
mixer body). Test for leaks and
correct operation of the mixer.