Refer to www.meir.com.au for tolerances, flow rates and other additional information | 1312
DIVERTER MIXER INSTALLATION INSTRUCTIONS
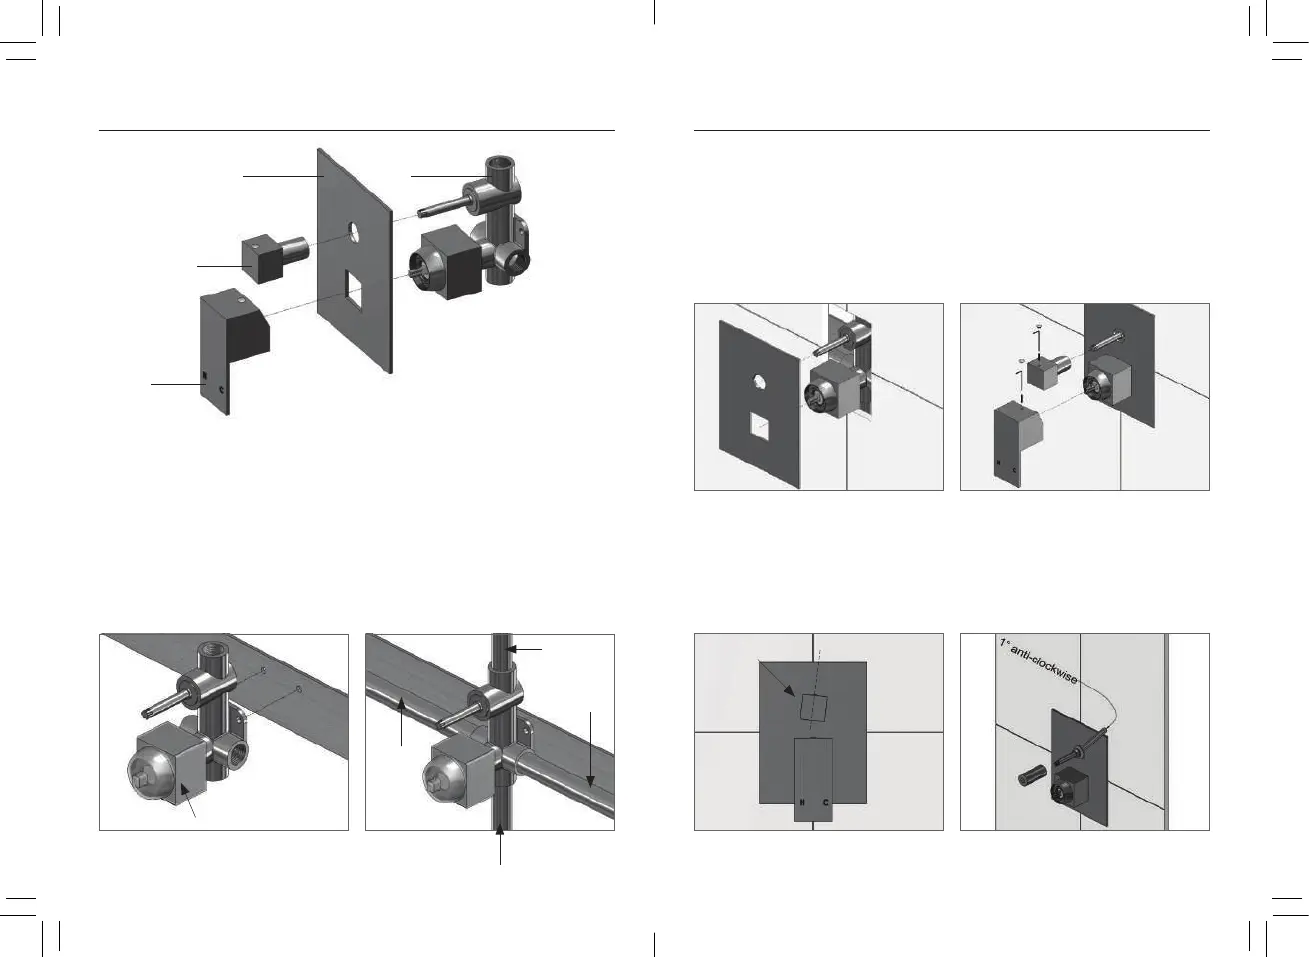
3. Remove the protective covers
and carefully slide the back plate
(part 2) over the mixer/diverter
bodies until it is firm against the
wall (it is recommended to apply
a clear sealant behind the back
plate to ensure water cannot run
behind the plate).
4. Fit the handle (part 3) and
diverter knob (part 4) ensuring
they are secured correctly
(the diverter knob should be
turned all the way to the left
then adjust the knob so it lines
up before tightening).
Diverter Handle Orientation Adjustment:
In the case where the diverter handle is not orientated exactly to the
vertical, as in the picture below, adjust the diverter anti-clockwise
by a small amount as shown in the image. Remove the diverter sleeve,
and using a size 10 spanner, make the adjustment slightly to the left
(anti-clockwise) until the handle points exactly to the vertical.
1. Body
2. Back plate
3. Handle
4. Diverter knob
12
3
4
1. Fix the body of the mixer
to a suitable fixing plate or
noggin. Ensure the mixer is
level and will have enough
of the body exposed to install
the plate (part 3) and diverter
knob (part 3).
IMPORTANT: Ensure the plastic
protector cover remains over
the body during installation.
2. Install the hot (on the left)
and cold (on the right) water
connections and the bottom
and top outlets (typically the top
outlet is to be used for a shower
and the bottom outlet is to be
used for a bath or hand spray).
Once all the fittings have been
tightened, check for leaks and
correct operation of the mixer.
Protective Plastic cover
for during installation.
Outlet to
shower
Hot water
inlet
Cold water
inlet
Outlet to Bath
or Hand-Held
Skew diverter
handle