RIGHT HAND NON-RATCHETING
Page 6A-14 90-855347R1 JANUARY 1999
IMPORTANT: It is recommended that all seals and gaskets be replaced (as a normal
repair procedure) to assure effective repair.
REMOVAL AND DISASSEMBLY
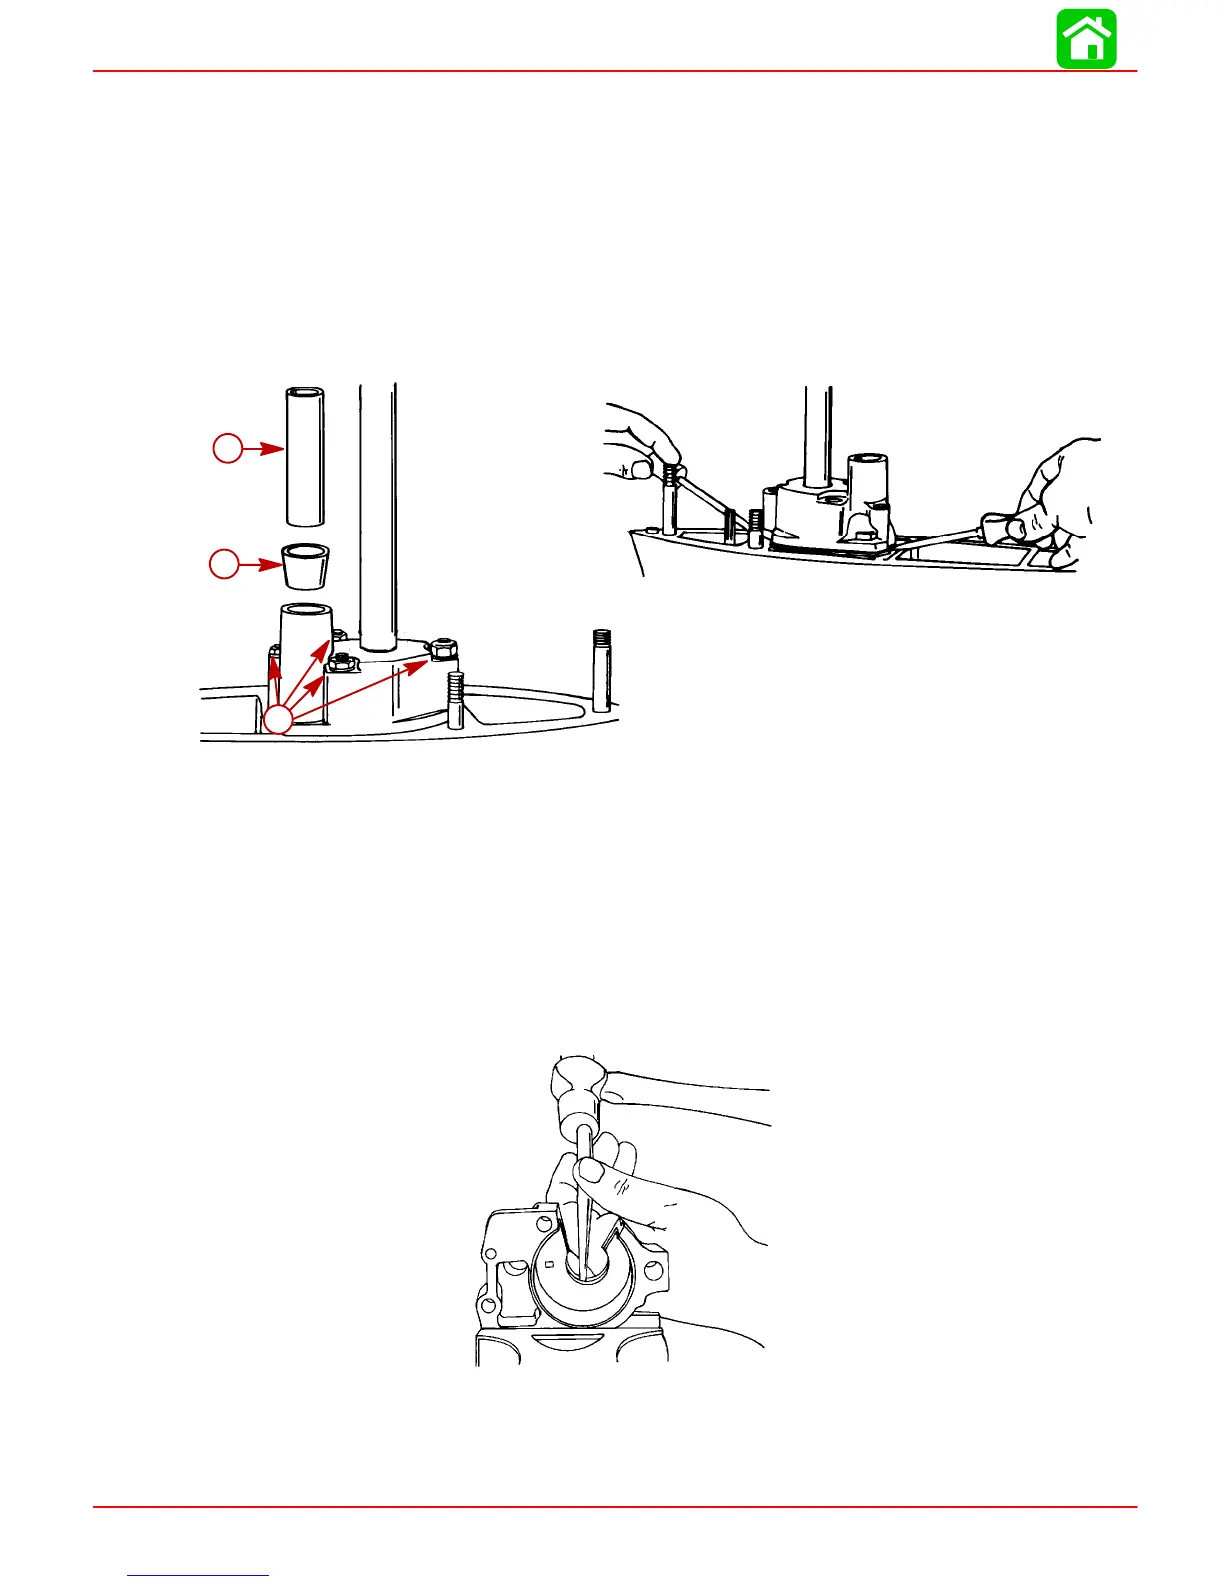
1. Slide rubber centrifugal slinger up and off driveshaft.
2. Remove water tube guide and seal from water pump cover. (Retain guide for reas-
sembly and discard seal.)
3. Remove (and retain) 3 nuts, one bolt and all washers which secure water pump cover
to gear housing.
4. Using 2 pry bars, lift water pump cover up and off driveshaft.
51874
51874
a
b
c
a-Water Tube Guide
b-Water Tube Seal
c-Nuts, Bolt and Washers To Be Removed
5. Inspect water pump cover and insert, as outlined in “Cleaning and Inspection,” pre-
vious.
6. If inspection of water pump insert determines that replacement is required, follow Step
“a” or “b” (immediately following) to remove insert from water pump cover.
NOTE: Try Step “a” first. If insert cannot be removed with Step “a,” use Step “b”.
a. Drive water pump insert out of water pump cover with a punch and hammer.
51874