LEFT HAND NON-RATCHETING
90-855347R1 JANUARY 1999 Page 6B-15
Water Pump
CLEANING AND INSPECTION
1. Clean all water pump parts with solvent and dry with compressed air.
2. Inspect water pump cover and base for cracks and distortion (from overheating).
3. Inspect face plate and water pump insert for grooves and/or rough surfaces.
IMPORTANT: When completing gear housing repairs, that require removal of water
pump impeller, it is recommended that the impeller be replaced. If it is necessary,
however, to re-use impeller, DO NOT install in reverse to original rotation, or prema-
ture impeller failure will occur.
4. Inspect impeller side seal surfaces and ends of impeller blades for cracks, tears and
wear. Replace impeller if any of these conditions are found.
5. Inspect impeller bonding to impeller hub.
6. Inspect impeller for glazed or melted appearance (caused by operation without suffi-
cient water supply). Replace impeller if any of these conditions exist.
IMPORTANT: It is recommended that all seals and gaskets be replaced (as a normal
repair procedure) to assure effective repair.
REMOVAL AND DISASSEMBLY
1. Slide rubber centrifugal slinger up and off driveshaft.
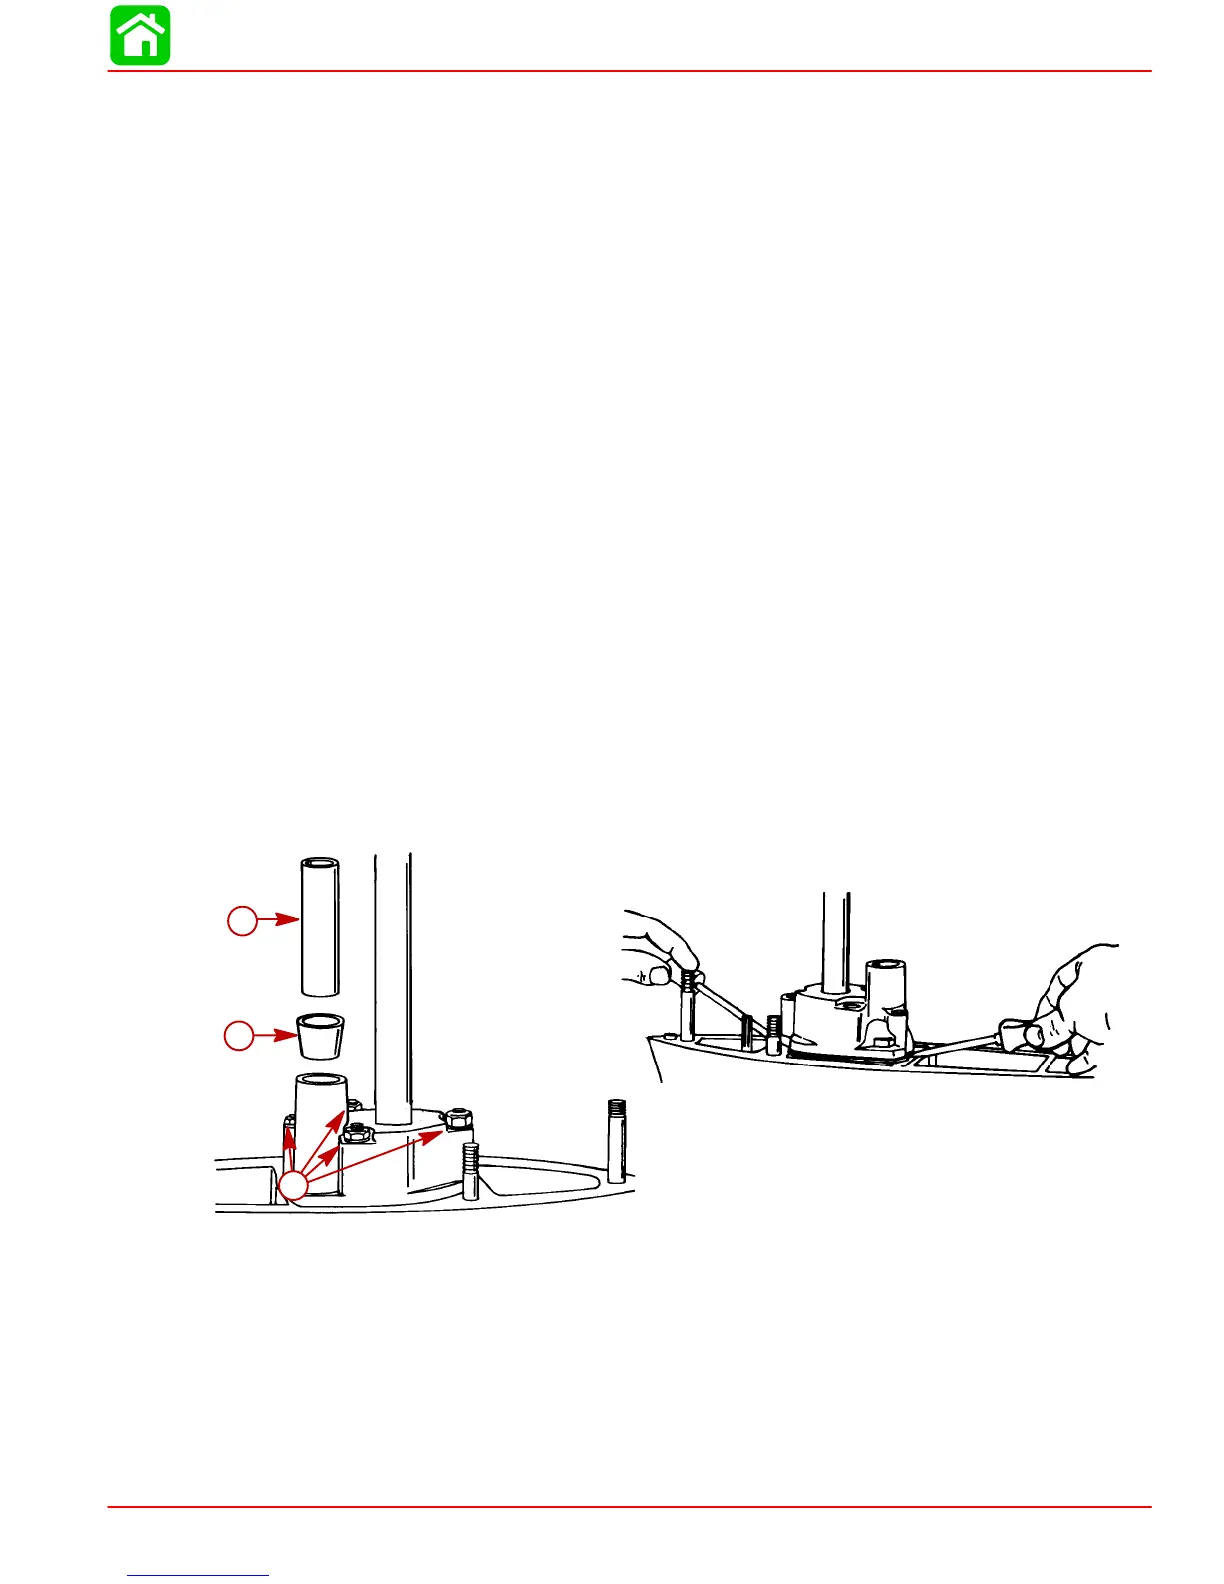
2. Remove water tube guide and seal from water pump cover. (Retain guide for reas-
sembly and discard seal.)
3. Remove (and retain) 3 nuts, one bolt and all washers which secure water pump cover
to gear housing.
4. Using 2 pry bars, lift water pump cover up and off driveshaft.
51874
51874
a
b
c
a-Water Tube Guide
b-Water Tube Seal
c-Nuts, Bolt and Washers to be Removed
5. Inspect water pump cover and insert, as outlined in “Cleaning and Inspection,” pre-
vious.
6. If inspection of water pump insert determines that replacement is required, follow Step
“a” or “b” (immediately following) to remove insert from water pump cover.
 Loading...


