13
WP4C
From the Main screen, press the bottom left button to access this menu. Use the buttons to
select the desired setting to configure: audible notification, calibration, and temperature.
Press the upper left button to toggle adjust the audible notification at the end of a reading.
Three icons represent the three options: no notification (0x), beep momentarily before
stopping (4x), or beep continuously until the sample drawer knob is turned to the OPEN/
LOAD position.
NOTE: The audible notification is not changed by turning the instrument off and on.
Press the upper right button to go to start calibration (Section4.1).
Press the lower right button to set WP4C temperature (Section3.2.4.6)
Press the lower left button to exit back to the Main menu at any time.
3.2.4.6. TEMPERATURE SET SCREEN
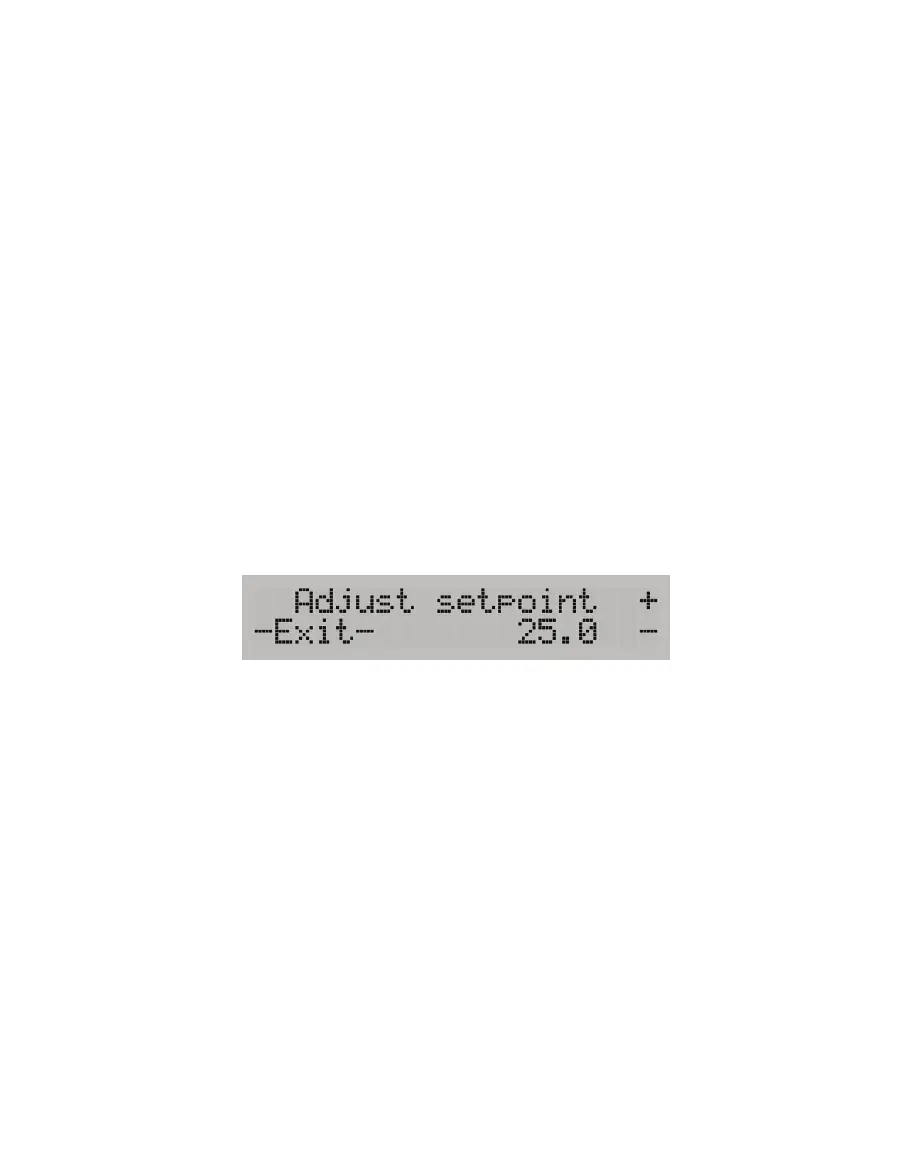
The default temperature of the WP4C sample block temperature is 25 °C. The Temperature
Set screen allows the sample block temperature to be set manually (Figure13). The sample
block temperature roughly corresponds to the temperature needed to read the sample.
To access this screen from the Main menu, press the lower left button, followed by the lower
right button (next to set T) on the System setup screen.
Figure13 Temperature Set screen
The index number can be adjusted between 15 and 40 °C. Use the right buttons next to the +
and − symbols to adjust the sample block temperature value in increments of 0.1 °C.
NOTE: Holding down the button will rapidly increment the value.
The temperature control can be disabled by pressing the − button after reaching 15 °C.
Reenable temperature control by pressing the + button to bringing the sample block
temperature back into its controllable range.
After adjusting the sample block temperature, wait 15 min before taking a measurement to
allow the sample block to reach the new temperature.
3.2.4.7. PERFORMANCE EVALUATION SCREEN
The Performance Evaluation screen needs to be accessed only if one of the components
of the WP4C may be causing a measurement error. Before accessing this screen, ensure
the instrument has been cleaned (Section4.3) and other troubleshooting steps have been