21
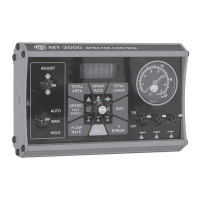
Pre-Field System Checkout
Before actual spraying begins, you must perform a pre-field
check to be sure that you value adjustments, nozzle selection
and desired speed range will allow the MT-3000 to control
the application rate you have selected.
Before beginning the pre-field check, make sure the plumbing
matches that of the system diagram and fill the sprayer tank
with clean water.
NOTE: Never use chemical until the entire system has been
completely checked out and everything is performing
properly.
The Pre-field Checkout requires the use of the DELTA feature.
Temporarily calibrate your DELTA for 2.00 GPA (5.00 LPH).
Refer to system diagram on page 6 for location of valves
mentions in the following procedure.
NOTE: If you have a Trak-Star Ultrasonic Speed Sensor or
Radar, you should disconnect it from the MT-3000 console
before performing pre-field check. While standing still the
Trak-Star or Radar may emit an occasional pulse which will
cancel TEST SPEED.
CAUTION: With positive displacement pumps, adjust the
pressure relief valve first to avoid possible damage from
excessive pressure.
1. Close the RANGE ADJUST VALVE if installed.
2. Close the BOOST ADJUST VALVE if installed.
3. Get pump running at normal operating RPM.
4. With spray booms on (master switch in MANUAL, boom
switches up), adjust AGITATION SHUT-OFF for agitation
desired.
5. Turn to SPEED TEST SPEED.
6. Flip to MANUAL.
7. Flip to HOLD.
8. Enter TEST SPEED by holding the ADJUST switch to “+”
until display starts increasing.
9. Adjust display to match your desired maximum spraying
speed.
EXAMPLE
If you plan to spray at a speed of 10 but you may get up
to 12 going downhill and down to 8 going uphill, use 12
for maximum speed and 8 for your minimum speed.
NOTE: Most nozzles can maintain a good pattern over a
maximum speed range of two to one. (If your maximum
speed is 8 you should not go below 4.
10. Turn boom switches on (up).
11. Flip to MANUAL. Booms should begin spraying. (Remote
Run/Hold must be in RUN or have dust cover with
jumper wire installed.)
12. Hold “+” for about 30 seconds to manually increase
nozzle flow and pressure to maximum.
13. Turn to SPRAY RATE, Display shows what your spray
rate would be if you were traveling at maximum control
speed.
14. Adjust THROTTLE valve until the number displayed
equals or slightly exceeds the maximum spray rate you
wish to apply at your maximum control speed.
IMPORTANT: Make sure your SPRAY RATE, FLOW RATE,
SPEED and PRESSURE all coincide with the Spray Tip
Manufacturer’s Chart.
NOTE: If throttle valve is more than two thirds closed, open
RANGE ADJUST slightly and readjust THROTTLE valve.
15. Flip to HOLD.
16. Turn to SPEED TEST SPEED.
17. Adjust display to match your desired minimum control
speed.
18. Flip to MANUAL.
19. Turn to SPRAY RATE. Display shows what your spray
rate would be if you were traveling at minimum control
speed.
20. Hold “-” for about 30 seconds to manually decrease
nozzle flow and pressure to minimum. The display
should read lower than the spray rate you wish to apply
at your minimum speed.
NOTE: Adjusting any values at this time will alter your
maximum spray rate settings.
CAN’T GET THERE?
If you can not get the flow DOWN to the desired spray rate,
see TROUBLESHOOTING - Plumbing section
21. Flip to HOLD.
22. Turn to SPEED TEST SPEED.
23. Adjust display to match your actual desired control
speed.
24. Turn to SPRAY RATE.
25. Flip to AUTO. The console should take control and lock
onto your Target Application Rate.
26. Now give an ”Up DELTA” (Flip adjust switch to “+”).
Display should momentarily (2 seconds) show the new
Target Application Rate (Original Rate + DELTA) and the
console should quickly lock onto and display that rate.
27. Now give a ”Down DELTA” (Flip adjust switch to “-”).
The console should quickly lock onto and display your
original rate.
28. Now give another ”Down DELTA” (Flip adjust switch to
“-”). The console should quickly lock onto and display
your original rate (Original Rate - DELTA).
If MANUAL works but spray rate is too high in AUTO, the
minimum flow rate is set too high. If spray rate and pressure
fluctuates greatly in AUTO but not in MANUAL, check for
kinked or sagging hoses. If any other problems exist, see
Troubleshooting Section stating on page 24.
Make sure Target Application Rate and Delta are returned to
their correct settings when finished.
NOTE: The TEST SPEED is not saved in memory. Therefore,
should you wish to do the pre-field check at a later date
(when changing rates or tips), you will have to reenter the
TEST SPEED.
At this point the pre-field check is complete. You can cancel
TEST SPEED by simply driving the vehicle or by turning
power off. Do not forget to connect the Trak-Star or Radar
if you unhooked it earlier.