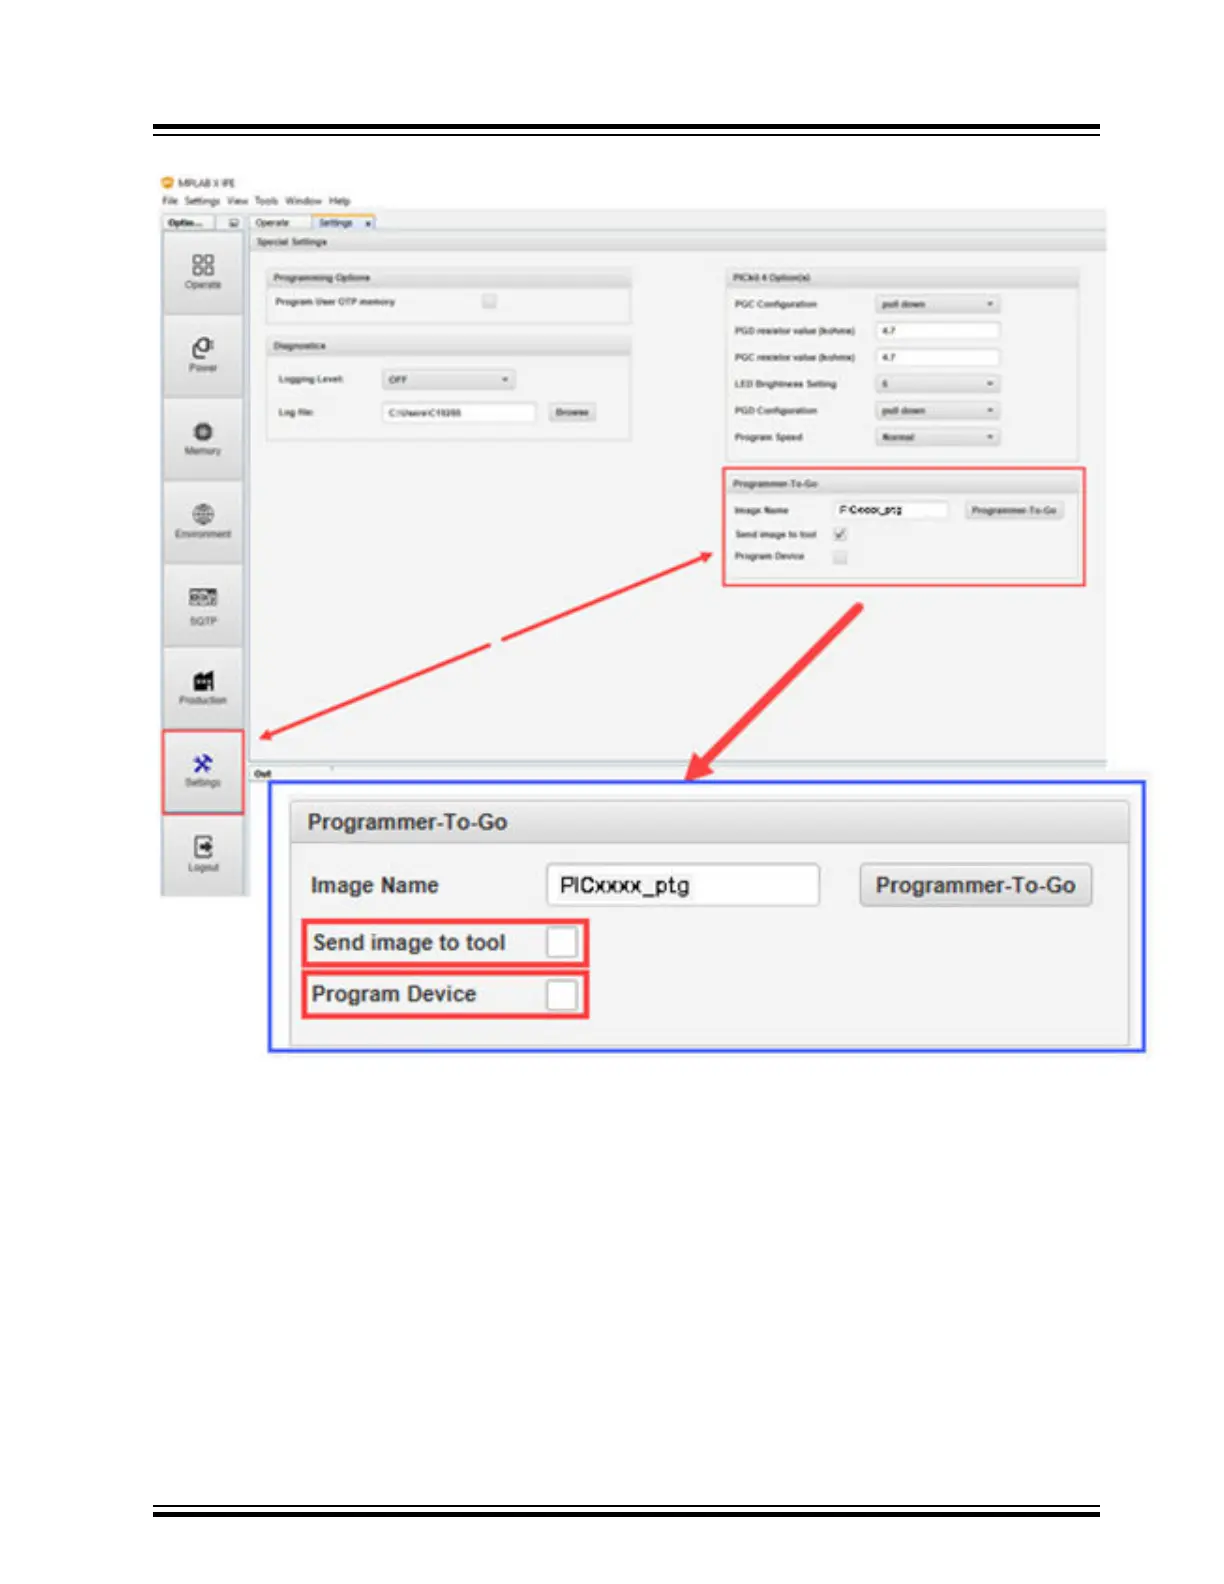
Figure 5-5. MPLAB IPE Programmer-To-Go Options
4. In the Image Name field, the default is “<your project name>_ptg,” though you can edit the name if you wish.
This will be the folder name on the microSDHC card that contains the appropriate files for Programmer-To-Go.
5. In the Send image to tool, the check box is selected by default. With the check box selected, the PTG image is
created and then sent to the microSDHC card in the connected MPLAB PICkit 4.
6. The Program Device the check box is selected by default. With the box checked, the device connected to the
MPLAB PICkit 4 is programmed.
Note: If both the Send image to tool and Program Device check boxes are unchecked, see 5.3.3 Setting Up
PTG Mode Without a Memory Card.
7. Click the Programmer-To-Go button.
During this process, the device is programmed, then the Programmer-To-Go directory is populated with the
appropriate files for the Programmer-To-Go operation into the microSDHC card. The Output window displays a
status message “Programming/Verify complete” when the process finishes successfully.
Note: The PTG settings on the microSDHC card are the same as in the project (for example, memory, power,
etc.).
MPLAB PICkit 4 Programmer-To-Go
© 2020 Microchip Technology Inc.
User Guide
DS50002751D-page 29