purge the air (be careful of the liquid
refrigerant).
3) Place the charging cylinder onto the
electronic scale and record the weight.
4) Turn on the air conditioner in cooling mode.
5) Open the valves (Low side)on the charge set
and charge the system with liquid refrigerant.
6).When the electronic scale displays the
proper weight (refer to the gauge and the
pressure of the low side), disconnect the charge
hose from the 3-way valve’s service port
immediately and turn off the air conditioner
before disconnecting the hose.
7). Mount the valve stem caps and the service
port.
Use torque wrench to tighten the service port
cap to a torque of 18N.m.
Be sure to check for gas leaks.
14.4.5 Re-installation When Indoor Unit
Requires Repairs
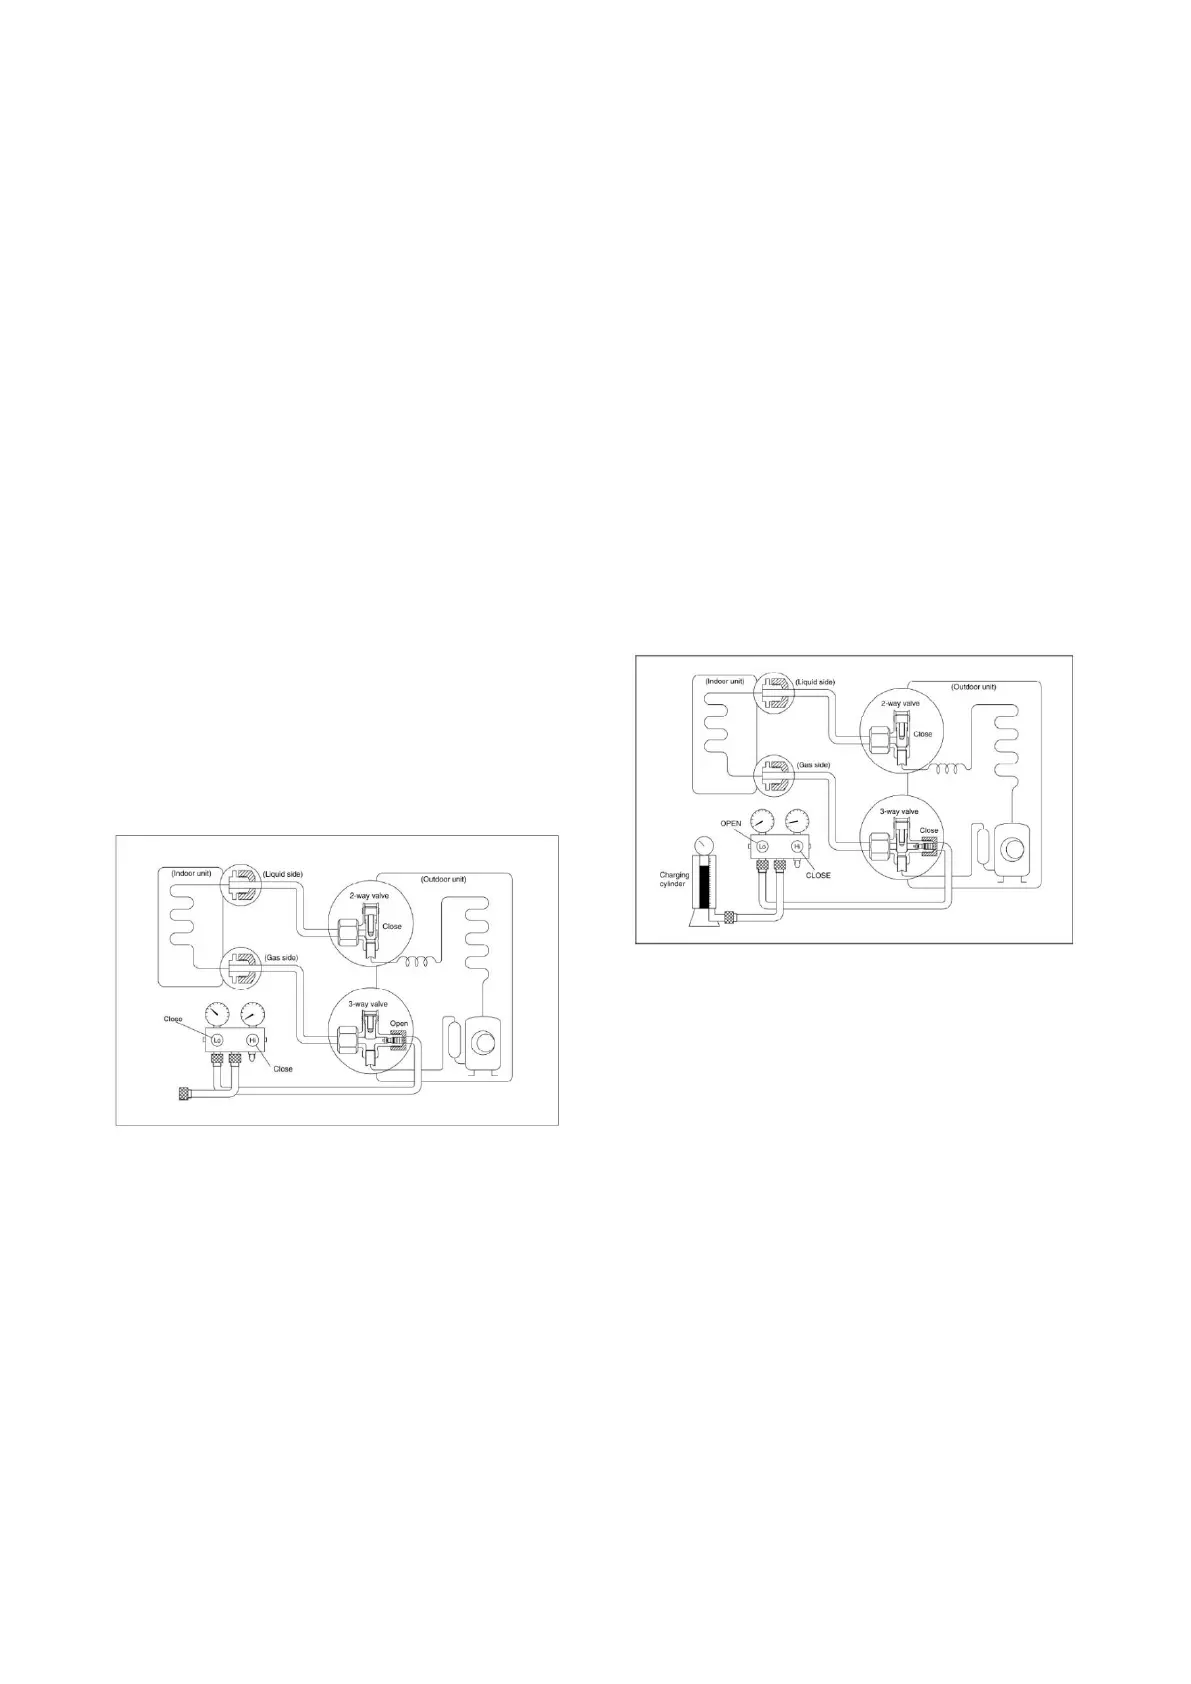
1. Collecting the Refrigerant into the
Outdoor Unit
Procedure
1). Confirm that both the 2-way and 3-way
valves are open.
Remove the valve stem caps and confirm that
the valve stems are open.
Be sure to use a hexagonal wrench to operate
the valve stems.
2). Connect the charge hose with the push pin
of handle lo to the 3-way valves gas service
port.
3). Purge the air from the charge hose.
Open the handle Lo valve of the manifold valve
slightly to purge air from the charge hose for 5
seconds and then close it quickly.
4). Close the 2-way valve.
5). Turn on the air conditioner in cooling mode.
Turn it off when the gauge indicates
-0.1MPa(14.5Psi).
6).Immediately close the 3-way valve
Do this quickly so that the gauge displays a
value between 0.3 to 0.5 Mpa(43.5 to 72.5Psi).
Disconnect the charge set, and tighten the
2-way and 3-way valves’ stem nuts.
Use a torque wrench to tighten the 3-way valves
service port cap to a torque of 18N.m.
Be sure to check for gas leaks.
2. Air Purging by the Refrigerant
Procedure:
1). Confirm that both the 2-way and 3-way
valves are closed.
2). Connect the charge set and a charging
cylinder to the service port of the 3-way valve
Leave the valve on the charging cylinder closed.
3). Purge the air from the charge hose.
Open the valves on the charging cylinder and
the charge set. Purge the air by loosening the
flare nut on the 2-way valve approximately 45’
for 3 seconds and then closing it for 1 minute.
Repeat 3 times.
After purging the air, use a torque wrench to
tighten the flare nut on the 2-way valve.
4). Check for gas leaks
Check the flare connections for gas leakage.
5). Discharge the refrigerant.
Close the valve on the charging cylinder and
discharge the refrigerant by loosening the flare
 Loading...