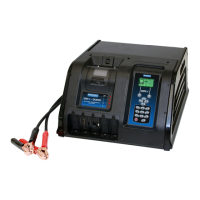
GRX-3000
Midtronics bv. Lage Dijk-Noord 6 IJsselstein NL
www.midtronics.com
23
Chapter 8: Printing / View Menu
The Print/View Menu enables you to view and print the re-
sults of the charge cycles before you perform another cycle
and overwrite the results in memory.
View test
VIEW TEST gives you the option of viewing and printing the
last results. To print the results, select the PRINT soft key.
To return to the MAIN Menu, press the END key.
Totals
This gives you the option of viewing the statistical data
collected for all the charge cycles in various ways or to reset
the counters.
Use the UP () or DOWN () ARROW key
to select one of
the options.
Totals by decision
The TOTALS BY DECISION shows the total number of
completed tests by battery decision since the last time the
totals were reset to 0.
Press EXIT to return to the TOTALS menu.
Clear counters
This allows you to reset the counters completely.
Press the YES soft key to clear the counters or the NO soft
key to cancel.
Version Info
The VERSION utility displays the current software version,
the software release date and the serial number of the
charger.
The above is an example of the screen
Problems with the Internal Printer
The internal printer will not print
• MakesuretheBatteryDiagnosticStationisconnected
to AC power and the POWER switch is pressed to the
ON position.
• Verifythatthepaperisproperlyinstalled.
Changing the Paper in the Internal Printer
The internal printer is shipped with a roll of thermal printing
paper installed in the paper compartment. The roll size is
2¼inches wide by 1
7
/
8
inch in diameter. Replacement rolls
are available at most oce supply stores.
The Battery Diagnostic Station uses only thermal
printing paper.
To replace the paper roll:
1. Unlock the printer door by gently lifting the latch on the
printer.
2. Lift the printer door and remove the spent roll.
3. Place a new roll of paper in the compartment. The pa-
per feeds from the bottom of the roll.
4. Pull the paper forward so that it extends past the ser-
rated edge of the paper slot.
5. Close the door and make sure the lever locks securely.
For a clean tear, pull the paper along the serrated edge.
Do not pull the paper straight out of the printer.
Chapter 8: Printing / View Menu

 Loading...