15
Chapter 3: Stack/Pack Discharge
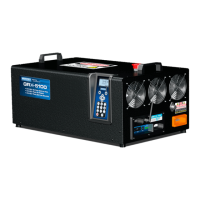
GRX-5100 HEV Battery Service Tool
Use this function to discharge a battery stack or bat-
tery pack down to a pre-determined voltage.
NOTE: The Stack/Pack Discharge procedure is the
same whether discharging a battery stack or an entire
battery pack. However the connection points to the
battery are dierent for each procedure. Consult the
appropriate Toyota/Lexus/Scion documentation for
the correct connections.
Hazardous voltage.
An improper connection can result in
serious injury or death.
To avoid electrical shock or burn, never alter
the GRX-5100’s original AC cord and plug. Dis-
connect plug from outlet when GRX-5100 is
idle.
IMPORTANT:
Make sure to properly prepare the bat-
tery pack by following all required Toyota/Lexus/
Scion guidelines. Refer to your Toyota/Lexus/Scion
documentation for complete information.
When using the ARROW keys to select option buttons, press
NEXT to continue to the next step. When using the keypad,
no additional keypress is needed. Use
BACK to return to the
Main Menu at the start of the test and or the previous screen
during the test.
NOTE: Depending on the condition of the battery
pack or section, this process may take several hours
to complete.
Before de-powering a battery pack or stack, make sure all of
the external components connected to the GRX-5100 are in
good working order.
1. At the Main Menu, select the Stack Balance icon.
2. Select the vehicle MAKE.
1 TOYOTA
3. Select the vehicle MODEL.
1 PRIUS PHV
2 PRIUS
4. Select the vehicle MODEL YEAR.
1 2012–2015
2 2016–CURRENT (Prius Only)
5. Use the keypad to enter the last 6 digits of the VIN (if avail-
able). Press SKIP to move past this step.
PLEASE ENTER THE
LAST 6 DIGITS OF
VIN IF AVAILABLE
6. Select the high voltage fault status.
1 YES
2 NO
NOTE: Selecting YES will automatically limit all
discharge currents to 1.5 A.
7. Select the DISCHARGE MODE.
1 FOR SHIPMENT
2 FULL DISCHARGE
8. Select the discharge TARGET.
1 PACK
2 STACK #1
3 STACK #2
4 STACK #3 (Prius PHV Only)
5 STACK #4 (Prius PHV Only)
9. Conrm that you are wearing the appropriate personal
protective equipment for high voltage service.
10. Conrm the appropriate repair procedures for this vehicle.
11. Conrm that the High Voltage Service Plug has been re-
moved.
12. Connect the green HV Bonding Cable to a suitable mount-
ing bracket.
13. Connect the Cell Voltage Interface cables from the BCU-64
to the Battery Pack.
14. Connect the Temperature Sensor Interface cables from
the BCU-64 to the Battery Pack.
Chapter 3: Stack/Pack Discharge

 Loading...