• 12 •
Data Entry Methods
To perform a particular test or function, the EXP will ask for different types of information. This means
that the methods you use to enter information will change depending on the type of information re-
quested. The four types of entry methods are described below.
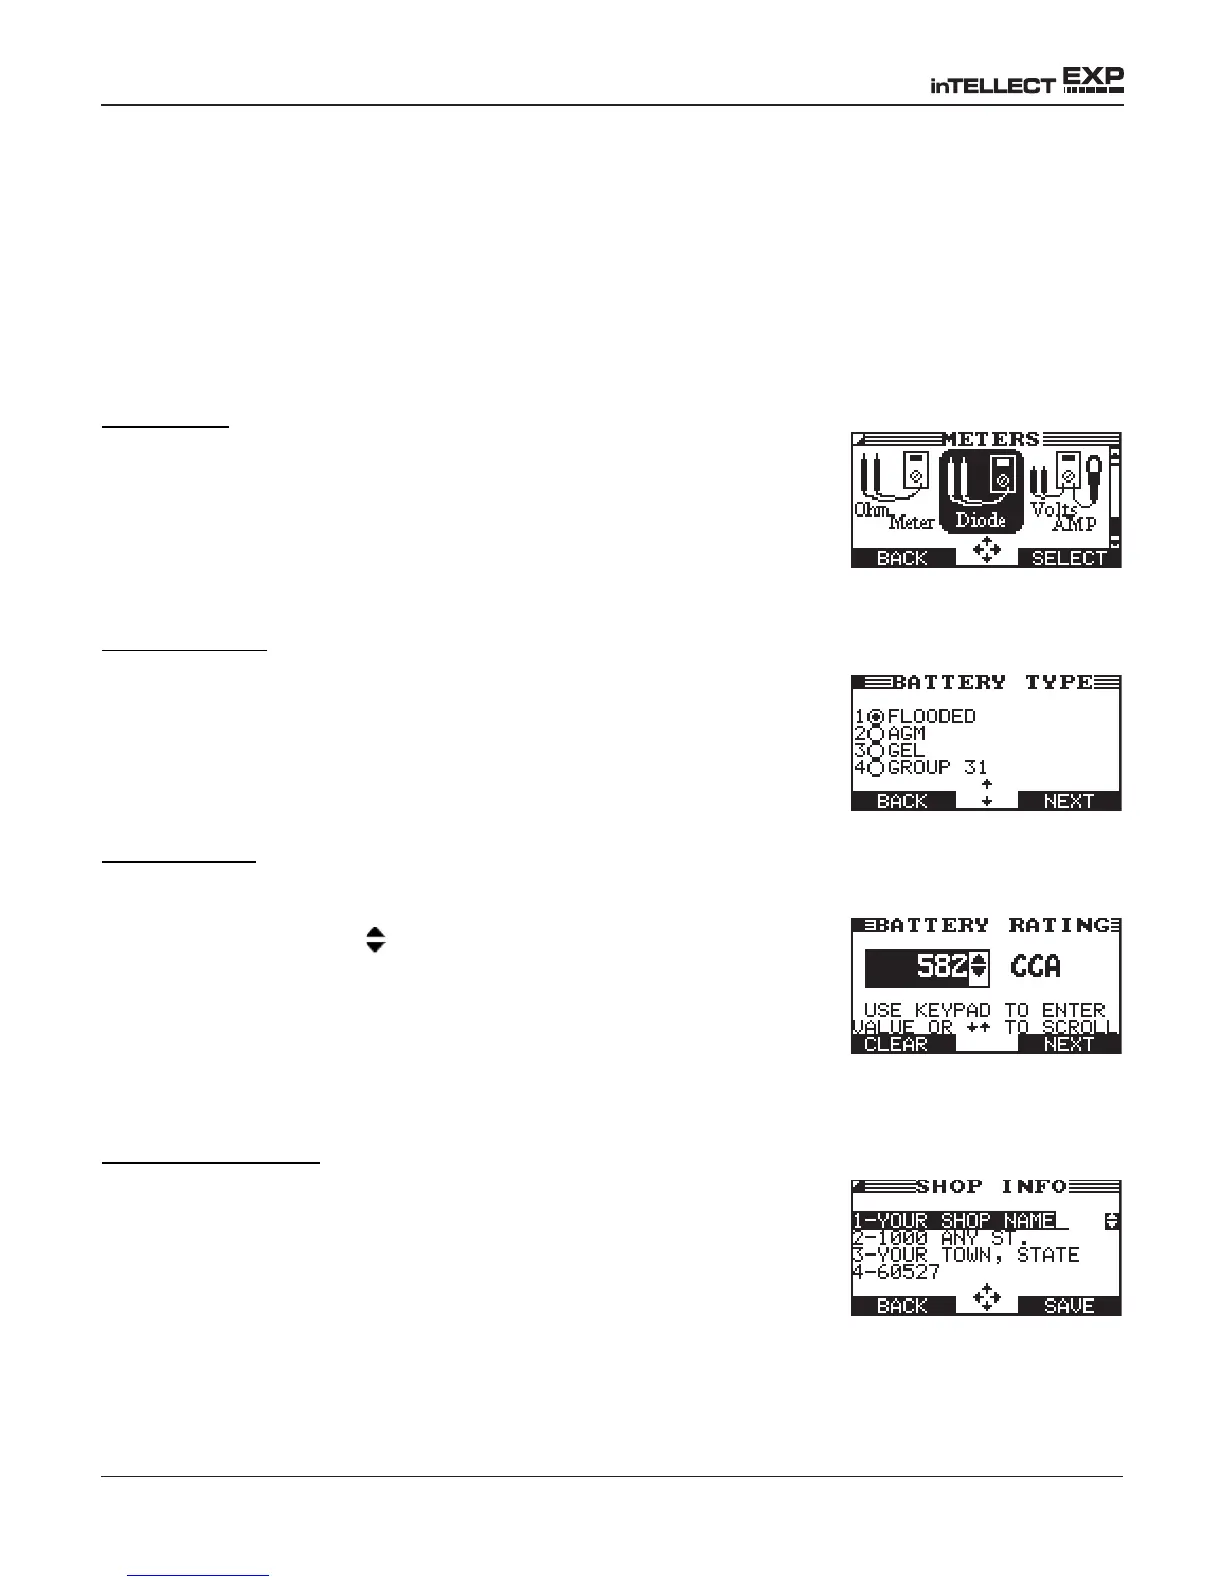
Typically, the soft key below the right half of the screen conrms your choice, although the word above
it may vary. In Figure 7, for example, the word is SELECT; in Figures 8 and 9, NEXT; and in Figure 10,
SAVE. In a similar fashion, the soft key below the left half of the screen cancels your choice or returns
you to the previous screen, although the word above it may also vary.
Menu icons
A menu icon is a graphical representation of a function you can select,
such as the Diode Icon in the DMM Menu. To select an icon, use the
LEFT or RIGHT ARROW key to highlight it. Highlighting changes the
icon to a white picture on a black background as shown in Figure 7. To
conrm your selection, press the appropriate soft key.
Option Buttons
Some lists have option buttons before each item. To select an item, use
the UP/DOWN ARROW keys to move the dot into the button next to the
item you want. You can also use the alphanumeric keypad to enter the
number preceding the option button. To conrm your selection, press
the appropriate soft key.
Scrolling Lists
Scrolling lists contain items that extend above and below the screen
or the selection box that contains them. To indicate that there are
more items, the symbols
appear to the right of the rst visible or
highlighted item on the list.
To select from this type of list, use the UP/DOWN ARROW keys to
scroll to the item, or use the keypad to enter your choice, and press
the appropriate soft key.
Alphanumeric Entry
Some selections require you to use the alphanumeric keypad. These
“user-dened” selections have a blinking horizontal line (cursor) to the
right of the last character (Figure 10).
Use the UP/DOWN ARROW keys to highlight a line for editing. Display
the character, symbol, or number you want by rapidly pressing its key
as many times as needed. If you pause, the cursor moves to the right.
To backspace, press the LEFT ARROW key. Use the RIGHT ARROW
key to add a space. Use the UP/DOWN ARROW keys to highlight a
line for editing. When nished, press the appropriate soft key to save
your settings.
Figure 7: Highlighted Icon
Figure 9: Scrolling List
Figure 8: Option Buttons
Figure 10:
Alphanumeric Entry
Chapter 2: Description