OM-252 052 Page 9
SECTION 5 − REPLACING THE LENS COVERS
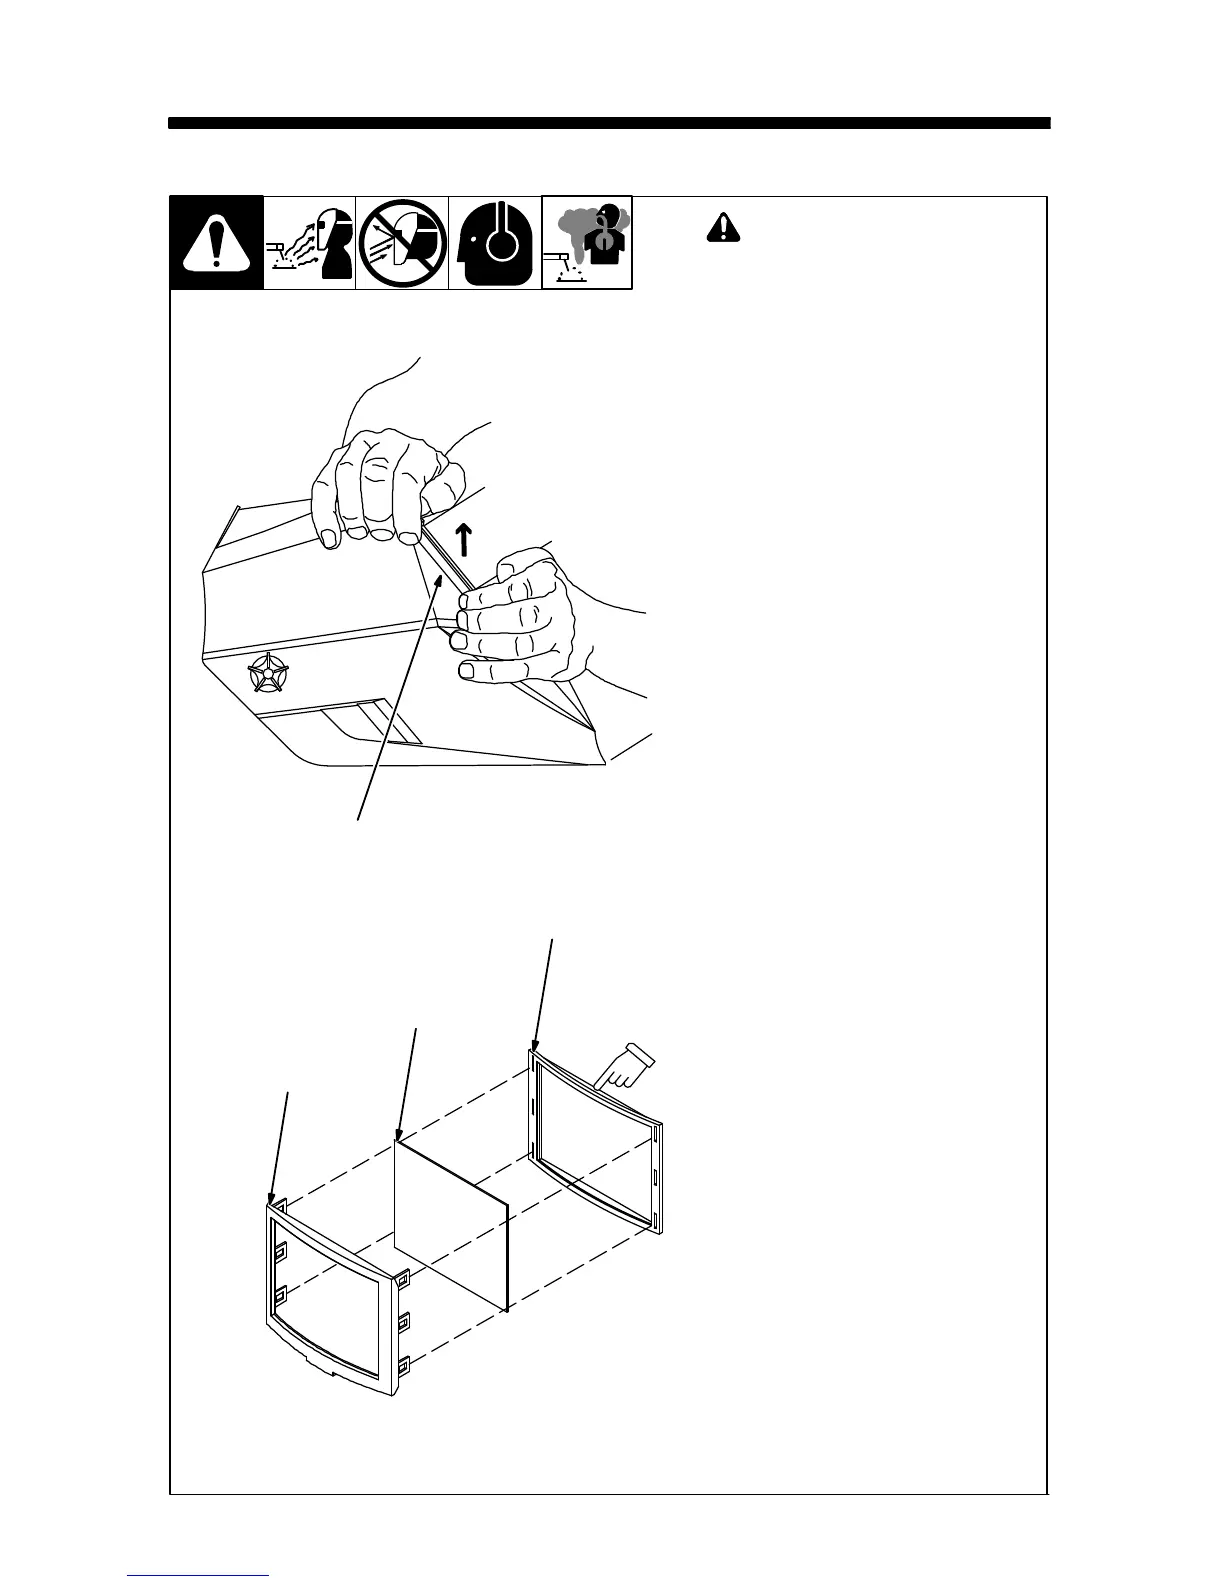
5-1. Replacing Outside Lens Cover
! Never use the auto-darkening
lens without the inside and
outside lens covers properly
installed. Welding spatter will
damage the auto-darkening
lens and void the warranty.
1 Outside Lens Cover Frame
2 Lens Cover
3 Gasket
Remove lens cover frame by grasp-
ing the outside corners and pulling
the frame away from the helmet.
Remove lens cover and gasket from
the six-prong lens frame. Replace
lens cover and reinstall gasket and
lens in frame. Reinstall frame in hel-
met.
Be sure the flat side of lens gas-
ket faces the six-prong lens
frame.
Be sure all six prongs of lens
frame are securely fastened in
slots in helmet.
1
804 794
1
2
3
Be sure flat side of gasket
faces lens frame.

 Loading...