OM-252 052 Page 4
SECTION 3 − OPERATING INSTRUCTIONS
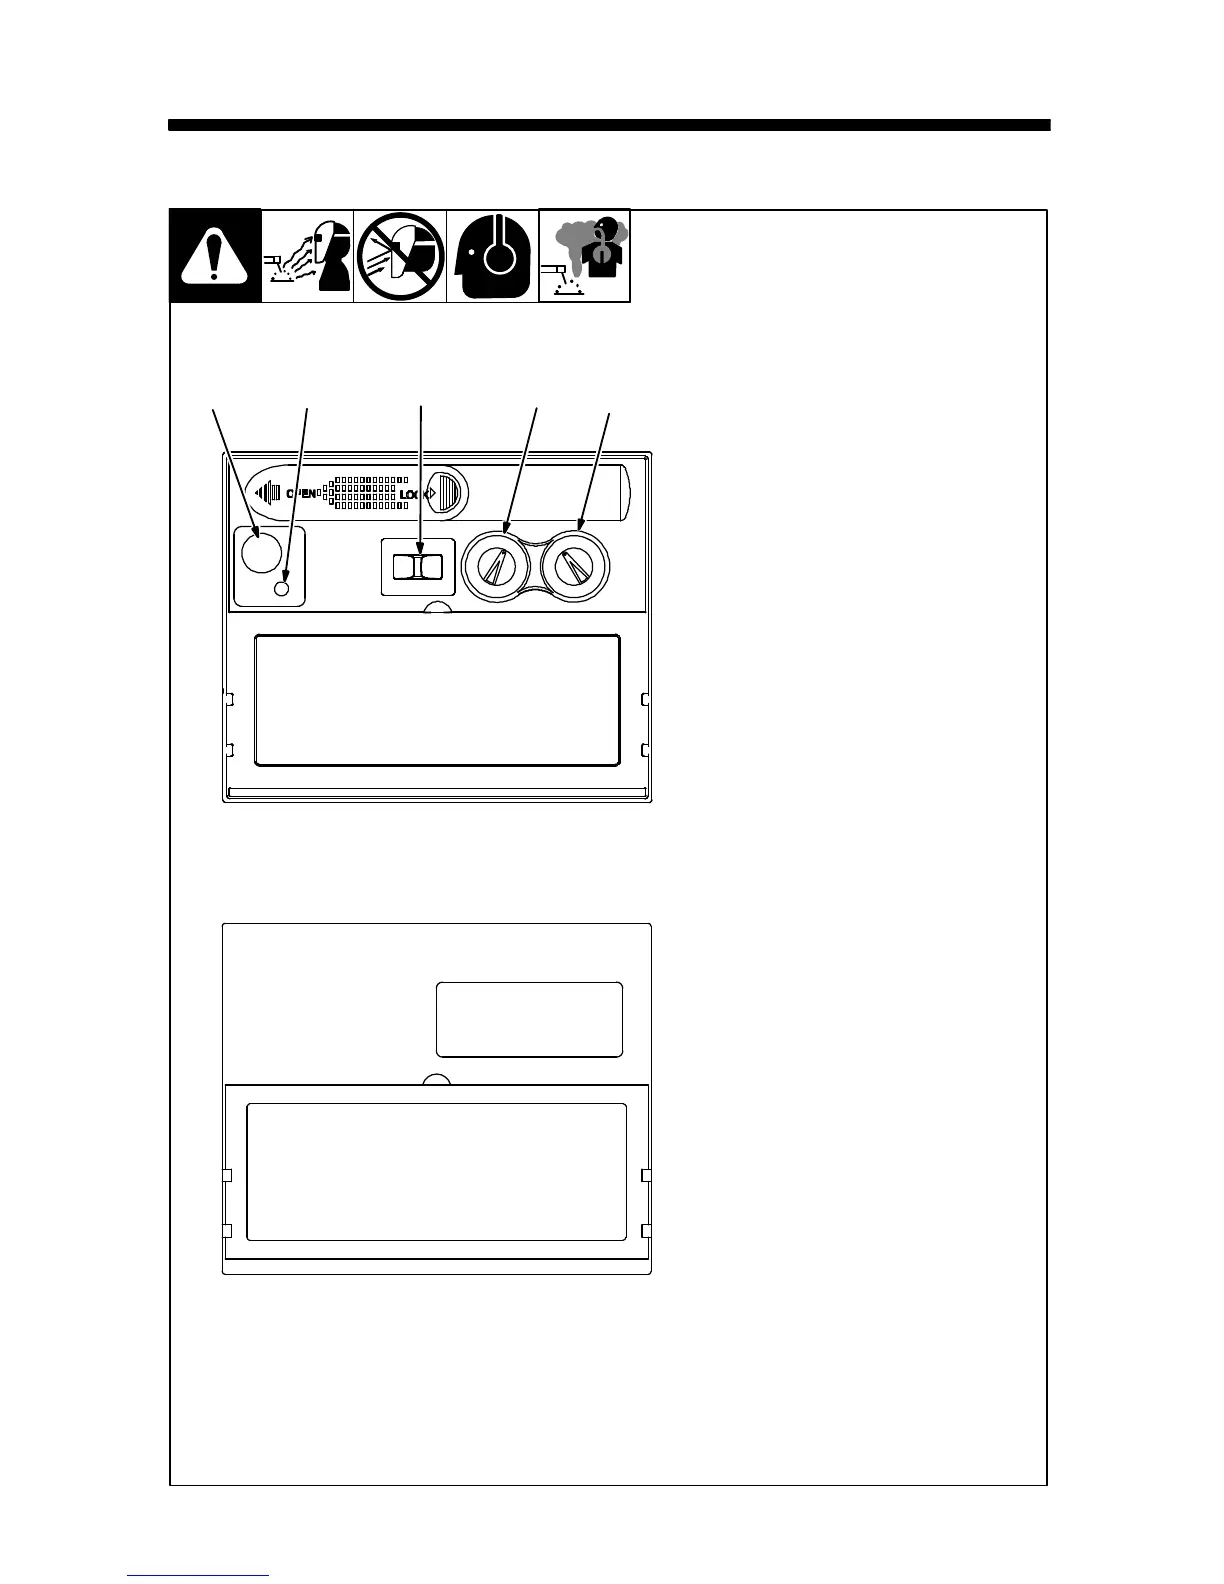
3-1. Helmet Controls
Two different lens assemblies are
shown. Refer to the illustration
that matches the lens on your
helmet.
Variable Shade Model
1 Reset Button
(See Section 3-2)
2 Low Battery Indicator
(See Section 3-2)
3 Lens Delay Control (See
Section 3-3)
4 Variable Shade Control
(No. 8 − 12) (See Section 3-4)
5 Sensitivity Control
(See Section 3-5)
Fixed Shade No. 10 Model
The fixed shade model has no buttons
or controls. The lens turns on (dark-
ens) automatically when welding be-
gins and turns off when welding stops.
Always make sure the lens is fully
charged before welding. Place
helmet in direct sunlight for 20
minutes to charge the lens as-
sembly solar cell.
1 23 45
804 792
Variable Shade Lens Assembly
Fixed Shade No. 10 Lens Assembly

 Loading...