EasyManua.ls Logo

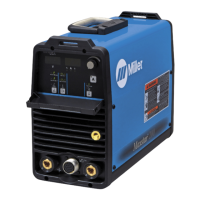
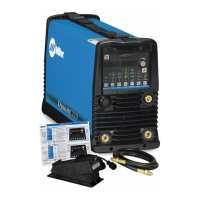
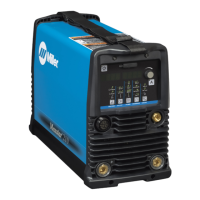
Miller DYNASTY 200 DX User Manual

Miller DYNASTY 200 DX
92 pages
To Next Page IconTo Next Page
Page #1 background imageLoading...
Page #1 background image
Visit our website at
www.MillerWelds.com
Processes
Description
TIG (GTAW) Welding
Stick (SMAW) Welding
OM-2240 207688K
March 2005
115/230/400/460 Volt Models W/AutolineR
Arc Welding Power Source
Dynasty 200 SD And DX
R
And Non-CE Models

Table of Contents

Questions and Answers:

Miller DYNASTY 200 DX Specifications

General IconGeneral
Welding Amperage Range1-200 A
Output Current Range1-200 A
Pulse Frequency0.5 - 500 Hz
AC Frequency20-250 Hz
ProcessesTIG (GTAW), Stick (SMAW)
Output Power200 A at 26 V, 40% duty cycle
Input Power120 V, 208 V, 220/230/240 V, 460 V, 575 V, 1- or 3-Phase

Summary

Safety Precautions

1-1. Symbol Usage

Explains the meaning of safety symbols used throughout the manual.

1-2. Arc Welding Hazards

Identifies potential hazards associated with arc welding processes.

ARC RAYS can burn eyes and skin.

Details hazards from welding arc rays and protective measures.

BUILDUP OF GAS can injure or kill.

Warns about hazards from shielding gas buildup and precautions.

HOT PARTS can cause severe burns.

Alerts to the danger of touching hot components after operation.

NOISE can damage hearing.

Notes the risk of hearing damage from operational noise and suggests protection.

CYLINDERS can explode if damaged.

Warns about the hazards of compressed gas cylinders and their safe handling.

1-3. Additional Symbols For Installation, Operation, And Maintenance

Explains additional symbols related to safe installation, operation, and maintenance.

1-4. California Proposition 65 Warnings

Lists warnings required by California law regarding hazardous substances.

1-5. Principal Safety Standards

Lists key safety standards and organizations relevant to welding equipment.

1-6. EMF Information

Discusses electromagnetic fields and precautions for pacemaker wearers.

Definitions (CE Models)

3-1. Warning Label Definitions

Explains the meaning and context of various warning labels on the equipment.

3-2. Manufacturer's Rating Label

Details the information provided on the equipment's rating label.

3-3. Symbols And Definitions

Provides a comprehensive list and explanation of symbols used in the manual and on the equipment.

Installation

4-1. Specifications

Lists technical specifications of the welding unit, including input power and output ratings.

4-2. DC Volt-Ampere Curves

Illustrates DC output voltage and amperage capabilities across different input voltages.

4-3. AC Volt-Ampere Curves

Illustrates AC output voltage and amperage capabilities across different input voltages.

4-4. Duty Cycle And Overheating

Explains duty cycle limits and the unit's response to overheating.

4-5. Selecting A Location

Provides guidelines for choosing a suitable installation location for the equipment.

4-6. Weld Output Terminals And Selecting Cable Sizes

Guides on connecting output terminals and selecting appropriate weld cable sizes.

4-7. Remote 14 Receptacle Information

Details the function and pinout of the remote 14 receptacle.

4-8. Gas Connections

Explains how to connect shielding gas supply to the unit.

4-9. TIG HF Impulse/ Lift-Arc™ Connections

Guides on connecting TIG torch and remote control for HF/Lift-Arc functions.

4-10. Stick Connections

Details how to connect electrode holder and work clamp for Stick welding.

4-11. Electrical Service Guide

Provides recommendations for input voltage, fuses, and conductor sizing.

4-12. Connecting Three-Phase Input Power

Step-by-step instructions for connecting three-phase input power safely.

4-13. Connecting Single-Phase Input Power

Step-by-step instructions for connecting single-phase input power safely.

Operation

5-1. Controls

Provides an overview of the front panel controls and their functions.

5-2. Encoder Control

Explains how to use the encoder control for setting parameters.

5-3. Amperage Control

Details how to set and adjust welding amperage using the controls.

5-4. Ammeter And Parameter Display

Describes the function of the ammeter and parameter display.

5-5. Voltmeter

Explains how the voltmeter displays output or open circuit voltage.

5-6. Polarity Control (Dynasty™ Models Only)

Details how to select DCEN, DCEP, or AC polarity for welding.

5-7. Process Control

Explains how to select welding processes like TIG HF Impulse, TIG Lift-Arc, and Stick.

5-8. Output Control

Details how to control output using remote standard, 2T hold, or ON settings.

5-9. Pulser Control (DX And LX Models)

Explains how to use the pulser function for advanced TIG welding.

5-10. Sequencer Controls (DX, LX And All CE Models)

Guides on using sequencer controls for automated welding parameters.

5-11. Adjust Controls (Preflow/Post Flow/DIG/Purge)

Details how to adjust preflow, postflow, DIG, and purge functions.

5-12. AC Waveshape (Dynasty Models Only)

Explains how to adjust AC waveshape parameters like balance and frequency.

5-13. Spot Time Control (Reconfigured RMT 2T HOLD Output Selection)

Guides on setting spot time parameters for tacking and thin sheet joining.

5-14. Memory (Program Storage Locations 1-4) (DX And LX Models If Available)

Explains how to store and recall welding programs in memory locations.

5-16. Factory Parameter Defaults And Range And Resolution

Lists default parameter settings and their available ranges and resolutions.

5-17. Resetting Unit To Factory Default Settings

Provides steps to reset all welding power source functions to factory defaults.

Advanced Functions

6-1. Programable TIG Start Parameters

Guides on accessing and setting programmable TIG start parameters.

B. Changing Programmable TIG Start Polarity (Dynasty Models Only)

Explains how to adjust TIG start polarity for Dynasty models.

C. Changing Programmable TIG Start Amperage (All Models)

Details how to adjust TIG start amperage for all models.

D. Changing Programmable Start Time (All Models)

Guides on adjusting the programmable start time for TIG welding.

6-2. Output Control And Trigger Functions

Covers output control and various torch trigger operations.

A. Remote (Standard) Torch Trigger Operation

Explains the standard torch trigger operation for remote control.

B. Remote 2T Torch Trigger Operation

Details the 2T torch trigger operation for remote control.

C. Reconfiguring RMT 2T HOLD For 2T, 3T, Spot, 4T, 4T Momentary, Or Mini Logic Control

Guides on reconfiguring RMT 2T HOLD for various trigger control modes.

D. 4T Specific Trigger Method (DX, LX And All CE Models)

Explains the 4T trigger method for specific models.

E. Mini Logic Operation (DX, LX And All CE Models)

Details the Mini Logic operation for specific models.

F. 4T Momentary Operation (DX, LX And All CE Models)

Explains the 4T Momentary operation for specific models.

G. Spot Control Operation

Guides on using the Spot Control operation for timed welds.

H. On Trigger Operation

Explains the ON trigger operation for Stick and Lift modes.

I. 3T Specific Trigger Method (DX, LX And All CE Models)

Details the 3T trigger method for specific models.

6-3. Arc Timer/Counter Display

Explains how to display and interpret arc time and cycle counts.

6-4. Lockout Functions

Covers accessing and managing lockout features.

A. Accessing Lockout Capability

Guides on how to access and enable the lockout feature.

B. LockOut Levels

Explains the different lockout levels and their effects on parameter adjustment.

B. Lock Out Levels (Continued)

Continues explanation of lockout levels, covering Level 3 and Level 4.

6-5. Setting Unit To Display PPP While Pulse Welding (DX And LX Models Only)

Explains how to set the unit to display PPP during pulse welding.

6-6. Stick Open-Circuit Voltage (OCV) Selection (All Models)

Details how to select the open-circuit voltage for Stick welding.

Maintenance and Troubleshooting

7-1. Routine Maintenance

Outlines routine maintenance tasks and recommended intervals.

7-2. Blowing Out Inside Of Unit

Provides instructions for cleaning the internal components of the unit.

7-3. Voltmeter/Ammeter Help Displays

Explains the meaning of various help codes displayed on the voltmeter/ammeter.

7-4. Troubleshooting

Lists common troubleshooting issues and their remedies.

Electrical Diagrams

High Frequency (HF)

9-1. Welding Processes Requiring High Frequency

Identifies welding processes that utilize high frequency.

9-2. Correct Installation

Provides guidelines for the correct installation of HF components and grounding.

Selecting and Preparing Tungsten Electrode

10-1. Selecting Tungsten Electrode

Offers guidance on selecting the appropriate tungsten electrode based on welding parameters.

10-2. Safety Information About Tungsten

Details safety precautions related to grinding and handling tungsten electrodes.

10-3. Preparing Tungsten For AC Or DC Electrode Negative (DCEN) Welding

Explains the correct preparation methods for tungsten electrodes for AC/DC welding.

Guidelines for TIG Welding (GTAW)

11-1. Typical GTAW Set-Ups

Provides typical setup configurations for AC and DC TIG welding.

11-2. Positioning The Torch

Explains proper torch positioning techniques for effective TIG welding.

11-3. Lift-Arc™ And HF TIG Start Procedures

Details the procedures for starting arcs using Lift-Arc and HF methods.

11-4. Torch Movement During Welding

Illustrates proper torch movement techniques for forming weld beads.

11-5. Positioning Torch Tungsten For Various Weld Joints

Shows optimal tungsten positioning for different weld joint types.

Stick Welding (SMAW) Guidelines

12-1. Front Panel Display For Stick DCEP (Direct Current Electrode Positive)

Shows the correct front panel display for Stick DCEP welding.

12-2. Electrode and Amperage Selection Chart

Provides a chart for selecting electrodes and corresponding amperage settings.

12-3. Stick Welding Procedure

Outlines the general procedure for performing stick welding.

12-4. Striking an Arc - Scratch Start Technique

Explains the scratch start technique for initiating a stick welding arc.

12-5. Striking an Arc - Tapping Technique

Details the tapping technique for initiating a stick welding arc.

12-6. Positioning Electrode Holder

Illustrates proper electrode holder positioning for groove and fillet welds.

12-7. Poor Weld Bead Characteristics

Identifies common defects found in poor quality weld beads.

12-8. Good Weld Bead Characteristics

Describes the characteristics of good quality weld beads.

12-9. Conditions That Affect Weld Bead Shape

Lists factors influencing weld bead shape, such as electrode angle and arc length.

12-10. Electrode Movement During Welding

Explains electrode movement techniques like stringer and weave beads.

12-11. Butt Joints

Describes different types of butt joints and their preparation.

12-12. Lap Joint

Details the procedure for creating lap joints using fillet welds.

12-13. Tee Joint

Explains how to perform tee joint welds, including multi-layer deposits.

12-14. Weld Test

Describes a test to check the integrity of a weld.

12-15. Troubleshooting – Porosity

Identifies causes and corrective actions for porosity in welds.

12-16. Troubleshooting – Excessive Spatter

Lists causes and remedies for excessive spatter during welding.

12-17. Troubleshooting – Incomplete Fusion

Addresses issues of incomplete fusion and provides corrective actions.

12-18. Troubleshooting – Lack Of Penetration

Explains causes and solutions for lack of penetration in welds.

12-19. Troubleshooting – Excessive Penetration

Covers issues related to excessive penetration and how to correct them.

12-20. Troubleshooting – Burn-Through

Details causes and corrective actions for burn-through during welding.

12-21. Troubleshooting – Waviness Of Bead

Explains how to correct waviness in weld beads.

12-22. Troubleshooting – Distortion

Addresses weld distortion and methods to prevent or correct it.

Parts List

Figure 13-1. Main Assembly

Provides an exploded view of the main assembly with numbered parts.

Figure 13-2. Panel, Front w/Components

Lists components for the front panel assembly.

Figure 13-3. Panel, Rear w/Components

Lists components for the rear panel assembly.

Figure 13-4. Magnetics Assembly w/Components

Lists components for the magnetics assembly.

Figure 13-5. Windtunnel w/Components

Lists components for the windtunnel assembly.

Figure 13-6. Heat Sink, Secondary Assembly

Lists components for the secondary heat sink assembly.

Figure 13-7. Base Assembly

Lists components for the base assembly.

True Blue Warranty

Limited Warranty Terms

Details the terms, conditions, and duration of the limited warranty.

Owner's Record

Related product manuals