© 2009 MIMAKI ENGINEERING CO.,LTD.
6.4.3 P.3
6.4.3 Y Drive Pulley
1
2
3
4
5
6
7
8
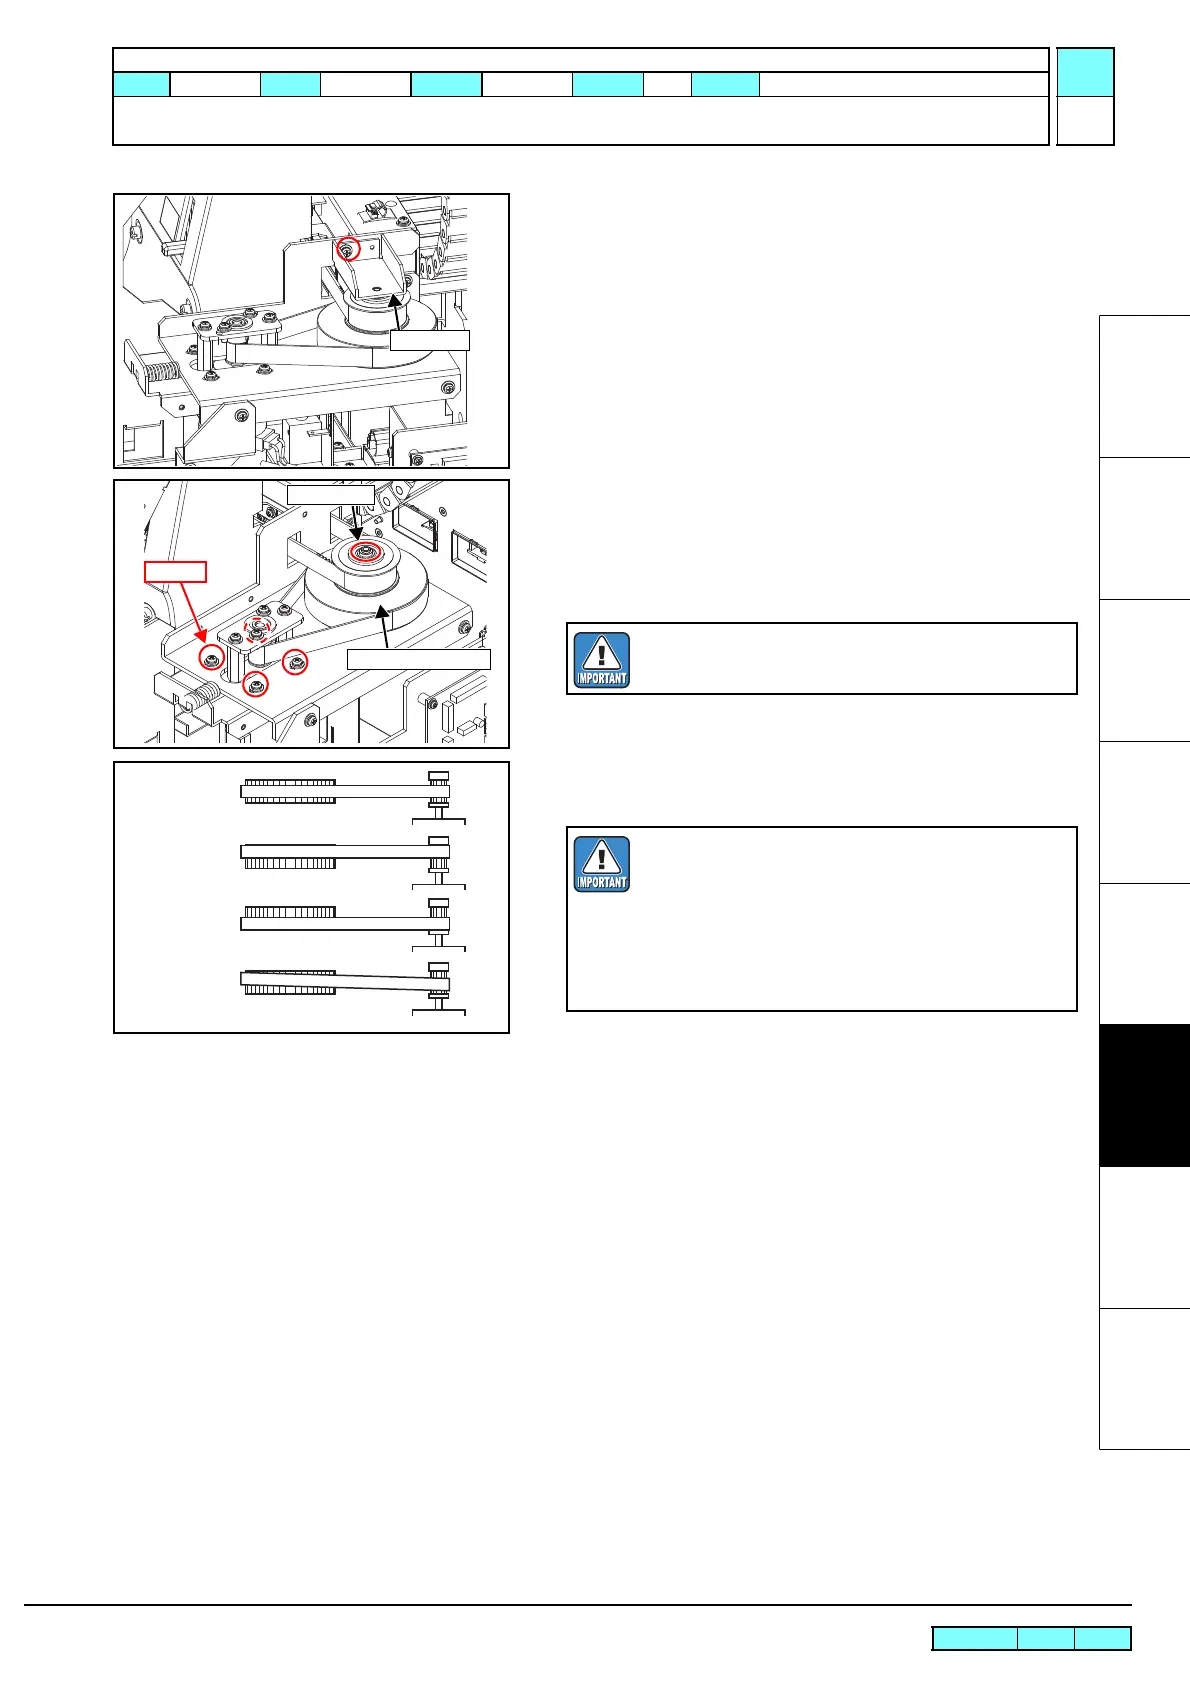
9. Remove the screw, and detach the D BKT U from the Y drive
pulley.
10. Loosen the screws for fixing the Y-axis motor belt tension, and
reduce the tension of the belt.
11. Remove the O-ring from the top of the Y drive pulley, and then
remove the two belts to detach the Y drive pulley.
12. Reverse the disassembly procedure for reassembly.
Loosen
O-ring
Y Drive Pulley Assy
Take care not to lose the O-ring.
Good
Example:
Bad
Example:
Slanting
Horizontal in the middle
Bad
Example:
Good
Example:
Shifted lower
Horizontal but upper
Mount the Y-axis motor so that the belt is
horizontal and centered on the Y drive pulley
(upper side is also acceptable).
After mounting the motor, if the hunting sound is
heard when the motor drives, make adjustments
making reference to the following:
• Adjusting the Y-axis motor current
R.1.0
Maintenance Manual > Disassembly and Reassembly > Drive System > Y Drive Pulley
Model CJV30/TPC Issued 2008.08.04 Revised F/W ver. 1.00 Remark
1.0

 Loading...


