© 2009 MIMAKI ENGINEERING CO.,LTD.
7.2.1 P.3
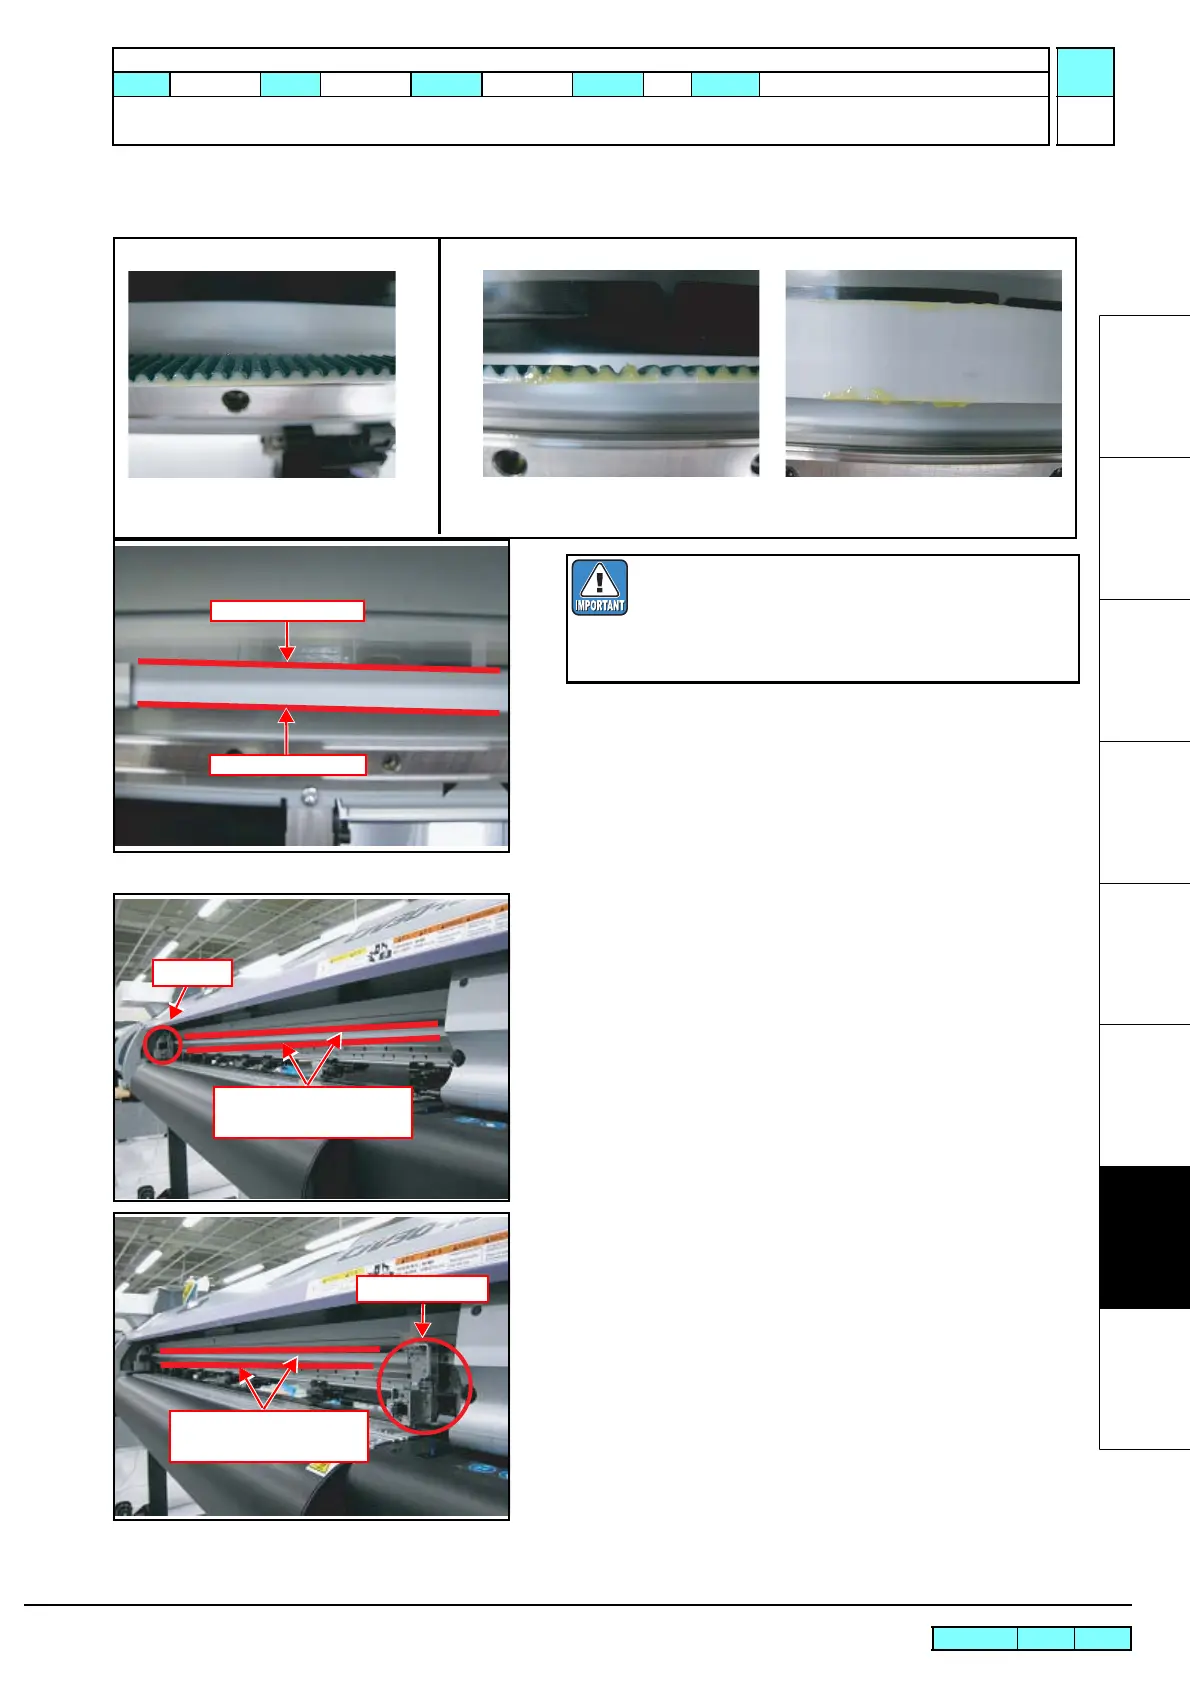
7.2.1 Y Drive Belt Noise
1
2
3
4
5
6
7
8
When using MG-A1-GU grease
1. Move the joint unit to the left end of the platen.
2. Spread a thin layer of the grease on the upper and the lower
faces of the belt with your finger.
3. Move the joint unit to the right end of the platen.
4. Spread a thin layer of the grease on the upper and the lower
faces of the belt with your finger.
Good Example
Bad Example
Greased too much.
Spread or wipe off the extra grease.
Belt edge (upper face)
Belt edge (lower face)
Spread a thin layer of the grease on the whole spread-
able area of the white belt edges (on both upper/ lower
face) with your finger.
Be careful not to spread too much that will spatter the
mist of the grease.
Grease on the belt edge
(upper and lower faces)
Joint Unit
Grease on the belt edge
(upper and lower faces)
Joint Unit
R.1.0
Maintenance Manual > Troubleshooting > Detailed Methods of Coping with the Malfunctions > Y Drive Belt Noise
Model CJV30/TPC Issued 2008.12.06 Revised F/W ver. 1.00 Remark
1.0

 Loading...


