© 2009 MIMAKI ENGINEERING CO.,LTD.
7.2.4 P.2
7.2.4 Y Drive Belt Damage
1
2
3
4
5
6
7
8
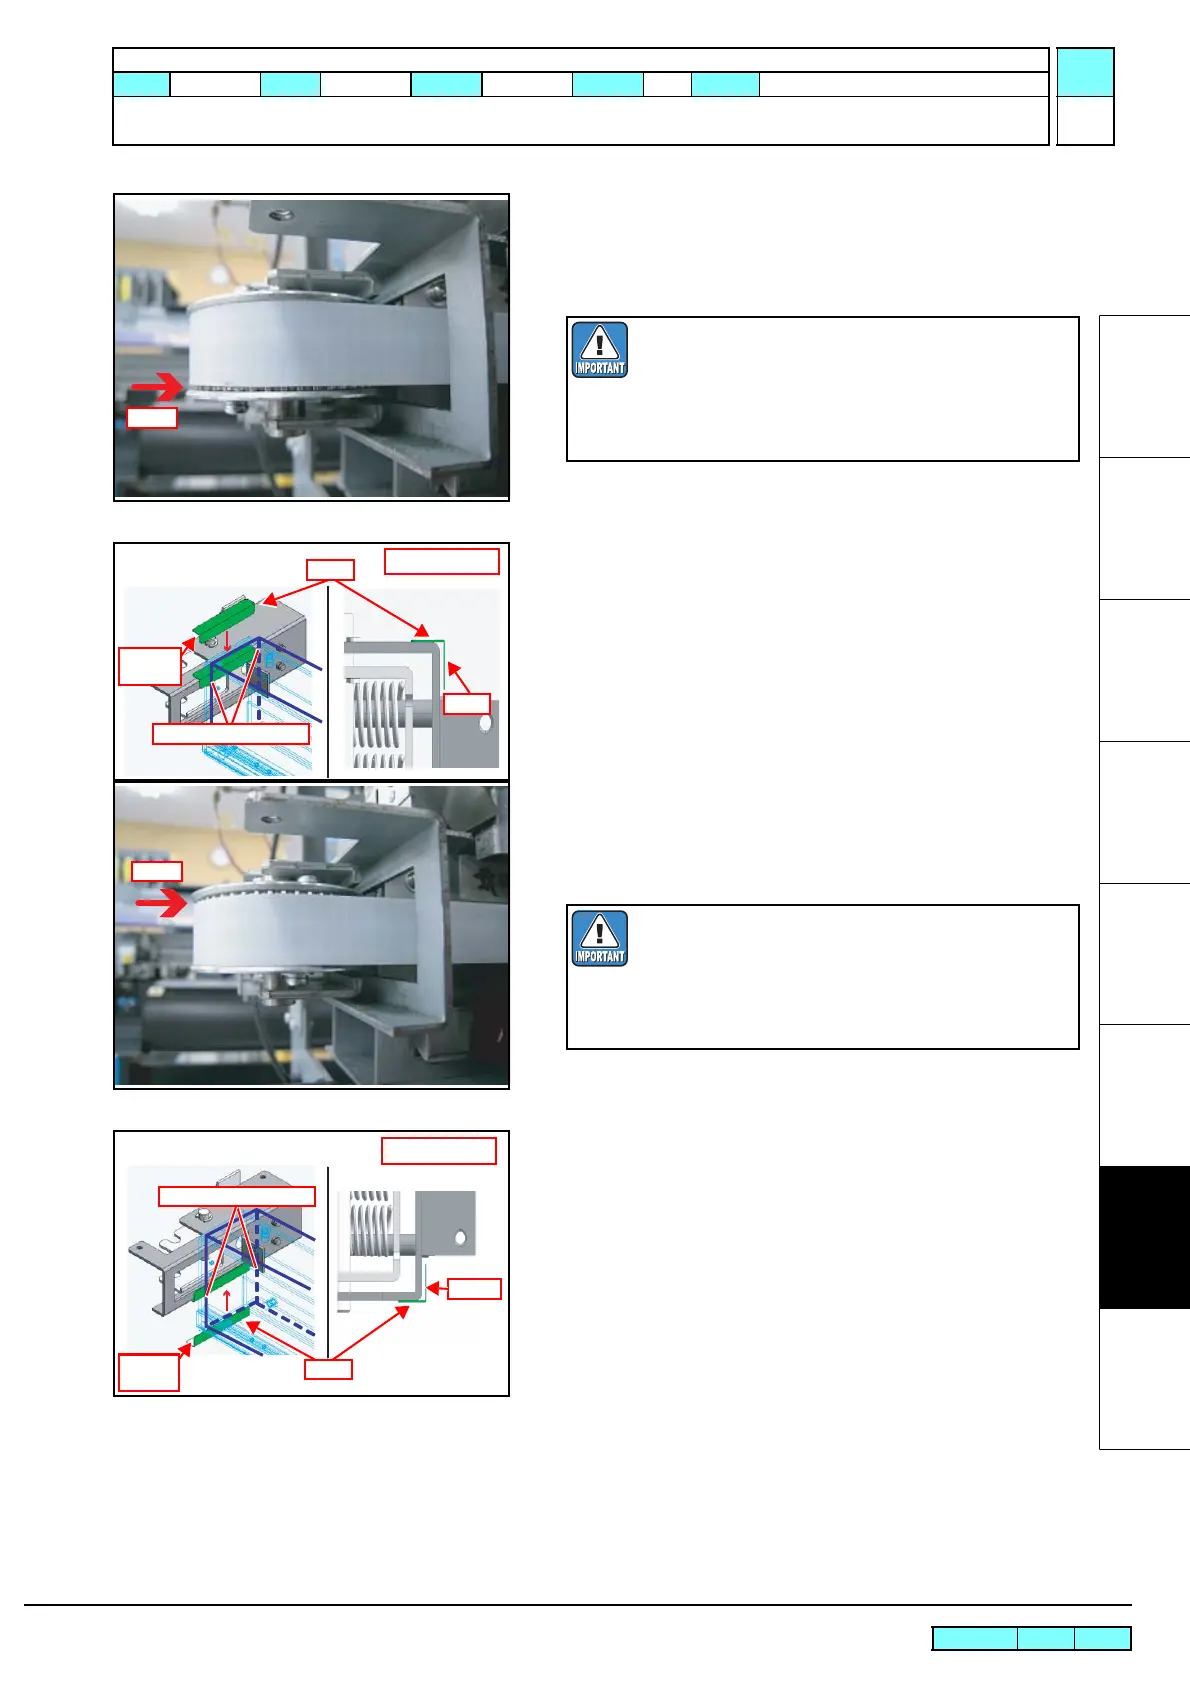
3. In case that the Y belt is raised on the Y-T pulley.
Loosen the belt tension, loosen the all screws fixing the Y-T
pulley BKT ASSY to the Y-bar, then attach the shim to the
upper side.
4. In case that the Y belt is lowered on the Y-T pulley.
Loosen the belt tension, loosen the all screws fixing the Y-T
pulley BKT ASSY to the Y-bar, then attach the shim to the
lower side.
5. Press the Y-T pulley BKT ASSY to the Y-bar and fix the
screws.
Readjust the belt tension and attach the removed covers.
Attach the shim to touch both the rear and the front
side of the Y bar.
Attach the adhesive face of the shim to the upper
side of the Y-T pulley BKT ASSY.
Do not attach the shim to the Y-bar side.
Gap
Bad example
Shim
adhesive
face
Contacted with Y-bar
Attach the shim to touch both the rear and the front
side of the Y bar.
Attach the adhesive face of the shim to the lower
side of the Y-T pulley BKT ASSY.
Do not attach the shim to the Y-bar side.
Gap
Shim
adhesive
face
Contacted with Y-bar
Bad example
R.1.0
Maintenance Manual > Troubleshooting > Detailed Methods of Coping with the Malfunctions > Y Drive Belt Damage
Model CJV30/TPC Issued 2009.06.30 Revised F/W ver. 1.00 Remark
1.0

 Loading...


