3-10 System Preparation
3. Connect the power cord to a power supply receptacle that is well grounded.
4. Install the printer driver (steps are the same as of graph/text printer, please refer to “3.7
Graph / Text Printer” for details). And you need not install the driver of the printer listed in
section “2.5.4 Peripherals Supported”.
5. Add a print service. Please refer to “3.8 Digital Video Printer”.
3.10 External DVD
1. Connect the USB cable of the DVD recorder to the USB port on the ultrasound system
(all USB ports available).
2. Connect the power adapter of the DVD on the power supply.
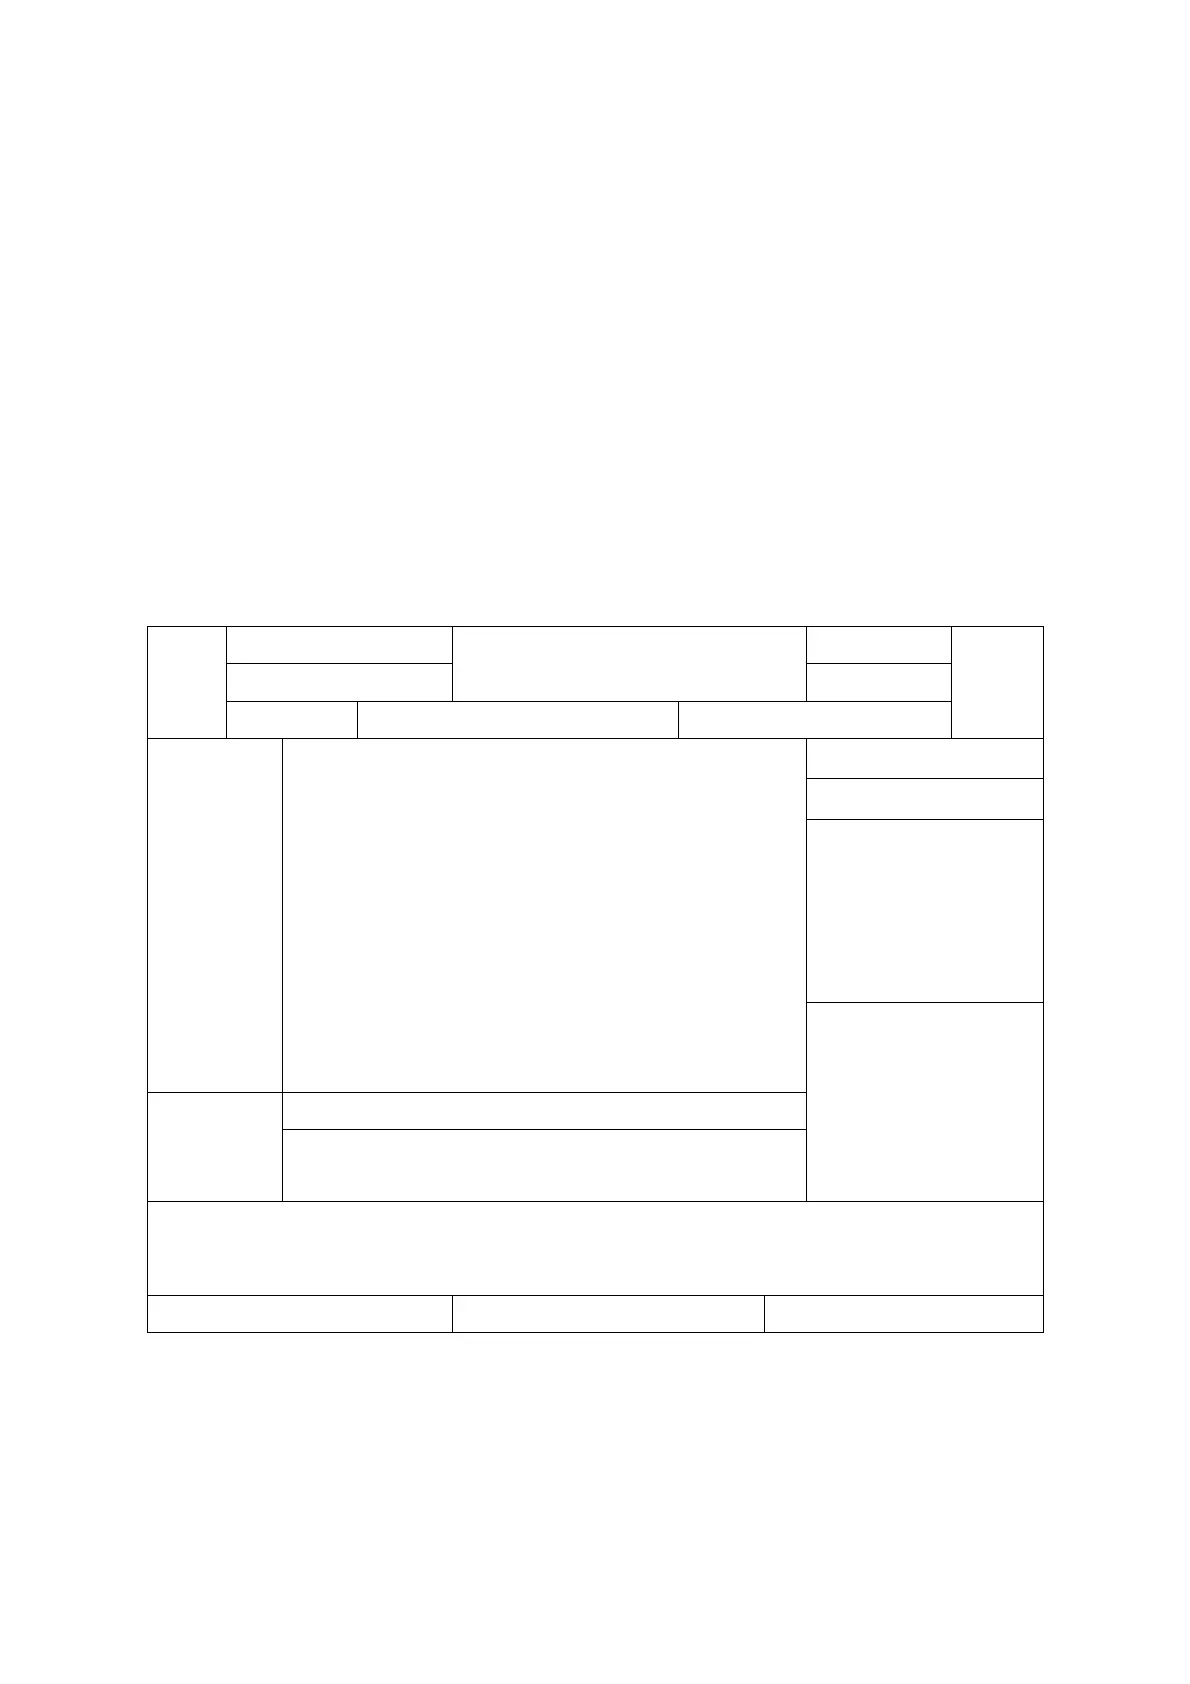
3.11 Basic Screen and Operation
3.11.1 Basic Screen
The following diagram maps out the different areas in the screen:
Thumbnail
preview&
zoom
window
Thumbnail Area of Images Saved
Information Area
The information area displays manufacturer logo, hospital name, exam date & time,
acoustic power & MI/TI, freeze icon, patient information, probe model, current exam mode,
and accession #, etc. It can be preset whether to display the operator, patient gender, age,
ID, name etc. via [Setup]-> [System Preset]-> [General]. See “11.1.2 General” for detailed
preset procedures.