F3 Service Manual
Page
60
Remove the electronics pack. Refer to section 4.3.a. To Remove the
Electronics Pack
Remove the coil. Refer to section 4.4.a. To Remove the Coil.
Using Figure 61 as a guide, use the 3mm hex driver (Allen key) or punch to
push out the two pins (Part 5) from the camlock lower
Remove the camlock body lower (Part 1) from the lower shaft.
Remove the lower shaft by pushing it back through the upper/middle shafts.
Note
The pressure block can be replaced without the need to remove the electronics pack
and coil. Press out the pin through the camlock lever then remove the camlock lever
to directly access the pressure block.
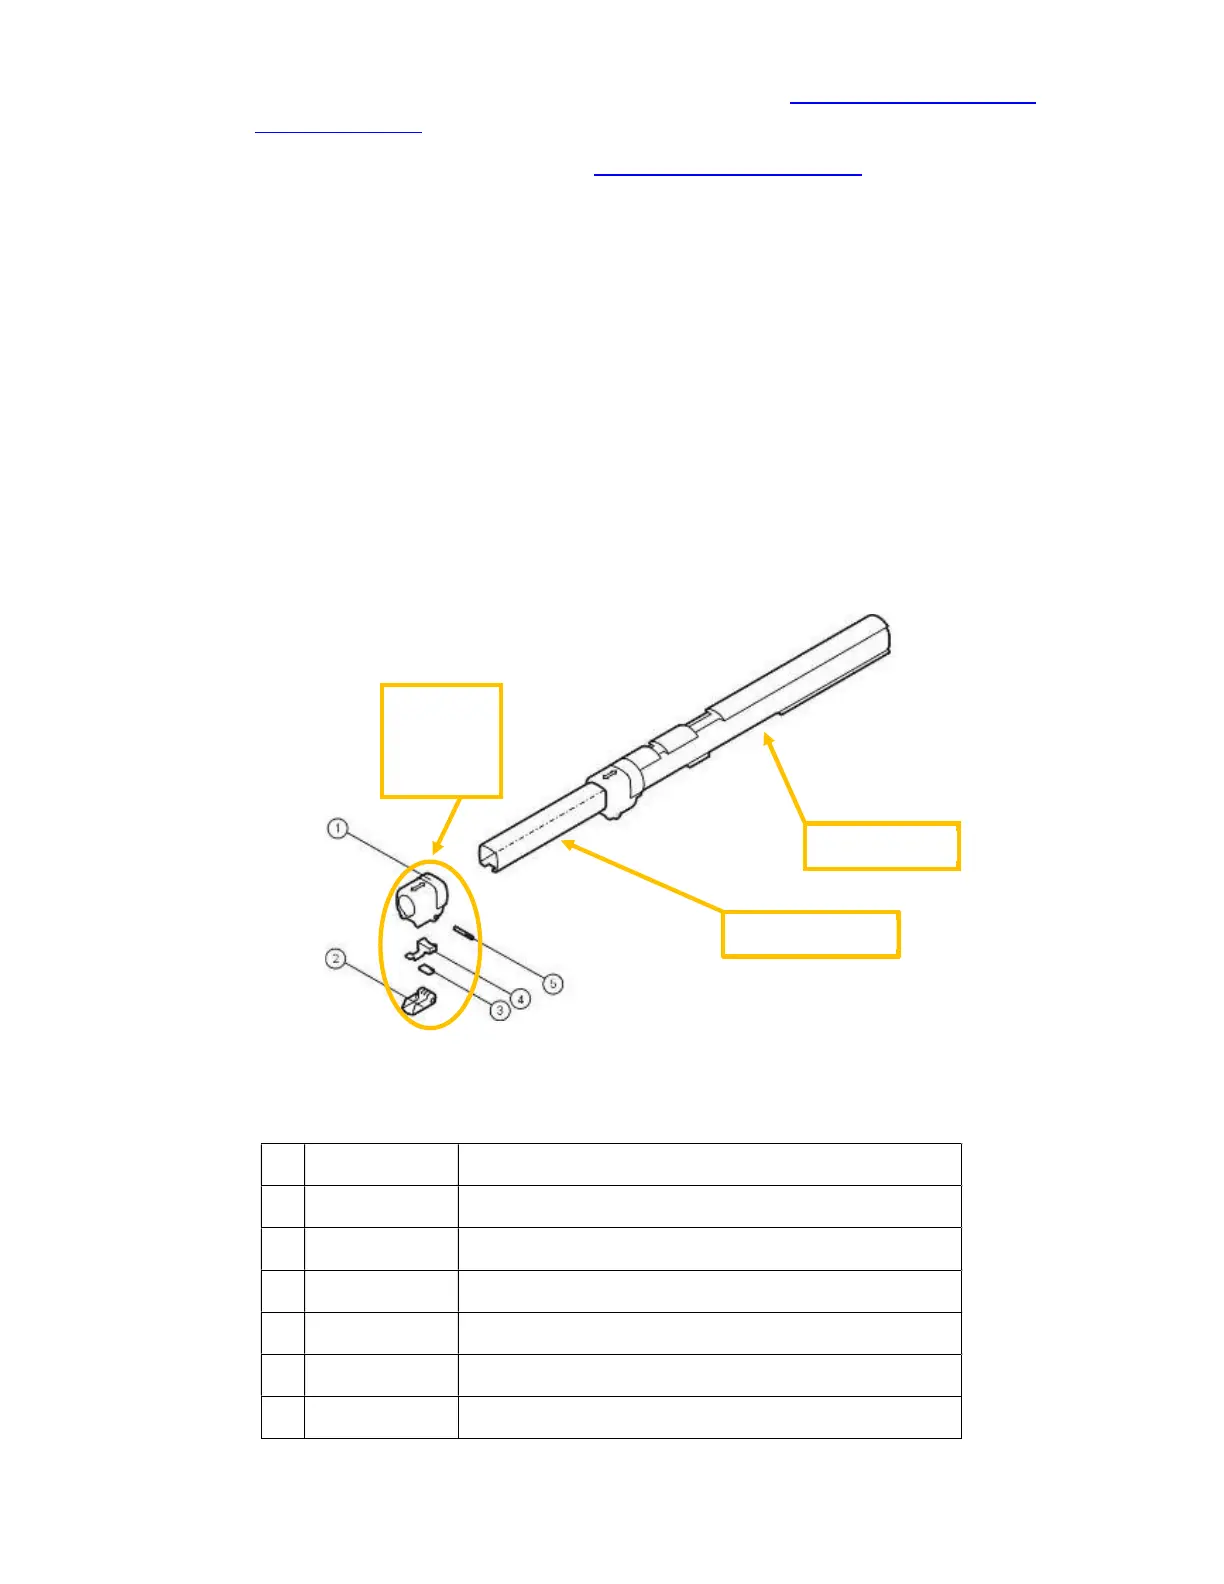
b. To Disassemble the Camlock Middle and Middle Shaft:
Figure 62: Camlock Middle.
Table 9: Camlock Kit Middle.
3004-0012 Camlock Kit Middle, contains items 1 to 5
1 8008-0023 Camlock Body Middle
2 8008-0005 Cam Lever
3 8008-0030 Wear Plate
4 8008-0069 Pressure Block Middle (include wear plate)
5 4308-0003 Pin Cam Lever
8007-0024 Middle Shaft (not part of camlock kit middle)
Middle Shaft
Upper Shaft
Camlock
Kit
Middle
 Loading...