February 2007 /// Created by: FA-EBG Marketing Communications Dept
Servo /// Motion /// Servo /// Motion /// Servo /// Motion /// Servo /// Motion /// Servo
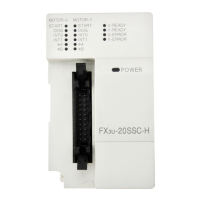
Read/Write Properties for the 20SSC-H Buffer Memory
BFM # Content R/W
0 – 99 X-axis Monitor Data R
*1
100 – 199 Y-axis Monitor Data R
*1
200 – 499 Undefined R
500 – 599 X-axis Control Data R/W
600 – 699 Y-axis Control Data R/W
700 – 999 Undefined R
1000 – 3999 X-axis Table Information R/W
4000 – 6999 Y-axis Table Information R/W
7000 – 12999 XY-axis Table Information R/W
13000 – 13999 Undefined R
14000 – 14199 X-axis Positioning Parameters R/W
14200 – 14399 Y-axis Positioning Parameters R/W
14400 – 14999 Undefined R
15000 – 15199 X-axis Servo Parameters R/W
15200 – 15399 Y-axis Servo Parameters R/W
15400 – 15999 Undefined R
16000 – 16255 System Use Only R
*1: R/W is possible for the Current address (user) in BFM #1,#0 and BFM #101,#100
4. Begin to Use FX3U-20SSC-H with FX Configurator-FP
4.1 Initialization Process
When setting up the F3U-20SSC-H for the first time or when beginning a new project, it is
recommended to clear the servo parameters and positioning parameters and then write
the desired settings (as needed by the user application) to the controller. The purpose of
this section is to define basic settings for the initial testing of the module using the FX
Configurator-FP software.
1) Confirm that the hardware is set up correctly (as described in Section 2.1:
Hardware Requirements) and the PLC is in STOP mode. Turn the power ON.
(Both of the servos should display ‘Ab’ when the power is turned ON for the very
first time.)
2) Open FX Configurator-FP from the Start menu [Start → MELSOFT Application →
FX Configurator-FP] or from the Tools menu of GX Developer [Tools → FX special
function utility → FX Configurator-FP] and create a New file by clicking on in
the Toolbar.
3) Expand the tree of folders in the ‘File data list’ panel on the left-hand side by
double clicking on ‘Unset file,’ ‘Edit’ and ‘Monitor.’
4) Go to [Online → Connection setup → Comm. Test.]
Verify that the devices are communicating properly.
5) Go to [Online → Initialize module.]
 Loading...