OPERATION
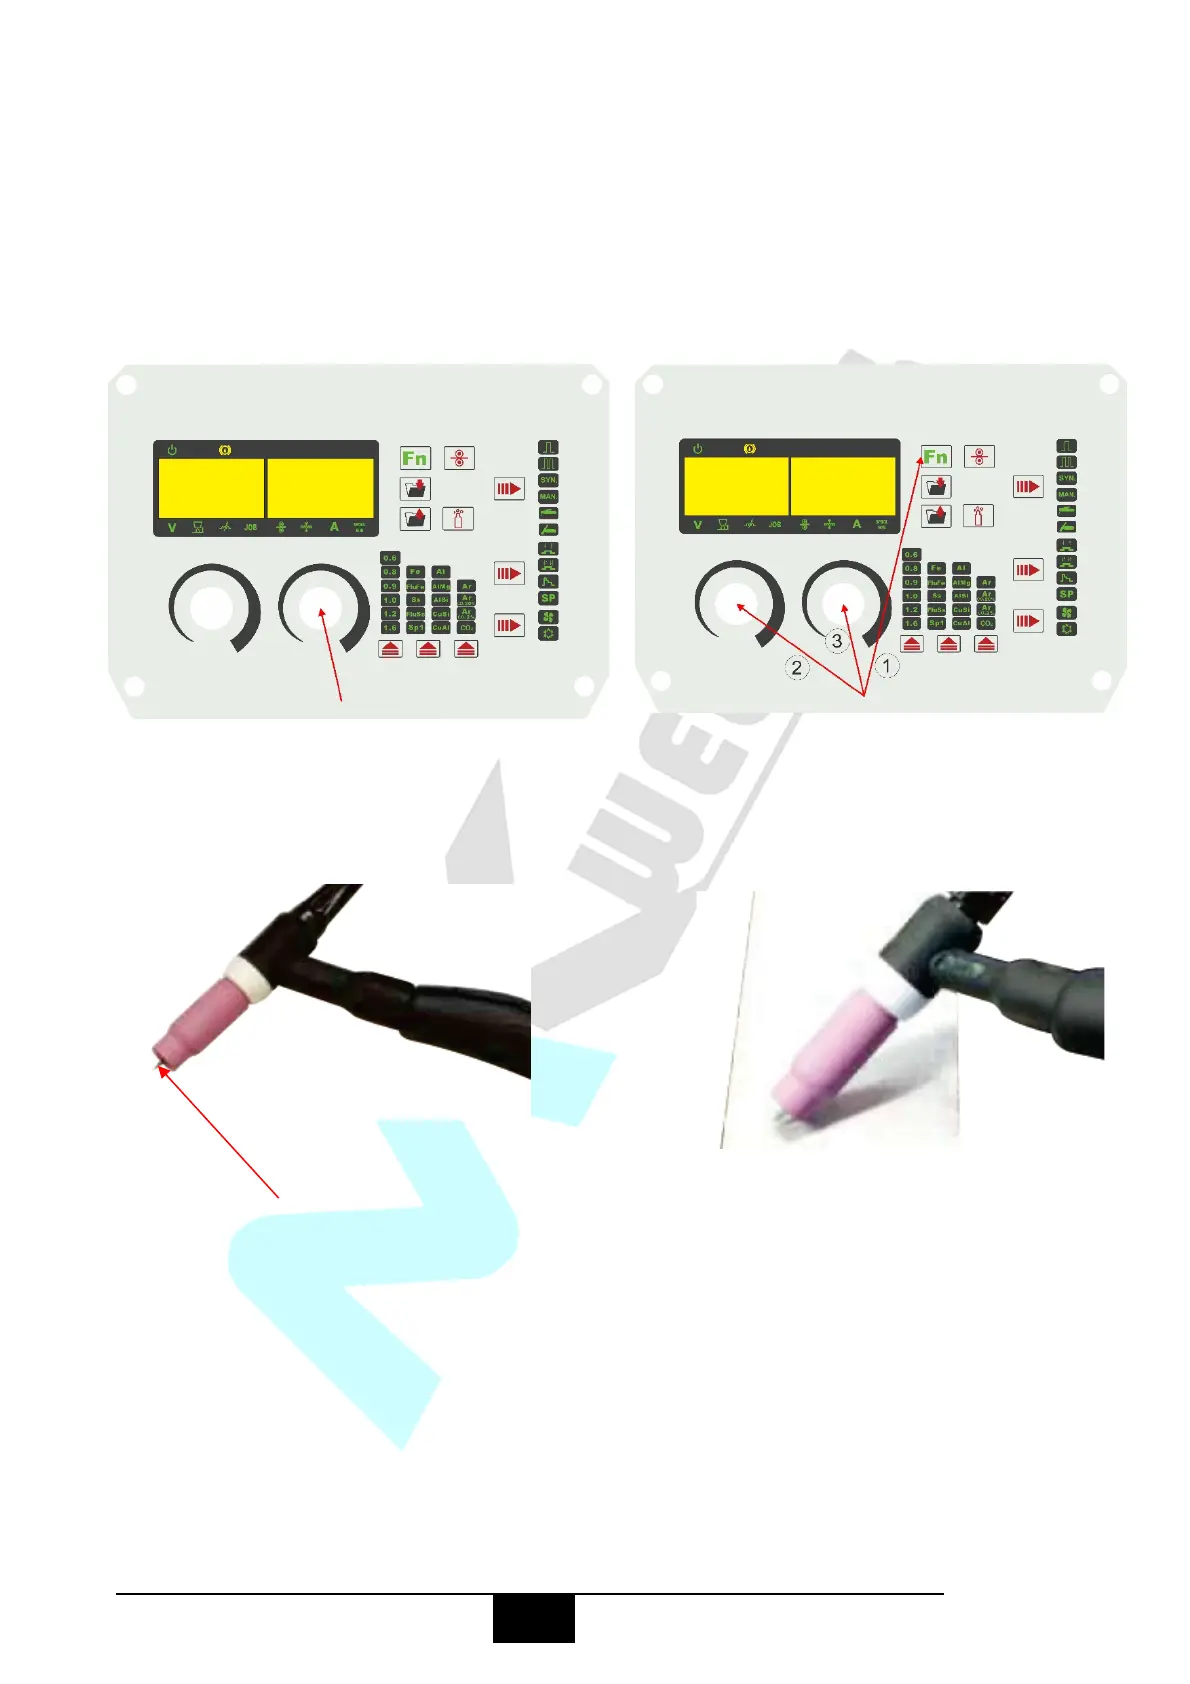
(18) With a small movement rotate the Gas Cup forward so that the Tungsten Electrode
touches the work piece.
(19) Now rotate the Gas Cup in the reverse direction to lift the Tungsten electrode from the
work piece to create the arc.
(20) Release the trigger to stop the welding.
(14) Select welding current as required using the (15) Set down slope time as required.
control knob.
(16) Assemble front end parts of the TIG (17) Lay the outside edge of the Gas Cup on
the torch, fitting a sharpened tungsten suitable work piece with the Tungsten Electrode
for DC welding. 1- 2mm from the work piece. Press and
hold the trigger button on TIG torch to
start the gas flow.
 Loading...